
For the Home / miniature lily pond in a pot. DIY Pet Bowl Stand. As I mentioned several weeks ago , as a birthday present for my daughter we adopted a sweet gray tabby kitten and we named her Coco-Nut. She’s quickly become a beloved member of the family, the first thing the kids ask me when I pick them up from school is “What did Coco do today?” Like all kittens, she gets into a lot of mischief and a few things have been tipped over and broken as a result of her exploration into every crevice of our home. Despite the broken tchotchkes, the kids and I adore her and her sweet personality. I bought her two little bowls for food and water and they used to sit at the base of a cabinet in the kitchen, but over time we all kept kicking them, spilling the contents, and it was driving me crazy.
Crafty Friday. This craft project was inspired by something almost identical I saw in a fancy shop here in NYC. It cost almost $500, and I thought to myself, "hey, I can make that". And so I did! Start by printing out butterflies. I found mine online, simply google butterfly prints and millions comes up. Cut them out. Hot-glue or super-glue a small branch to a vintage saucer. Fold the butterflies a little, so they look more alive and simple hot-glue them all to the branches. Photos by Alexandra Grablewski. DIY / IKEA shelves turned into bench seating for a playroom...complete with little cubbies for storage...perfect! Vinyl Wall Art Inspiration. Believe it or not….I don’t have ONE vinyl letter, picture, or ANYTHING vinyl on any of the walls in my entire house.
To be honest, the whole idea just doesn’t really do it for me. DIY Reversible Placemats. Happy Thursday! Atlanta has been rainy and stormy all week. I really hope the sun comes out this weekend, I have plans to lay by the pool ;-) So I had some leftover fabric from my pillow project and decided to make placemats! One side is green zebra and the other is orange print. I used an existing placemat as the template. To make the placemats more sturdy, I added another fabric in between, just a plain cotton fabric. Leave about 4 inches un-sewn so that you can flip the fabric right side out. Sew the opening shut. Iron the placemat so that the edges are flat and smoothe.
And there you go - homemade placemats!! How to Make Beeswax Candles. A guest post by Adrienne of Crafty Little Gnome and Adrienne Audrey Jewelry. If you want to guest post on this blog, check out the guidelines here. I love burning candles. There is something so serene about the warm glow of the flame. They warm up the room, smell great and who doesn’t look more attractive in candle light? As we approach the winter months and the holiday season grows closer many of us will be grabbing those old candles from the back of the cabinet and lighting them up to bask in the glow of the warm flame.
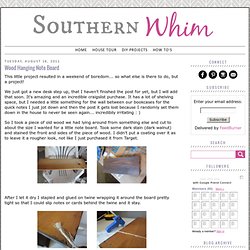
{Wood Hanging Note Board} This little project resulted in a weekend of boredom... so what else is there to do, but a project!

We just got a new desk step up, that I haven't finished the post for yet, but I will add that soon. It's amazing and an incredible craigslist purchase. It has a lot of shelving space, but I needed a little something for the wall between our bookcases for the quick notes I just jot down and then the post it gets lost because I randomly set them down in the house to never be seen again... incredibily irritating : ) So I took a piece of old wood we had lying around from something else and cut to about the size I wanted for a little note board. Took some dark stain (dark walnut) and stained the front and sides of the piece of wood. How to Make Leaf Skeletons - The Idea Room - StumbleUpon. I wanted to share with you a project from one of my readers who shares with us how to make leaf skeletons.

I LOVE this! I have several leafs in various forms displayed in my home and knew I needed to make some of her leaf skeletons to add to my decor. I love how a pattern of leaves can enhance the beauty in your home. So I asked Heather if she would mind sharing her project with you. You can find more great projects from Heather at her blog The Other White House.
I have spent hours and tried various ways of making these. You need washing soda, not baking soda! Gather your leaves. Washing soda is a strong base so you may want to wear gloves when handling the leaves. You will add 3/4 cup of washing soda and 4 cups of water to your pot of leaves. Keep going, you will need to add more water so your pan doesn’t dry out. When 1.75 hours are up fill a glass baking dish with cool water. I carefully removed them and rinsed with water and added clean water to the pan. 37.1Kstumbleupon. DIY it! / Cap floating candles. DIY / spray paint trash can, flip, instant side table!