
50+ Paper Flower Tutorials & Templates: {Free. Here’s a lovely assortment of paper flowers to make, I’ve organized them in a few sections for easier browsing: Bouquets & Centerpieces, Tissue Paper, Crepe, Origami and the rest under general tutorials.
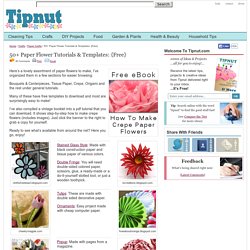
Many of these have free templates to download and most are surprisingly easy to make! I’ve also compiled a vintage booklet into a pdf tutorial that you can download. It shows step-by-step how to make crepe flowers (includes images). Just click the banner to the right to grab a copy for yourself. Ready to see what’s available from around the net? Ninthstreeteast.blogspot.com Stained Glass Style: Made with black construction paper and tissue paper of various colors. Double Fringe: You will need double-sided colored paper, scissors, glue, a ready-made or a do-it-yourself slotted tool, or just a wooden toothpick. increations.blogspot.com cheekymagpie.com Tulips: These are made with double sided decorative paper. Ornaments: Easy project made with cheap computer paper. howaboutorange.blogspot.com Tissue. How to Create Rosette Accessories Using Duct Tape. What up duct tape?
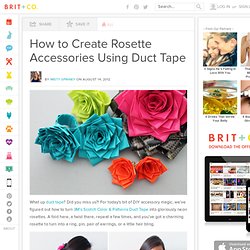
Did you miss us?! For today’s bit of DIY accessory magic, we’ve figured out how to turn 3M’s Scotch Color & Patterns Duct Tape into gloriously neon rosettes. A fold here, a twist there, repeat a few times, and you’ve got a charming rosette to turn into a ring, pin, pair of earrings, or a little hair bling. Materials: - duct tape - scissors - ruler - accessories: earring backs, barrettes, comb clip, pin We used an array of neon duct tape as well as a fun snakeskin pattern as an accent for the hair accessory.
We’ll start by showing you the step by step for our turquoise rosette ring. Repeat until you’ve folded all 20 pieces. Twist the first one into itself so it looks like the photo above. Cut off the bottom of the rosette so that you have a flat surface to attach your ring. Don’t worry about being gentle – duct tape is ridiculously durable! To make a ring, simply fold a piece of duct tape over itself lengthwise, roll into a ring and tape. Rose Barrettes. With Valentine's Day coming up I designed these little girl's barrettes in celebration of the rose.
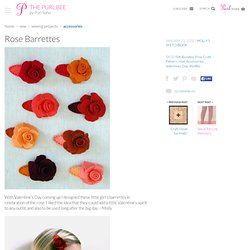
I liked the idea that they could add a little Valentine's spirit to any outfit, and also to be used long after the big day. --Molly Materials Cutting Cut out all of the pieces from the Rose Barrette Pattern. One rosebud strip in color Aone 1st tier petal piece in color Aone 2nd tier petal piece in color Aone barrette top in color Bone barrette bottom (with a small slit cut as marked) in color B Making the Rosebud Roll the rosebud strip tightly, lining up the straight edge, starting from the smaller end to form a little rosebud shape as shown above.
Thread a length of embroidery thread that matches the color of the rose. Turn the rosebud 90-degrees and take another stitch through all the layers perpendicular to the first set of stitches. Pull this stitch tight and take another stitch in the same place. You will have a pretty little rosebud. Adding the Petals The rose is now finished!