
perla
This is me I am 9 years old. I am in 4th grade. CeilingCat.jpg (JPEG Image, 1131 × 1600 pixels) - Scaled (42%) Stapleless Paper by Sherwood Forlee. A Little Bit of College Ruled Genius By our friend and returning Yanko champion, Sherwood Forlee.

Check out the simplicity. Just punch out the corner, make a cut or two, fold back, and POW! You are green. You are sooo green. Get out there and kick-start the economy! That Forlee, always thinking with his heart. Visit his portfolio or click below to see the other things by SF that have been featured on Yanko Design. Designer: Sherwood Forlee.
Stab Bound Journal. Make a hand bound journal with elaborate side stitching for yourself or as a gift.
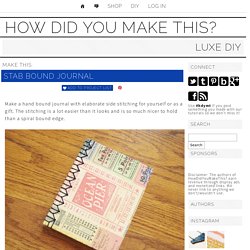
The stitching is a lot easier than it looks and is so much nicer to hold than a spiral bound edge. Supplies and Equipment – sharp utility knife and cutting surface BE VERY CAREFUL WITH THE SHARP BLADE – rulers – drill with 1/16th inch bit OR a small paper punch BE VERY CAREFUL WITH POWER TOOLS – fancy cover paper – I used Cavallini Vintage Tickets Wrapping Paper – 20″ x 28″ – 1 sheet of 8.5×11 for endpapers (this can be fancy or the same paper as your pages) – 10 sheets of 8.5×11 paper for pages – 3 yards of embroidery floss – mat board – I used Crescent No. 33 White & Cream Smooth Mat Board – Yes Stikflat Glue or other archival glue that leaves paper flat – heavy object to use as a weight – waxed paper – cutting/hole punch template – click here to download – thin cotton or linen fabric (optional) – needle with an eye large enough to fit embroidery floss – brush for glue Stitch down through the next hole.
DIY Paper Related. DIY Book clutch. Did you see this week’s Crafting with the Stars?
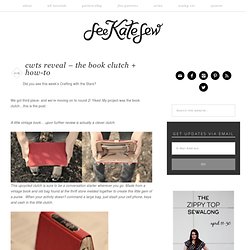
We got third place- and we’re moving on to round 2! Yikes! My project was the book clutch…this is the post:A little vintage book… upon further review is actually a clever clutch. This upcycled clutch is sure to be a conversation starter wherever you go. Made from a vintage book and old bag found at the thrift store melded together to create this little gem of a purse.
Pair it with a ruffley blouse and some skinny jeans and you’re rockin’ the librarian chic look. (Plus you’re husband won’t feel too awkward when you ask him to hold it!) Smart and fashionable. Did you vote for us? How to make a book clutch:Scour every thrift store for purses with metal frames and a books about the same size. Gut your book: (This is where I stopped taking pictures, sorry!) Now it’s off to make the project for round 2: Decoupage. Most favorited all-time - page 2. Lovely Wire Knot Ring Tutorial. You can make this lovely ring (or a version of this design) yourself, using just some basic tools, wire and a lip balm! Yes, in this tutorial I am going to demonstrate that just basic beginner tools and a wire from Michael’s can go a long way! Wouldn’t this ring make a great present??
For the purpose of this tutorial I am going to be using the very basic, cheap tools that are available almost everywhere. Instead of a ring mandrel you can just use a tube of a lip balm, like I did. I chose to make my ring from a simple gold-plated wire (20 gauge) but you could also use 18-gauge wire, twisted wire (wouldn’t that be nice?) PLEASE excuse the state of my nails in these pictures..
First thing to do is to cut a piece of wire. Next, wrap your wire around the tube of your lip balm. Cut of the extra bits, if any. Now bend the wire coming from your left to aim away from the ring and then bend again to aim it slightly upwards, as shown on pictures below. Almost done! And it’s done. D.I.Y. Lovely Wire Knot Ring Tutorial.
iPad. My cat. Esfriesen. Felting Project: A Rug! This is the most beautiful felt project we’ve seen.

Strips of felt are wrapped around each other with hot glue to create this amazing swirled effect. What a great project for a snowed-in weekend and a movie marathon with the family. The kids could even help cut strips and decide on color combination while you operate the hot glue gun. Would you attempt something like this? Keep reading to see more pictures and find out where to find more details about this beautiful felt project! You can see all the instructions and details here on The Crafts Dept blog A few other fun pictures of the process: Images: Martha’s Crafts Department Blog Other post of mine you might like: The Best Thing to Happen to Your Baby’s Feet This Winter! Zara Kids Winter Collection Snow Bricks! How To Make Tissue Paper Pom Poms - StumbleUpon. How To Make Tissue Paper Pom Poms - StumbleUpon.