
Master bedroom closet design. Cccp12_designguidelines.pdf. Closet Shelving Layout & Design. When I started out in the building business, interest rates were low, money was easy to borrow, and custom homes were the way to go.
But six years later, in the early 1980s, that all changed. Interest rates went over 15%. No one could afford, let alone qualify, for a loan. Economics and demand dragged us into multi-family housing—we started installing finish work on apartment complexes, condominiums, and townhouses. The work was hard, the prices competitive, but the profits were good if you had your act together, if you were fast and didn’t make mistakes. Five or six years later, I was glad when the custom home business came back with a roar. When it comes to installing closet shelving, if your crew isn’t following a manual of practice—a system that simplifies repetitive tasks, eliminates needless steps, and speeds installation time—then you’ll never enjoy the profits that can be made in closets. How to build custom closet shelves - * View Along the Way *
I’m sorry for taking so long to share the tutorial of how we built the custom shelves in my closet!
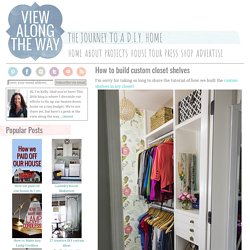
The honest truth is that when we were building these, I thought intensive construction tutorials would just not be your thang, so I didn’t take awesome photos at the time. But I obviously have no idea what I’m talking about, because you guys have been emailing me and asking for more details. First it was like “I can’t wait to see the post about how you built the shelves!” Then it was, “You ARE going to post about the shelves… right? Did I miss that post?” I can’t take another day of you not getting your dream closet, guys. Especially when you can do all those shelves for only about $120 or so. My closet is about 5 feet by 5.5 feet, and the ceilings are 8 feet tall. Materials you’ll need 2 sheets of MDF7 eight-foot pieces of poplar for the shelf fronts (optional)Shoe molding (aka quarter-round molding) — amount depends on your closet layout and size.
Step 1 (The Fun Part): Design your layout. ACSP_DCT.pdf. Master Closet – Part 4. Well, the week after my last post ended up being mostly a bust. I quickly realized I wasn’t going to get the center shelves or the trim installed by myself unless I suddenly grew extra arms. To fix the issue with the 1/2″ plywood being warped and potentially not holding up, I screwed inexpensive 1×3 furring strips to the bottom of the middle divider shelves. With the trim along the front, it is not noticeable unless you lay on the floor. For the adjustable shelves, I decided to go back to my original plans to use MDF. We lost some money there since I had already cut them out of plywood and had to buy 2 sheets of MDF instead.
Master Closet – Part 3. Where did the weekend go? Oh yeah, it’s in our closet. Here are a couple piles of the cut boards after Dad and I finished last week. The next day, I organized them by cabinet and labeled them all. Once I figured out where all the pieces went and how they would go together, I started drilling pocket holes. Thanks to Ana White‘s website for introducing this awesome tool to me. Master Closet – Part 2. I finished my last post with a glimpse of what we were working on. We ended up going with a tile that looks like wood from Lowe’s. It’s Style Selections Serso Wheat Tile. I need to take some pictures with my real camera to show the color better, but it has similar tones to what is in our bathroom, so they go well together. The next picture is pre-grout. We were originally going to lay it in a standard wood pattern.
We knew it would be a lot of extra work for just a closet where half the floor is going to be covered with cabinets, but it turned out awesome. Meanwhile, Sunday, we ran back to Lowe’s to get lumber for the cabinets. Master Closet – Part 1. I began demo on our master closet this week. With no dressers in our bedroom, the wire shelves alone weren’t going to cut it for long. Our room is full of boxes and bags of clothes since there was no good place to put them. (Now, it’s even worse since the closet’s been emptied.)
After designing our dream closet for the new construction house, I was hoping to do something similar here. This closet was a bit more challenging since it is smaller and has several obstacles I had to work around. Obviously, the breaker boxes need to remain accessible, but leaving that part of the wall empty wasn’t an option given the size of the closet. There are 5 – 48″ wide cabinets, a 28″ wide cabinet and a 30″ wide cabinet at the end. Untitled - download-a-pdf-.pdf.