
Pocket NC. View topic - Shapeoko #736 upgrade. View topic - Upgraded to 9mm wide belts. View topic - Visual alignment mod for shapeoko. Hi, One of the things I want to do with my ShapeOko is two sided PCBs or even more layers (stacking 1mm or 0.5 mm PCBs).
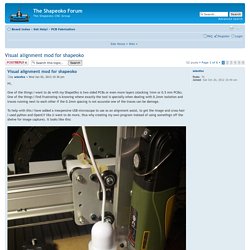
One of the things I find frustrating is knowing where exactly the tool is specially when dealing with 0.2mm isolation and traces running next to each other if the 0.2mm spacing is not accurate one of the traces can be damage. To help with this I have added a inexpensive USB microscope to use as an alignment assist, to get the image and cross-hair I used python and OpenCV libs (I want to do more, thus why creating my own program instead of using somethign off the shelve for image capture).
Amazon. Installing Threaded Inserts on my Shapeoko 2 CNC - All. My Shapeoko 2 Workflow. Shapeoko 2, Arduino UNO R3, grbl 9g, 8bit Laser Diode Photo Engraving. Me and my son invented/developed a new concept of "On-The Fly" 8bit Laser Diode engraving photos over two years ago.
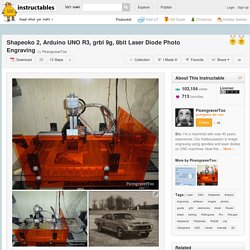
With this concept, the Laser Diode never turns off through the whole photo engraving process. It just varies the power up and down to produce the image and shading on the engraved material. We have came a long way since those days at the beginning of our experimentation and here is the instructions of our latest build on a Shapeoko 2. Photos can now be engraved on different materials using a variable intensity controlled Laser Diode to get 8bit shading. The materials we have tested successfully so far is, wood, white stained wood, white painted aluminum, mirrors, white leather and white Artist Canvas. The standard laser photo engraving process prior to our development was to TTL modulate (Pulse) the material with burnt spots/dots using a dithered black & white image to get the allusion of gray shades.
Steps: Shapeoko 2 Z Axis Fix. Shapeoko 2 X-axis Makerslide joiner by Tronn. Shapeoko 2 limit switch mounts by Tronn. Nate Duxbury's Blog. Completed machine after re-building and adding drag chains and a DC spindle.
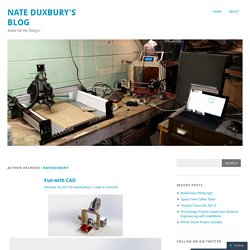
Yep, more upgrades for my shapeoko 2. The big ones in this post are the drag chains and 300W DC Spindle, but to add those two things in correctly I had to disassemble much of the machine. CNC and Linear Motion Related Tutorials. Topic: Grblshield vs. TinyG. It is a good question, and one that should have a good answer.
So please bear with this lengthy post. I’m not going to argue about which is “better” – we are heavily involved in both projects and want them both to be successful. Basic similarities between grbl+grblshield and tinyg: * Both basically support the same set of Gcodes – with some minor differences. refs: * Both adhere as closely as possible to the NIST Gcode spec. refs: * Both implement enhanced CNC features such as homing cycles, feedhold (!) And restart (~ , aka cycle start) and software reset (control-x) * Both use Texas Instruments DRV8811 stepper controller chips * Both are written in C, GNU GPL open source licensed * Both projects are currently in beta Some fundamental differences are: * grbl is an XYZ 3 axis controller (i.e. a cartesian robot) . * TinyG has 4 motors, grblshield has 3. . * TinyG runs 3rd order, constant jerk acceleration profiles, grbl runs 2nd order constant acceleration profiles. Autodesk Fusion 360 CAM Post-processor for ShapeOKO.
I recently started playing around with Autodesk’s Fusion 360 3D modeling and CAM software.
I managed to fumble my way through making some quick designs and setting up a simple cam job to make a tool holder. Designing the part was quick and so was setting up the CAM operation. However when exporting the G-Code through the grbl post-processor I discovered the G-code was using G28 (return to home) which isn’t supported in a stock ShapeOKO 2. Limit switches would need to be installed for this to work and for it to be turned on in grbl.
The default startup G-Code using the grbl post processor looks like this: Shapeoko Post Processor. ShapeOKO 2 Grbl 0.9G Upgrade. I was cutting on my ShapeOKO 2 last weekend and having major issues with missing steps on the Z.
During fast retracts the Z would just hum resulting in passes where the tool wouldn’t clear the work resulting in more or less catastrophic failure. Either the work piece was damaged or the bit from trying to be forced through way more material it should be before I hit the e-stop. After some research I came to the conclusion that the stepping was the culprit. The steppers are configured correctly, wired correctly and moving as freely as possible but the controller would step at a rate that was causing issues on the Z.
After a little research I found that there was an update to GRBL version 0.9G that in addition to having a better acceleration planner the maximum feed rates could be configured per-axis. UPGRADING the machine The easiest way to update the machine is with a little piece of software called X-Loader. Before you flash the machine you should make note of your current settings. Milling Time: Testing the Shapeoko 2 CNC Machine. Over the past few months, I've been working with various desktop CNC milling machines.

I first tested the Othermill, which I really enjoyed using. The next desktop CNC machine I tested was the Shapeoko 2. CIMCO Edit 7. CIMCO Edit is the editor-of-choice for professional CNC programmers who demand a reliable, full-featured and professional editing and communication tool.
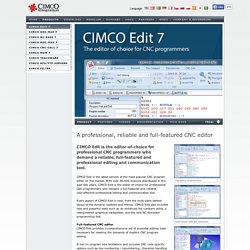
CIMCO Edit is the latest version of the most popular CNC program editor on the market. With over 80,000 licenses distributed in the past few years, CIMCO Edit is the editor-of-choice for professional CNC programmers who demand a full-featured and reliable, cost-effective professional editing and communication tool. Otherplan — Other Machine Co. Make: DIY Projects, How-Tos, Electronics, Crafts and Ideas for Makers.
Interested in CNC routing but clueless about tooling?

Can’t tell an end mill from a drill bit? Here’s an overview of end mill anatomy, some basic cutter types, and tips on how to choose the correct tooling for basic wood or plastic jobs. Drill Bits vs End Mills Top: Drill Bit, Bottom: End mill. Automatic Z Homing When Milling PCBs · synthetos/TinyG Wiki. (This page originated by John Lauer) There is a great trick you can use on the TinyG to get to a perfect 0 on the z-axis when milling PCBs.
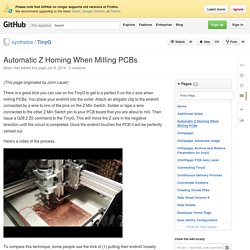
You place your endmill into the collet. Attach an alligator clip to the endmill connected by a wire to one of the pins on the Z Min Switch. Solder or tape a wire connected to the other Z Min Switch pin to your PCB board that you are about to mill. Then issue a G28.2 Z0 command to the TinyG. Simple Surface Mount PCB Milling With The Othermill. The Othermill Milling PCBs has historically been a bit of a trial, with long wait times and expensive board manufacturers. We here at Other Machine Co. like to think we have solved this prototyping problem by producing the Othermill, a tiny 3-axis mill that fits on a desktop and is perfect for PCB milling (among other things!). It’s easy to use and comes with its own free motion planning software, Otherplan.
Here’s a tiny project for a tiny mill. This project will show you the basics of manipulating a file in Otherplan and cutting it out on an Othermill. The traditional first project for something like this usually contains a phrase like “Hello World.” Simone Davalos is the Project and Support Engineer at Other Machine Co. Lifehacker - Tips and downloads for getting things done. ChiliPeppr - Hardware Fiddle. Makercam.
Synthetos. KiCad EDA Software Suite - Kicad EDA - KiCad EDA. KiCad is an EDA software suite for the creation of professional schematics and printed circuit boards up to 32 copper layers with additional technical layers. KiCad runs on Windows, Linux and Apple OS X and is released under the open-source GNU GPL v2 free of charge. If you like KiCad or are making a good living using KiCad in your toolset, you should consider donating funds used for development.
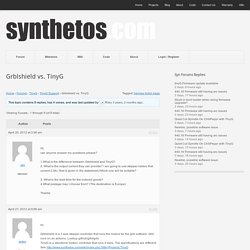
CERN has put up a place to collect donations which will be used directly to support a developer. With KiCad you can create schematic diagrams and printed circuit board up to 32 copper layers. KiCad comes with a rich set of libraries with 3D models as well.KiCad is a mature EDA software tool under active development by a team of developers and a vibrant user group. Eeschema, schematic editor.Pcbnew, printed circuit board editor, with a 3D viewer.Gerbview, Gerber file viewer. And then some other auxiliary tools: KiCad is under heavy development. STEP 1, schematic capture. STEP 3, PCB layout. View topic - Shapeoko #0735, mods evolution... (at least my version) ;-) I got my shapeOko Mechanical kit a few months ago and I have been CNCing since then. At some point I felt I needed more working space and accessibility. Also been watching all the different upgrades and ideas people have been coming with.
Here it is how my machine has been evolving. hopefully others will find this inspiring or useful for their builds... So how does it look now?