background preloader

Estudos

Facebook Twitter

Using CSS3 Animations to Build a Sleek Box UI. Get the FlatPix UI Kit for only $7 - Learn More or Buy Now Back just a few years ago it was required for web developers use JavaScript/jQuery to perform animated effects in-browser. 
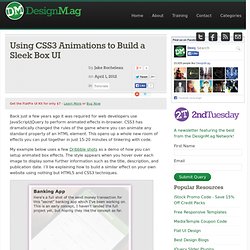
CSS3 has dramatically changed the rules of the game where you can animate any standard property of an HTML element. This opens up a whole new room of effects you can put together in just 15-20 minutes of tinkering with code. My example below uses a few Dribbble shots as a demo of how you can setup animated box effects. The style appears when you hover over each image to display some further information such as the title, description, and publication date.

Browser Support Before we begin I should bring up a small tidbit about browser support. The most notable browsers to support these features include Apple’s Safari, Mozilla Firefox 4+, Google Chrome, Opera, and as of the latest release Internet Explorer 9+. Structuring the HTML Possibly the most interesting piece of this code is our span classed .details. Learn HTML5 in 5 Minutes! Written by Jennifer Marsman There's no question, HTML5 is a hot topic for developers. If you need a crash course to quickly understand the fundamentals of HTML5's functionality, you’re in the right place.

In this tutorial, I’ll cover the new semantic markup, canvas for drawing and animation, audio and video support, and how to use HTML5 with older browsers. Might be a bit more than five minutes, but I promise I’ll keep it quick. There’s a great story about a university who, when building their campus, didn’t create any walking paths. A year later, the grass was all worn out where people walked most frequently. It makes perfect sense! The HTML5 new semantic elements were based on that exact same logic (see the W3C design guidance to “Pave the Cowpaths”). Semantic elements describe their meaning or purpose clearly to the browser and to the developer.

Developers commonly use IDs and/or class names with these <div> tags. Here are a few of the new semantic elements in HTML5: <! Using HTML5 to Create Charts and Graphs. Today I found an interesting library – flotr2: an opensource library for drawing HTML5 charts and graphs. It allows you to draw charts in different formats such as: linesbarscandlespiesbubbles Also, it doesn’t require any additional libraries such as jQuery or Prototype.

And finally – it has good compatibility with different browsers. Here is our demo and a downloadable package: Live Demo Downloadable Package Ok, download the source files and lets start coding! Step 1. Here is the markup of our final page: index.html <! Step 2. Here are all the stylesheets: css/main.css Step 3. Js/flotr2.min.js and js/flashcanvas.js Both libraries are required and available in our package. Next – our custom file where I have implemented two different functions and three visual modes for charts. js/script.js Full documentation for the flotr2 library is available here. Conclusion As usual, I hope that today’s lesson was interesting for everyone. Source: HTML5 Image Effects: Sepia. 02.var canvas, ctx; 03.var imgObj; 11.var noise = 20; 13.function processSepia() { 15. var imageData = ctx.getImageData(0,0,canvas.width,canvas.height); 17. for (var i=0; i < imageData.data.length; i+=4) { 20. imageData.data[i] = r[imageData.data[i]]; 21. imageData.data[i+1] = g[imageData.data[i+1]]; 22. imageData.data[i+2] = b[imageData.data[i+2]]; 25. if (noise > 0) { 26. var noise = Math.round(noise - Math.random() * noise); 28. for(var j=0; j<3; j++){ 29. var iPN = noise + imageData.data[i+j]; 30. imageData.data[i+j] = (iPN > 255) ?

36. ctx.putImageData(imageData, 0, 0); 39. 42. canvas = document.getElementById('source'); 43. ctx = canvas.getContext('2d'); 46. imgObj = new Image(); 47. imgObj.onload = function () { 50. ctx.drawImage(this, 0, 0, this.width, this.height, 0, 0, canvas.width, canvas.height); 52. imgObj.src="images/pic1.jpg"; 55. var iCur = 1; 56. 57. iCur++; 58. if (iCur > 6) iCur = 1; 59. imgObj.src="images/pic" + iCur + '.jpg'; 61. 62. processSepia(); 64. 65. FlashJS - opensource HTML5 game engine with API similar to Flash one. Construct 2 the HTML5 Game Maker.

HTML5 Game Development – Lesson 8. The chetankjain dev Blog: Minimal required code in HTML5. I've encountered this question repeatedly of late. "What are the tags required at bare minimum for a html file? " <TITLE>A small HTML</TITLE> <P>Small HTML file! </P> Yes, using capitals for the tags was the way to go! Those were the days of the purists and strict was the way to be.

Now open your notepad and copy the above code, save the file as old.html and launch it in Chrome or Firefox. Now lets look at how things stand today. Smallest HTML file! Type the above code in notepad and save it as new.html. <body>Smallest HTML file! Great isn't it. There is one more thing that I wish to highlight. This can simply be There is no need to specify the type attribute. There are many more wonderful simplifications done in the HTML5 semantics. HTML5 Context Menus. Update: These context menus display even when JavaScript is disabled; so best practice will be to create these menu structures via JavaScript.

Mass innerHTML injection can be used or basic DOM node injection. One of the hidden gems within the HTML5 spec is context menus. The HTML5 context menu spec allows developers to create custom context menus for given blocks within simple menu and menuitem elements. The menu information lives right within the page so there's no need to create a custom plugin. Let me show you how you can create your own custom context menus from basic HTML! Let's first start by defining a block of HTML and assigning the ID of the menu nodes to be used: With the block defined, now it's time to create the additional context menu items for the given block: With a base menu tag with the type of context and id to match the context attribute for the blog it's to be used for, menu items or submenus may be created. An HTML 5 Navigation Screen - Paul Sheriff's Blog for the Real World.

Like many people today, we are exploring HTML 5 for use in web applications. While not really ready for prime-time on its own at this point, it can definitely be used in combination with tools like Modernizr (www.Modernizr.com). One of the first things you might do is create a home page with a simple navigation system on it. This blog post will show you one way to accomplish this. Navigation Figure 1 shows an example of a home screen and a navigation system. While there were ways to accomplish drop shadows, rounded corners and gradients prior to CSS 3 and HTML 5, it was not always easy for developers to do so. Figure 1: A navigation system in HTML 5 can be surrounded with <nav> tags. Listing 1 shows the complete HTML for the navigation screen shown in Figure 1. Listing 1: The HTML for the default page of your web application. The <nav> element is nothing more than a semantic markup used to group links together to make up your main navigation area.

Summary. HTML5 Image Effects – Sepia. HTML5 Image Effects – Sepia Today we continue our HTML5 canvas examples, today I want to share with you a method of applying a sepia effect to images. This is not a very difficult method, anyone can repeat it. In our demo we can play with different images by adding a sepia effect to them, as well as we can ‘export’ our result on the image element (<img>). Here are our demo and downloadable package: Live Demo download in package Ok, download the example files and lets start coding ! Step 1. This is markup of our demo page. Index.html Basically – it contain just one canvas object, one image, and three ‘buttons’ (div elements). Step 2. Here are our stylesheets: css/main.css Step 3. Finally – our javascript code of Sepia effect: js/script.js Main idea is: as we know – sepia images have own quite predefined colors.

Conclusion I hope that our demo looks fine. If you enjoy our articles, feel free to share our tutorials with your friends. CSS: From Screen to Print and Beyond. Revolutionary for Web design, Cascading Style Sheets (CSS) have solved and continue to solve numerous challenges in designing for the continuous media of the Web. But what of paged media, as we want with our digital readers and printed collateral? Making websites and applications attractive and logical in paged media has been at best poorly achieved without the use of additional scripts and programming. Along with the many advances that CSS Level 3 (aka CSS3) has brought developers, two modules are on the horizon.

Paged Media and Generated Content for Paged Media (GCPM) will allow the creation of paged media alongside existing websites. The combination of PM and GCPM is a powerhouse for the publication of far richer paged experiences. They provide a source for many long-relied upon print features that have eluded us in Web design including leaders, height control, page-breaks, footnotes, and even attention to widows and orphans. Solving a long-standing design problem GCPM features include: Apple OS X Lion Buttons in CSS | Improve your UI | Pixify.

Mac OS X Lion with CSS3. Hello everyone and Happy New Year to all, lately i’ve been busy and so i haven’t time to write here, i hope that by this experiment to be pardoned :). I wanted to create with only use of CSS3 the boot, the login page and finally the desktop of the Mac OS X Lion. This is the first release and as you will see not everything is fully functional and at least as regards the desktop. In the next release i will implement new icons and new features while we examine what we have today. Boot This is simply the Mac OS X Lion boot. Login This section mainly consists of a clock, two images (logos and avatars user name), two backgrounds and a password input field. Thanks to the :target pseudo-class can be passed from one section to another. The animation of password error is connected via javascript but the animation is created using CSS3. Desktop Finally here we have in our desktop.

For the rest is all CSS3 excluding the background image and icons. About this Project Modern Browser Supported HTML5 and CSS3. Pure CSS3 Accordion. How to optimize your CSS. Keeping your CSS files small and organized is very important, especially if you’re going to spend any time editing your site in the future, (or if others are gonna be using the code i.e. clients).

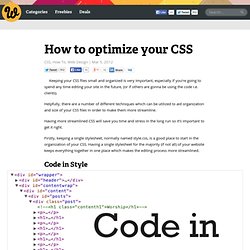
Helpfully, there are a number of different techniques which can be utilized to aid organization and size of your CSS files in order to make them more streamline. Having more streamlined CSS will save you time and stress in the long run so it’s important to get it right. Firstly, keeping a single stylesheet, normally named style.css, is a good place to start in the organization of your CSS. Having a single stylesheet for the majority (if not all) of your website keeps everything together in one place which makes the editing process more streamlined. Code in Style In order to keep your CSS files more streamline it is important to start by using a good code editor, such as TextWrangler on Mac, or Notepad++ on Windows. Organize by Location CSS Comments Using CSS comments is simple. Avoid Duplication. Pure CSS3 LavaLamp Menu. Accordion with CSS3. Using hidden inputs and labels, we will create a CSS-only accordion that will animate the content areas on opening and closing.

View demo Download source Today we’ll experiment some more with the adjacent and general sibling combinator and the :checked pseudo-class. Using hidden inputs and labels, we will create an accordion that will animate the content areas on opening and closing. There are many variations of CSS-only accordions around, most of which are implemented using the :target pseudo-class. So, let start! Please note: the result of this tutorial will only work as intended in browsers that support the CSS3 properties in use. The Markup We will be going through an example that uses checkboxes where one content section is open by default (the input needs to be ‘checked’). Note that we need to give each input an ID which we will then use in the for attribute of the label. Each article will have a class that will help us determine to which height we it to expand to.

The CSS Demos. Doing Conditional Comments for your Internet Explorer css fixes better, with HTML top tag classes | False Positives. Now browser sniffing is basically a bad thing but there is still a need to fix / hack issues on older browsers, in particular Internet Explorer. Okay, almost entirely in Internet Explorer. IE6 may be -mostly- dead, but IE8 will be around for a long time given that there is no IE9 for WinXP. (See Detecting a Mobile Browser on the Server in your Rails app for one reason server side agent sniffing and how to do so.) The “traditional way” to correct IE issues is using a conditional css style sheet (in the head section ) to load an additional style sheet after the default styles specific to that browser version and take advantage of the cascading part of Cascading Style Sheets (CSS) like so: The conditional comments tag is a proprietary IE tag, introduced in IE5, and only works in IE, and “are thus excellently suited to give special instructions meant only for IE”.

(IE10 will not support this tag, because it will render perfect HTML5. ) which can also be found in his github repo: Like this: Fancy FAQ page using CSS3 only. Usually, a FAQ page is that long page with lots of questions and answers, the one we are searching for when we need some extra info regarding a subject. So, for example, if you own a website that sells stuff, then you will need a page like that. In this article I'll show you how to create a fancy FAQ page using CSS3 only, no JavaScript. View demo The idea When I visited Facebook's Help Center section (theirs FAQ's), I noticed a cool effect for the answers previews. After seeing it, of course I immediately thought about how can I create a similar effect using CSS3 only.

The HTML We will start as usual with the markup structure: <section class="faq-section"><input type="checkbox" id="q1"><label for="q1">Question? In the above image, the label is the proper heading of the section. How it works? There's no rocket science here. I played before with this cool technique, but never had the opportunity to create a practical example actually. The CSS Browser support What about the older browsers?

Done! Six Degrees of Kevin Bacon Using Neo4j and Ruby | Ruby Zone. Previously I showed you how to get Neo4j up and running with Ruby and how to find recommended friends on a social network. What about finding out how you are connected to someone outside of your friends of friends network? Do you remember the concept of six degrees of separation? No, how about six degrees of Kevin Bacon? A credit card commercial explains how this works: The actor, Kevin Bacon wants to write a check to buy a book, but the clerk asks for his ID, which he does not have.

He leaves and returns with a group of people, then says to the clerk, “Okay, I was in a movie with an extra, Eunice, whose hairdresser, Wayne, attended Sunday school with Father O’Neill, who plays racquetball with Dr. Sanjay, who recently removed the appendix of Kim, who dumped you sophomore year. You may not be a Hollywood actor, but if you’ve used the social network site Linked In, you’ve seen this feature in their “How you’re connected to” window. 01.require 'rubygems' 02.require 'neography' 04. 07. 08.end. The Julia Language. Building a UML editor in JavaScript - part 1 | Open Source Solutions for Software Development. The New Interface Is There Is No interface.