
Stm Labs Forum - Support for eGalax Touchscreens? Besides calibration, another issue many of us are having is clicking in xbmc with touchscreen.
I have looked into keyboard.xml and tried to assign an enter key to left mouse click for touchscreen with no success. Any luck in this area? Unfortunately not, I still can't make any changes with /etc/eGTouchL.ini and I have not heard back from the support guys I was speaking to either I paid $155.00 for my touch screen and it sucks that it can't work properly with raspbmc (or xbmc for that matter). Looks like my only alternative in my car-pc project is to use flirc device with an apple remote ( If you guys have any alternative idea's of maybe somehow creating a x-input calibration application that runs in the framebuffer instead of X.
Can someone try this out: Basically after you have installed TSLIB you need to do the following exports before launching XBMC: export SDL_MOUSEDRV=TSLIB export SDL_MOUSEDEV=$TSLIB_TSDEVICE I've used this with other SDL apps and a touchscreen and it worked. eGalax touchscreen calibration. Old file 47419 111 -9640392 -260 27323 -3837576 65536 1240 720 0 new file-45926 111 -5111808 -260 -27569 -3604480 65536 1240 720 0 if you need to, check the signs the scale values, they're not that different, you can see the 'x-offset' is....like I said the clue is when ts_calibrate was executed the resolution was 1240 x 720 you can change the press-time for right click (<=0.5secs), there is a time check and a range check so if no-move it will right_click on release.
How to get eGalax TouchScreen film (0eef:0001) working in Linux for Raspberry Pi. This is an How-To guide on getting a Touch Screen Film working in Linux.
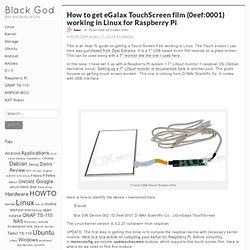
The Touch screen I use here was purchased from Deal Extreme. It is a 7″ USB based touch film layered on a glass screen. This can be used along with a 7″ monitor like the one I used here. In this case, I have set it up with a Raspberry-Pi system + 7″ Lilliput monitor + raspbian OS (Debian derivative Linux). Setting up a 7″ Lilliput monitor is documented here in another post. 4 Wire Resistive LCD Touch Screen Panel USB Port Controller Touch Panel Driver. D h m s day hour hours FREE shipping See item description Approximately: (Enter ##1## or more) (Enter more than ##1##)
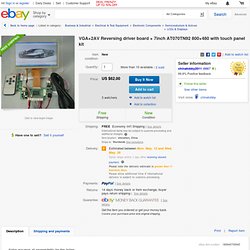
VGA 2AV Reversing Driver Board 7inch AT070TN92 800×480 with Touch Panel Kit. D h m s day.
Www.vslcd.com/Specification/VS-TY2662-V1.pdf. Www.vslcd.com/Specification/VS-040TPUSB.pdf. Three Wireless Display Technologies That You Probably Own But Don’t Use. Want to relay your smartphone’s or laptop’s display onto a larger screen without wires? No, it’s not science fiction. You can wirelessly output video from computers and smartphones today. Wireless display technologies use WiFi to output video to compatible adapters. You only need a display adapter, which connects to a monitor and a WiDI or Miracast compatible device. Most modern devices are compatible with the technology. Noticing wireless display technology on all my devices, I recently set up a Miracast adapter.
WiDi Intel developed the Wireless Display (WiDi) technology as a means of streaming video and audio from compatible devices. Additionally, WiDi will also soon receive support for Miracast in its 3.5 incarnation, meaning that the two major wireless displays will actually converge. WiDi shows up in many second generation Intel Core-series processors. AirPlay AirPlay, unlike WiDi or Miracast, is a proprietary technology. You can check out AirPlay in action below: Bau dir deinen eigenen Touchscreen PC für 100€ – Teil 1. Heute habe ich ein absolut spannendes Thema für euch.
Wir bauen uns einen Touchscreen PC mit einem Raspberry Pi. Das gesamte Projekt kostet am Ende ~100€ und bietet viele Möglichkeiten. Sicher, es gibt inzwischen Tablets, mit denen man genau das Selbe tun kann, was wir hier tun werden, aber wenn man sich einfach immer nur alles kauft, wo bleibt denn da der Spaß Ich teile dieses Tutorial mal in mehrere Schritte. Teil 1 beschäftigt sich mit der reinen Technik. Also was brauchen wir für den ersten Teil? Raspberry Pi – ~40€Touchscreen – ~ 60€HDMI Kabel ~1€USB Tastatur ~3€USB Hub ~3€optional WLAN USB Stick – ~5€ Beim Raspberry Pi hab ich das B-Modell mit 512 MB und einem aktuellen Raspbian Wheezy Image. Die Komponenten: Wir beginnen alle Komponenten miteinander zu verbinden. Wenn ihr den Raspberry Pi jetzt hochfahrt, dann sollte der Bootscreen und später der Desktop des Raspbian OS zu sehen sein.
Sucht die folgenden Zeilen und ersetzt sie mit den angegeben Werten: Raspberry Pi, RaspBMC & eGalax touchscreen. AspBMC: Touchscreen calibration & extra features The following tutorial describes additional steps, after installation of RaspBMC, to enable calibration and extra functionality for the eGalax touchscreen in XBMC.
By using a modified version of ts_calibrate for touchscreen calibration and python utility uinput-mapper, it’s possible to generate a user-input device even which handles the calibration transformations and gives additional BTN_LEFT/RIGHT functionality within XBMC on the Raspberry Pi. The procedure requires to install the following: Www.tij.co.jp/jp/lit/an/slyt277/slyt277.pdf.