

Projectos. Raspberry Pi. Case - Is there an accurate 3D CAD model of the version B board? Current community your communities Sign up or log in to customize your list. more stack exchange communities.
Strompi. Sensores. Project. Ivan X's Raspberry Pi Party. Welcome to my Raspberry Pi page.
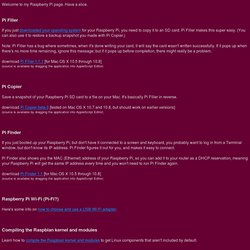
Have a slice. Pi Filler If you just downloaded your operating system for your Raspberry Pi, you need to copy it to an SD card. Pi Filler makes this super easy. PiFace – Raspberry Pi Interface. FHT 8v direkt ansprechen – FHEMWiki. Die Heizungs-Stellantriebe FHT8v können mit einem CUL direkt angesprochen werden.
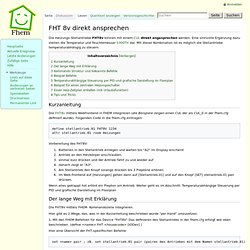
Eine sinnvolle Ergänzung dazu stellen die Temperatur und Feuchtemesser S300TH dar. Mit dieser Kombination ist es möglich die Stellantriebe temperaturabhängig zu steuern. BusWare. Nicht verfügbar: 1-Wire und S0-Erweiterung bei volkszaehler.org. Wordpress, Paragleiten, Bloggen, Snowborden, Fotografieren und sonstige Sinnlosigkeiten … › Lexxi's Blog. Raspberry Pi. Programmierer verwandelt Raspberry Pi in Babelfisch.
Raspberry. XBMC - Raspbian. Instructions for building XMBC from source are below, but they will take over 12 hours to compile on the Pi.
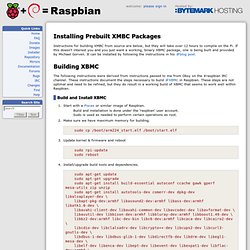
If this doesn't interest you and you just want a working, binary XBMC package, one is being built and provided by Michael Gorven. It can be installed by following the instructions in his blog post. The following instructions were derived from instructions passed to me from Obsy on the #raspbian IRC channel. These instructions document the steps necessary to build XBMC in Raspbian. These steps are not optimal and need to be refined, but they do result in a working build of XBMC that seems to work well within Raspbian. Build and Install XBMC Start with a Pisces or similar image of Raspbian. Downloads - andrei-development - Cross platform projects.
OS. XBMC. Setting up Raspberry Pi Auto Login on raspbian - Hosted on Simon's Raspberry Pi. Raspberry Pi » The Rantings and Ravings of a Madman. So lately, I’ve been trying to use one of my Raspberry Pis as a WiFi bridge.

That is connecting the Pi to a WiFi network, and sharing it out via the ethernet port. I was trying to do that with the RT5370 USB sticks that I was also using to broadcast hotspots. With the default drivers in Raspbian however, trying to add wlan0 to a bridge results in this message can't add wlan0 to bridge br0: Operation not supported According the the drivers, wlan0 can’t do it. The only way to add the RT5370 NIC to a bridge is to activate 4addr (4 address frame) mode. iw wlan0 set 4addr on However, once 4addr mode is on, traffic between the WiFi device and the AP seemed to stop altogether. The solution to this issue, is to use the RALink drivers.
Preparation Before we can actually compile the drivers, we’re going to need to grab the kernel sources. Once the source is extracted, we’ll need to copy the current kernel configuration into the source directory. cd linux-rpi-3.6.y gzip -dc /proc/config.gz > .config. Google veröffentlicht Programmierwerkzeug für Raspberry Pi.
Touchscreen. Google veröffentlicht Programmierwerkzeug für Raspberry Pi. Getting Started With ownCloud » ownCloud on Raspberry Pi. Raspberry PI, Raspbian, XBMC and eGalax 7 inch touchscreen. Hello!
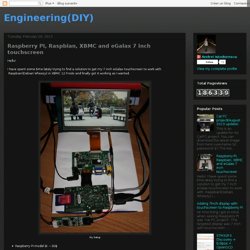
I have spent some time lately trying to find a solution to get my 7 inch eGalax touchscreen to work with Raspbian(Debian Wheezy) in XBMC 12 Frodo and finally got it working as I wanted. Raspberry PI model B: ~30$7 inch display with touchscreen for car rear view camera, from eBay(touchscreen is connected to one USB port): 80$HDMI male to HDMI male connector(from eBay): <2$4GB SDHC class 4 card12V(500mA) AC to DC adapter for powering the display5V(1A) microUSB AC to DC converter for powering the PIUSB keyboardEdit: I have uploaded my image with XBMC 12 build with eGalax touchscreen support(download it from here, with md5sum c59330154143d9e5e43217322bbd92ce).
It seems that you need to request permission and I will give you access. The account is pi and password: a. 1. 2. 3. 4. Here is how the calibration was done. In the picture above, we see that "touch panel values frame" differs from "touch panel physical size frame". B. C. 5. Enjoy! Build XBMC Frodo from source in Raspbian on Raspberry PI.
Hi!
After struggling couple of days in finding the best way to build XBMC on Raspberry PI I have finally got a working solution(haven't discovered how I can cross-compile it, which would be the best choice). This takes about 15 hours, on my Raspberry PI model B, but the good news is that 'make' takes about 12 hours, so you don't need to watch it, just come from time to time to see if it is working. Besides the build messages displayed on screen you have the whole logs for rbp_depends, configure, make and make install steps. If anything goes wrong you can investigate these files(the last one reached) and search for the first error.
[Tutorial] In-Car Raspberry with Wifi Access point - DWA-121. My car is a Renault Espace with integrated screens at the back of the headrests (infrared transmitter for the sound to headsets) with a DVD Player and an extra RCA audio/video input.
![[Tutorial] In-Car Raspberry with Wifi Access point - DWA-121](http://cdn.pearltrees.com/s/pic/th/raspberry-tutorial-access-83018899)
Since I was bored with kids battles choosing cartoons from old DVDs I decided to use a Raspberry Pi together with Raspbmc as a media center. Everything had to be powered from the cigar lighter receptacle... I took an old 2.5" hard-drive as the repository for cartoons. Because of power constraints, I bought a 2.1A dual USB car adapter: it provides enough power for the Raspberry Pi and for the hard-drive; one USB cable goes to the power input of the Raspberry and another "Y" USB cable is connected to the USB car adapter, to the Rabspberry Pi USB port and to the hard-drive.
Y USB Cable like this one: Raspberry Pi, RaspBMC & eGalax touchscreen. AspBMC: Touchscreen calibration & extra features The following tutorial describes additional steps, after installation of RaspBMC, to enable calibration and extra functionality for the eGalax touchscreen in XBMC.
WLAN Router. Dieser Artikel wurde für die folgenden Ubuntu-Versionen getestet: Dieser Artikel ist größtenteils für alle Ubuntu-Versionen gültig.
Zum Verständnis dieses Artikels sind folgende Seiten hilfreich: Ubuntu-Linux als WLAN-Accesspoint und Router. Nachfolgend wird die Konfiguration aufbauend auf den Artikeln Router, Dnsmasq und der Konfigurationsdatei /etc/network/interfaces beschrieben. Die Konfiguration kann sowohl auf Desktop-Systemen mit grafischer Oberfläche als auch mit einer Serverversion vorgenommen werden.
[Tutorial] In-Car Raspberry with Wifi Access point - DWA-121. Set-up the Raspberry Pi as an access point. I’ve had a successful time getting the Pi set-up as a Wifi access point. The end result is an access point running on one wifi dongle, bridged to a second wifi dongle for an internet connection. This means that I can connect a phone to the Pi using an adhoc wireless network connection. For the access point dongle, I am using an old AzureWave AW-NU221 dongle. It’s an ugly white plastic thing that’s definitely NOT a ‘nano’ dongle. This dongle is known on my system as wlan3. WLAN Router. Turn Your Raspberry Pi Into a WiFi Hotspot with Edimax Nano USB EW-7811Un (RTL8188CUS chipset) Posted by dconroy on Jul 10, 2013 in How To's, Raspberry Pi | 125 comments | 67,357 views I’m writing this blog to help anyone with an Edimax Nano USB WiFi adapter (EW-7811Un) configure a Wireless Accesss Point. The main reason I wrote this post is because the Edimax was the first wireless adapter I ever recommended(turning a Raspberry Pi into a fully functional web server).
I chose this adapter because it works out of the box, is cheap, and has a really low profile. But when I started the process of trying to turn my rPi into a WiFi hotspot, it seemed that every tutorial out there claimed that the Edimax card I had recommended “doesn’t support Access Point”. Luckily for you and me, this is not the case. Given the varied level of experience of my readers, this tutorial will start from scratch. Die Raspberry Pi Community. Learn.adafruit.com/downloads/pdf/using-a-mini-pal-ntsc-display-with-a-raspberry-pi.pdf. RPiconfig. As the Raspberry Pi doesn't have a conventional BIOS, the various system configuration parameters that would normally be kept and set using the BIOS are now stored in a text file named "config.txt". The Raspberry Pi config.txt file is read by the GPU before the ARM core is initialized.
This file is an optional file on the boot partition. It would normally be accessible as /boot/config.txt from Linux, but from Windows (or OS X) it would be seen as a file in the accessible part of the card. To edit the configuration file, see the instructions at R-Pi_ConfigurationFile. You can get your current active settings with the following commands: vcgencmd get_config <config> - lists a specific config value. The format is "property=value" where value is an integer. Note: In the newer Raspberry Pi models there is # before every line, if you want changes to have an affect then 'uncomment' meaning remove the #.
Car DVD player TFT Screen For the raspberry. Brian's Life: Raspberry Pi Robot + Wii remote (Phase 1) So I know my last post on how to use the Nintendo Wii controller with the Raspberry Pi was quite popular. I've been working on the next stage of the project which includes connecting my Digilent Cerebot II Atmega64L micro-controller to the Raspberry Pi. This required that I get the SPI connection working between the Pi and the micro-controller and get the Wii remote to control everything. I constructed this project using a set of Python and C programming with modules I either created or borrowed. Check out Previous Posts to help build the robot! Installing Raspbmc to Raspberry Pi for Mac. In our never ending quest to make XBMC easier to use, we discovered that it wasn’t very easy to install Raspbmc to your Raspberry Pi device if you are a Mac user. It was without question that we immediately began developing an application that would simplify the process for end users, allowing XBMC use to grow across the Raspberry Pi community into the future.
It’s very easy to install XBMC to your Raspberry Pi with Raspbmc using the new XPi Installer for Mac, follow the instructions below. Requirements. Raspberry Pi GPIO - The Easy Way. Wireless UART TFT LCD with touchpad for Raspberry Pi displaying system information. Raspberry Pi - Pi Face Tutorial 01. Die Raspberry Pi Community. Raspberry Pi via MAC OS X aufsetzen. An ARM GNU/Linux box for $25. Take a byte! Tüftler bauen Supercomputer aus Raspberry Pis und Legos. Bastel-Rechner Raspberry Pi: Mini-Spielautomat: "Bubble Bobble" auf 2,4-Zoll-Display.