
Sound Triggered Flash: High speed photography. I was always amazed with Discovery Channel's Time wrap video clips.
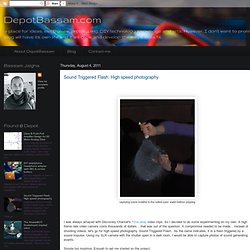
So I decided to do some experimenting on my own. A high frame rate video camera costs thousands of dollars... that was out of the question. A compromise needed to be made... instead of shooting videos, let's go for high speed photography. Sound Triggered Flash. Slaveflash with Attiny24 ver. 2.0. You might have noticed the Slaveflash I built with an Attiny 24, the instructable can be found here: Slaveflash-trigger-for-digital-with-Attiny24 After building the first prototype I collected all my old flashes I got over the years and had four more slaveflash-triggers to built.
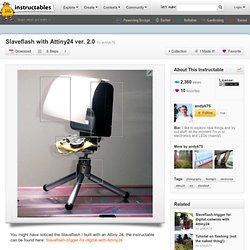
I already figured out an PCB-Layout for the SOIC-version of the attiny 24. But the biggest parts in the design are actually the hex-switch and the optocoupler, so it would make no sense to substitute only the microcontroller by a smaller one. Instead I replaced the hex-switch by a learning mode in software and also replaced the power source. Panoramic Head. Viktor's DIY: Zeus: Lightning Trigger for Cameras. Introduction I have always been fascinated by photographs about lightnings.
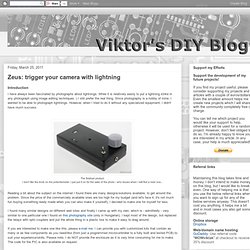
While it is relatively easily to put a lightning strike in any photograph using image editing techniques :) I still prefer the real thing. Video Light Painting - The Easy Way. One of the most repeated questions we get on our light painting tuts is: “Yes, but how about video?
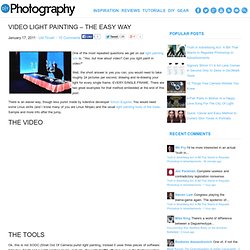
Can you light paint in video? “ Well, the short answer is yes you can, you would need to take roughly 24 pictures per second, drawing and re-drawing your light for every single frame. EVERY.SINGLE.FRAME. From Paper To RingFlash In Few Easy Steps. If you’re into ring-flashes, this should be one of the most fun projects ever.
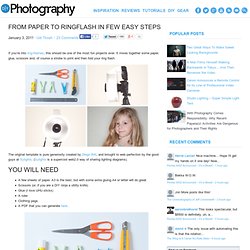
It mixes together some paper, glue, scissors and, of course a strobe to print and then fold your ring flash. The original template is pure generosity created by Diego Billi, and brought to web perfection by the good guys at Sylights. Shooting stereographic at jpixl . net. My son Ronan and I were looking through an old ViewMaster (it was my dad’s when he was a kid) yesterday, and we decided to shoot our own stereographic image.

The idea behind shooting 3D images is to take two identical photographs offset horizontally by approximately 2.5″. This is the average interaxial distance between human eyeballs. If this website were visited primarily by hammerhead sharks I’d have to widen that separation distance. Fancy stereoscopic camera rigs have two lenses on a single camera body, or two bodies and set of mirrors and lenses to achieve that distance. Or, you can simply take a photo, slide your camera sideways and take another.
I build this simple rig out of chemistry lab equipment. Next comes the image processing. Next, I cropped the image to remove the offset edge difference.
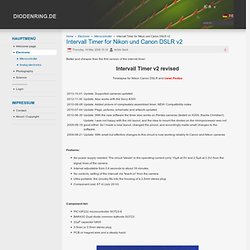
Intervall Timer for Nikon und Canon DSLR v2. Thursday, 14 May 2009 15:19 Achim Sack Better and cheaper than the first version of the interval timer: Timelapse for Nikon Canon DSLR and (new) Pentax Features: No power supply needed: The circuit "steals" in the operating current (only 10µA at 5V and 2.5µA at 3.3V) from the signal lines of the cameraInterval adjustable from 0.4 seconds to about 18 minutesNo controls, setting of the intervall via "teach-in" from the cameraUltra-portable: the circuitry fits into the housing of a 2.5mm stereo plugComponent cost: 87 ct (July 2010)
Intervalometer for Canon and Nikon cameras. This instructable is teaches you how to make an intervalometer that can be used with virtually any camera. It has been tested with Canon and Nikon cameras, but making adapter cables for other cameras is just a matter of figuring out the camera pinout. This intervalometer has the following features: Intervalometer mode with options to change delay time and exposure time Sensor mode with built in light sensor and connector for external sensor input Manual mode allows intervalometer to act like a simple remote cable Integrated 2x12 LCD display Fully optically isolated interface to camera Total package is roughly 1" x 2.5" x 3" finished Electronics small enough to fit in a mint box Source code is available for download so that you can change programming as desired Available as a kit from www.ottercreekdesign.com Below are some pictures of the intervalometer.
DIY iPhone 4 Steadicam. I've been working on a fun little project that I though I'd share.
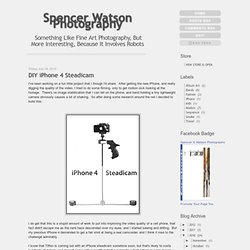
After getting the new iPhone, and really digging the quality of the video, I tried to do some filming, only to get motion sick looking at the footage. There's no image stabilization that I can tell on the phone, and hand holding a tiny lightweight camera obviously causes a lot of shaking. So after doing some research around the net I decided to build this: I do get that this is a stupid amount of work to put into improving the video quality of a cell phone, that fact didn't escape me as the nerd haze descended over my eyes, and I started sawing and drilling.