
DIY: Crazy for Crosshatch. Once you start with this crosshatch pattern, you won't be able to stop!

All it takes is a few minutes and a couple dollars worth of supplies. You probably have most of this stuff hanging around already. Here are the supplies you'll need: something to decorate (card, notebook, etc.)cardstock, scissors, pencil OR a pre-made stencilpainters tapeultra-fine point Sharpie Start by drawing a simple shape on to the cardstock and cutting it out. Make sure you really secure your stencil with painter's tape and start drawing your lines. Once you're done filling in the lines in one direction, start on the other way!
Try not to be too heavy with your Sharpie around the edges of the stencil or you'll get little dots along the edge. Now peel off the stencil and take a look at the pretty crosshatch pattern you just made. Repeat the previous steps on everything you own. I liked how this turned out so much, I immediately reached for a mini Moleskine notebook and stenciled an 'F' for my last name. Cut Out Christmas Card DIY! If you're looking for a super simple yet personal DIY Christmas card this year, I've got the perfect idea for you!

The best part is that these cards can be customized however you like... from the graphic image to the words of your choice. You can use a family holiday photo, a joyous pic of your pet, or you can get abstract with it and do something like the first photo! I used my Cricut to cut out the letters, but you can also easily do the same thing using a nice quality card stock and a sharp blade or exact-o knife. With the Cricut, all you have to do is line up your letters and press a button. If you wanted to do this by hand, you could print your lettering out directly on the card stock in the position you like. Do you buy your Christmas cards, or make them yourself?? Diy wednesdays: personalized wallpaper stationery. With all the endless emails, texts, tweets, and “pokes” flying around these days, we’ve found our appreciation for simple handmade cards growing stronger. we always keep a stock of blank stationery on hand so we can quickly whip up personalized little notes to send off to friends and family. mother’s day is the perfect excuse to send a handmade hello to the one person in your life who will appreciate it most. you can make and send a single special card, or create a whole matching set that she can use as a line of personalized stationery. happy mother’s day to all the crafty moms out there!

(especially our moms, who taught us everything we know.) -derek & lauren CLICK HERE for full instructions after the jump here’s what you’ll need: scraps of wallpaper (or giftwrap) blank notecards and envelopes scrap paper for template pencil metal ruler rubber cement x-acto blade and cutting mat trace around the template on the backside of your wallpaper, and cut out your piece. Using Rubber Stamps: Stationery - Martha Stewart Weddings Planning & Tools.
How To: Make Typographic Gift Wrap & Man Made DIY. This year, I vowed to only make or buy handmade holiday gifts for my friends and family, and I've kept to it so far.
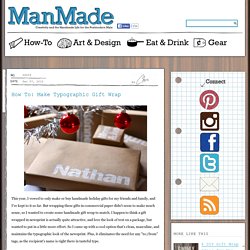
But wrapping these gifts in commercial paper didn't seem to make much sense, so I wanted to create some handmade gift wrap to match. I happen to think a gift wrapped in newsprint is actually quite attractive, and love the look of text on a package, but wanted to put in a little more effort. So I came up with a cool option that's clean, masculine, and maintains the typographic look of the newsprint. Plus, it eliminates the need for any "to:/from" tags, as the recipient's name is right there in tasteful type.
Once I figured it out, it was actually quite easy and quick - less than ten minutes per gift. Here's how to do it: Materials and Tools 1. 2. 3. 4a. 4b. 5. Hand Stitching, part 1. One of my favorite crafts is hand stitching-- it's fun, addictive, expressive and relaxing :) Over the next few weeks, I'm going to share easy ways to make your own patterns for hand stitching along with some tips and ideas :) These are some samples of my past projects-- I like to draw patterns freehand and use my handwriting.
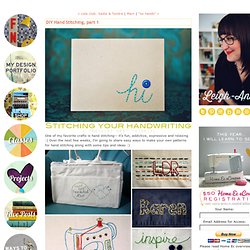
However, sometimes I adapt clipart type images to make a more complicated pattern, like the sewing machine or I just stitch the outline of an image I love, like the Goonies "Hey You Guys" silhouette :) I use a Back Stitch for all my hand stitching because it's very versatile and I like the look but you can use any combination of stitches for your projects... there's lots of fun ones! Today, we're going to start with handwriting & transferring your pattern :)