

Tailgating DIY Project: Paint Your Cooler for Team Spirit. Hey, sports fan!

Show off your team spirit in style with this easy DIY custom-painted cooler. You’ll be the coolest person tailgating this season! What You’ll Need • Ammonia based cleaner or paint thinner • Sandpaper • Tack cloth • Fusion for Plastic Krylon spray paint (or spray paint that is suitable for plastic) • Painter’s tape Directions Step 1: Clean the Cooler For older plastic, use an ammonia-based cleaner and wipe down to clean surface. Step 2: Sand the Surface Lightly sand glossy surface if previously painted and remove dust with a tack cloth. Step 3: Begin Painting When dry, begin painting. Note: Shake paint can for 1 to 2 minutes before using in well-ventilated areas. Step 4: Repeat and Reapply Paint body and lid of the cooler by applying a thin coat and allowing to dry for 30 seconds. Step 5: Remove the Tape Remove tape immediately after spraying. Note: Fusion dries in 15 minutes or less and can be handled in about one hour. A Fabulous Fete: diy \ wrapped flatware. It's been a while. i know. i think that all of my creativity was just sucked out of me for all of the other projects i have been working on. well, i'm back. one day a slew of project ideas hit me. i'm definitely excited to share them with you!
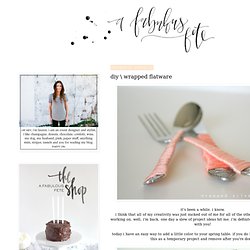
Today i have an easy way to add a little color to your spring table. if you do it right, you can even do this as a temporary project and remove after you're done! All you need is some flatware, embroidery floss, and a glue gun start with a dab of glue at the top, wait for it to dry and wrap your way on down to the bottom. DIY Satsuma Candle. A friend of mine DIYed her own candles, made from the peels of Satsuma oranges, for a recent dinner party.
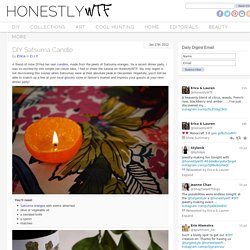
I was so excited by this simple yet clever idea, I had to share the tutorial on HonestlyWTF. My only regret is not discovering this sooner when Satsumas were at their absolute peak in December. Hopefully, you’ll still be able to snatch up a few at your local grocery store or farmer’s market and impress your guests at your next dinner party! The stem side of the Satsuma will be the bottom and base of the candle. Lightly score a ring around the top 1/3 portion of the orange. Because Satsumas are known for their loosely attached peels, the orange should easily be removed. Once the flesh of the orange is taken out, the pith connecting the outer stem should remain. Pour a few glugs of olive oil into the orange, leaving just the very tip of the pith exposed. DIY Project: Ombre Dip Dyed Party Skewers. July 13, 2012 DIY Project: Ombre Dip Dyed Party Skewers The ombre madness here at Somewhere Splendid continues!

Try This: Gilded Lace Champagne Glass Tutorial. I recently picked up a couple of champagne coupes from a local thrift store for a buck a piece.
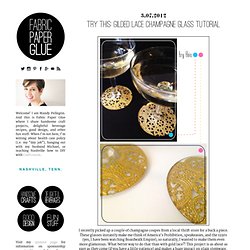
These glasses instantly make me think of America’s Prohibition, speakeasies, and the 1930s (yes, I have been watching Boardwalk Empire), so naturally, I wanted to make them even more glamorous. What better way to do that than with gold lace?! This project is as about as easy as they come (if you have a little patience) and makes a huge impact on plain stemware. Materials: Glass Stemware, Gold Paper Doilies, Matte Sealer Glue (like Mod Podge), Sponge Brush, Pen, Scissors DIRECTIONS: Begin by tracing the outline of the bottom of your stemware onto a gold paper doily.
Carefully cut out your doily circle just inside the line that you traced. Turn your glass upside down, and use your sponge brush to cover the bottom with a thin layer of glue. Place the doily cutout gold-side-down on top of the glue. Gold Dipped Holiday Glasses. Turn any set of wine glasses into a gorgeous holiday entertaining set.
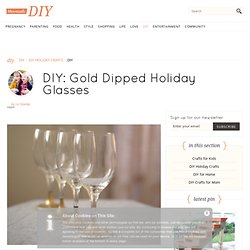
Keep reading to see how to make these beautiful gold dipped wine glasses for your holiday party! Metallic gold spray paint Masking tape Newspaper Wine glasses Wash wine glasses thoroughly. Wrap tape around the base of the wine glass leaving the area exposed you want to paint gold. Cover the rest of the glass with paper I taped up the sides too to be extra cautious. DIY: Make your own Halloween dinnerware. So now you've seen my interpretation of a Raven themed dinner party, I wanted to show you how I made the dinnerware.
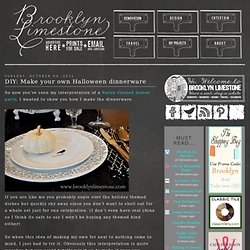
If you are like me you probably oogle over the holiday themed dishes but quickly shy away since you don't want to shell out for a whole set just for one celebration. (I don't even have real china so I think its safe to say I won't be buying any themed kind either) So when this idea of making my own for next to nothing came to mind, I just had to try it. Ice Shot Glasses: DIY Winter Wedding or Party Drinks. Posted on January 25, 2012 by Christina Learn How to Make Ice Shot Glasses Inspired by Quebec’s Hôtel de Glace I’ve always wanted to go to the Hôtel de Glace in Quebec.
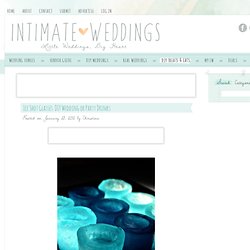
In fact, my husband and I had reservations there 11 years ago, but had to cancel because my dad was in the hospital. Thankfully my dad made a full recovery – but we never re-booked. Every winter I gaze longingly at online photos of the Hôtel de Glace. I decided to use the hotel’s notorious ice bar as inspiration for this tutorial. Seashell Lights. Inspired Entertaining: DIY Chalkboard Wine Glasses. Last month I got an email from one of those "deal of the day" websites featuring a very cute set of wine glasses with chalkboard stems from a company called Chalkboard China.
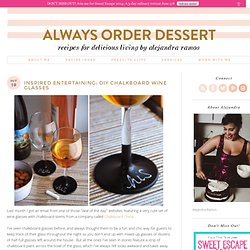
I've seen chalkboard glasses before, and always thought them to be a fun and chic way for guests to keep track of their glass throughout the night so you don't end up with mixed-up glasses or dozens of half-full glasses left around the house. But all the ones I've seen in stores feature a strip of chalkboard paint across the bowl of the glass, which I've always felt looks awkward and takes away from the beauty of the wine or beverage in the glass. What I like about this version is that the writing part is at the bottom on the stem and foot of the glass, so it doesn't compete with the beverage.
I also like that the simple black foot on the glass is in itself an elegant design element, and would work just as well with no writing on it. So I figured, "I can totally make that myself! " Materials 1. 2. 3. Method. Wine Glass Candles. Mothers day is here and I know it's a little late to post a tutorial about a mothers day gift, but my mom reads my blog, so I couldn't post this without ruining the surprise for her :) I made her these two cute pink candles and it was actually pretty easy to do: 1.

Put a candle in a pan (don't worry about getting it dirty, you will be able to clean the pan after you're done).2. Heat it up.3. Take the wick out of the pan with some tweezers, be very careful to not burn you're fingers!