
Craig Smarkus. How to enable Light Propagation Volumes GI [ WIP AND BETA] Light Propagation Volumes. Light Propagation Volumes are a feature in development and not ready for production.
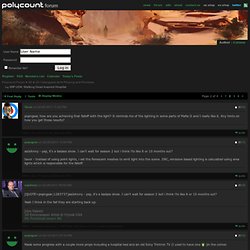
Enabling Light Propagation Volumes To get the feature enabled, put this into ConsoleVariables.ini and (re)start the engine: r.LightPropagationVolume = 1 At the moment, this console variable cannot be changed at runtime. Pirate castle [UDK] First, thanks everyone for your comments !
![Pirate castle [UDK]](http://cdn.pearltrees.com/s/pic/th/pirate-castle-polycount-forum-21241964)
Now i'll try to answer to questions but before i start, i must give some precisions : when i started the project i didn't intend to make an optimized map. Intro for Artists and Environment Artists. Режим кривых Curve Mode в ZBrush 4R2: SliceCurve, CurveLathe. [UDK] Desert enviro. WIP UDK: Walking Dead Inspired Hospital - Page 2. Thank you guys.
I put extra care into the little details so I hope you guys can pick them out if you look carefully Walrus, good suggestion, I am going to smooth that out the final images. Thanks for pointing it out. Damian Lazarski. Reducing seams In this section I will discuss the methods that can be used for reducing texture, shading, material and physical seams in UDK environments.
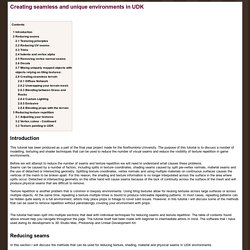
Texturing principles. Choco Nice Terrain UDK. Quote: Thanks, I'm thinking of making a tutorial about my texturing methodes plus some tips/tricks once I'm done with the whole thing. Just hoping that it turns out well and that I wont get burned out when I spend too much time on this project. As for the grass alpha, ya its pretty much 3 alpha maps stored in one big texture map (RGB channels). I'm thinking about replacing them by vertex colors and use small tilable high frequency alpha maps to give the grass a nice patchy look in order to compensate with the low quality of vertex color masking. Using vertex colors will help me save more texture memory and I will be able to paint the masks in the engine for accurate placements. [UDK] Rock Environment WIP. Needs more color variation, I'd say.
![[UDK] Rock Environment WIP](http://cdn.pearltrees.com/s/pic/th/environment-polycount-forum-21238545)
And post textures so we can have a looksie and crit that as well ^^. What are you using for reference? Reference is key. Play around with shapes, right now you've just got all these rounded shapes. Right now it just looks like a bunch of rocks piled together by someone. Is it supposed to be more of a canyon? If you want cool and weird looking canyon, maybe some reference from Bryce Canyon will do ^^ google it. 100k tris is usually the thing you get if you copy and paste smaller stuff to make bigger stuff, instead of making the bigger stuff from scratch.
UDK - Water with Flow Map. Jason Lavoie - demon throne. UDK Electric Smoke Material. UDK - Quick Light. Category: UDK In part 3 of the BSP brushes tutorial we will cover the how to add a quick test light and jump inside the game to test out your level.
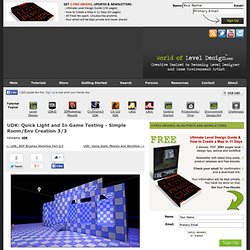
In the following tutorial, you will learn: How to add a point light How to add a Lightmass Importance Volume Many shortcuts and tips are also shown along the way Video and full notes for quick access are below If you are completely new to UDK, start with these three tutorials. They will help you to catch up and then come back here and continue with BSP brushes and the rest of the tutorials. Few ways of adding a simple light in your level. First is to Right Click --> Add Actor --> Add Light (Point) You could also add a Dominant Directional Light as well. Second is to use a shortcut. Udk Level. UDK - Mesh Instance Texture Offset. Object World Position: This function can be used to translate your textures based on their worlds position.
This web site covers the new features in UDK, and i strongly reccoment you to brows through it quickly. UDK: How to offset a secondary 'detail' texture when the asset moves around your scene. If you have ever created a game before, you are failure with the terrible repetition of assets around a scene. Either you need to create a new mesh, new material or place a decal or object over a section to hide the repeating texture when you duplicate the asset around your scene, but no longer is that the case. This method works best when you break up your repeated assets with some sort of object such as a pillar, beam or other method. This is alright, and with decals you can hide the repeating details, but we can break this up.
Basics speed tree. Rain UDK. Palm Tree - UDK. Julio Juarez. Level Design Memoirs.
Part 01 – ‘Overgrown’. Added August 18, 2011. Portfolio - Alyssa Reuter. I spent a while investigating different ways of representing water surfaces in Unreal - in the end I decided that there were two approaches that worked fairly well, although each of them have some limitations.
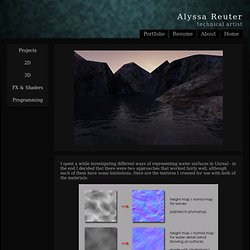
Here are the textures I created for use with both of the materials: Lake Water In this approach, I wanted to create a choppy lake surface with some transparency, so the the player can see a hint of what lies beneath the surface. This ability is determined by the angle of incidence - the greater the angle at which the player views the surface, the stronger the reflection will be, thus limiting the player's ability to see beneath it. July 2011. This is the shading network used for the water in the waterfall scene.
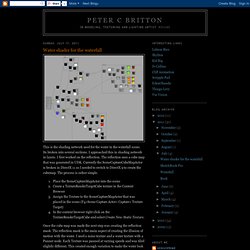
Its broken into several sections. MeshPaintReference. Search public documentation: MeshPaintReference 日本語訳中国翻译한국어 Interested in the Unreal Engine? Visit the Unreal Technology site. Looking for jobs and company info? Questions about support via UDN? Overview. UDK - DX11 tessellation/displacement icicle material tutorial. TerrainAdvancedTextures. Search public documentation: TerrainAdvancedTextures 日本語訳中国翻译한국어 Interested in the Unreal Engine?
Visit the Unreal Technology site. Looking for jobs and company info? Questions about support via UDN? Overview Terrain texturing is an enormous subject with a wide variety of methods and solutions. UDK Simple Water Tutorial – Part 1. This tutorial goes over the process of how I created my water shader for the River Shack scene in my portfolio. The shader is not meant to be a complete solution, and will require a lot of tweaking on your part in order to achieve the exact look you want – what is important is that the properties can be tweaked with much modification. In the future I will add a more advanced water shader tutorial that covers some Dx11 features such as tessellation, but its important to have a strong base of knowledge. Before I start, I have to give credit where credit is due. Thanks to Chris Albeluhn and Alyssa Reuter for their water tutorials.
UDK Up vector based snow shader overview. Chris Albeluhn - UT3: Reflective water tutorial for unreal. This tutorial will cover the creation of a truly reflective water surface in water. This water material reflects everything above it as well as becomes more opaque as the 'water' gets deeper and changes color the closer it gets to the land. I should point out that this is strictly a material water shader, there is no deformation in the geometry at all. Also i should note that since this shader will be plugged into the 'emmisive' of the material, it is ideal for in anterior scene. First we will need a scene to work with. * Skybox * Room box (large enough for the water to be opaque) * some kind of gometry (Terrain would be best) * Lighting * Post processing (not needed, but lets make it complete shall we)
UE4 Materials For Beginners: Vertex Painting Water Puddles.