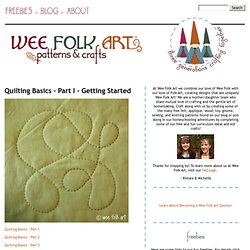

Quilting Basics - Part I - Getting Started. Quilting Basics - Part 1 Quilting Basics - Part 2 Quilting Basics - Part 3 Quilting Basics - Part 4 Probably the question I get asked MOST is... how do you get your stitches so even.

My glib response is usually... years of experience. Quilting is all about stitches. So, today, we are going to make a practice piece. Materials: solid fabric - use a light weight cotton or flannel (fabric should be washable in order to remove the tracing paper design) light weight cotton batting - DO NOT use the "fluffy" type of battings contrasting quilting thread or cotton floss (I used a fun variegated floss) needle small chunk beeswaxcopy of pattern or blank 8 1/2" x 8 1/2" piece of paper safety pins and/or stapler tracing paper and tracing wheel (the type with a "teethed" wheel, not a "smooth" wheel) To get started we need a design.
Now, you can either make a copy of a design I created, or let the spirit move you and draw your own. Cut out your fabric and batting. Pin the three pieces together. 5 Minute Simple Pillow Tutorial. Photo credit lisa clarke I know most of you probably know how to cover a pillow but I did have a few tips that might help your pillow look better and made faster.

My friend Abi is trying to save money everywhere she can for her upcoming wedding in June. She is making the ringbearer pillows....errrr I am making them. But she came over yesterday and I took about five minutes to recover two she had bought at the Salvation Army for $2. She had also bought the brown satiny material for 25 cents. We'll be doing something else to the pillows later to make them look really 'wedding worthy'.
So I thought I'd get a good post out of it and documented the very simple process. Freezer paper stenciled reverse applique hand stitched pillow - artsy-crafty babe. Now there's a title for ya!

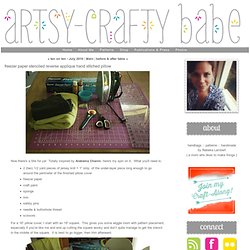
Totally inspired by Alabama Chanin, here's my spin on it. What you'll need is: 2 (two) 1/2 yard pieces of jersey knit + 1” strip of the under-layer piece long enough to go around the perimeter of the finished pillow coverfreezer papercraft paintspongeironsafety pinsneedle & buttonhole threadscissors For a 16” pillow cover, I start with an 18” square. This gives you some wiggle room with pattern placement, especially if you’re like me and end up cutting the square wonky and don’t quite manage to get the stencil in the middle of the square. It is best to go bigger, then trim afterward. Cut two pieces of freezer paper 18” square (pretty convenient that freezer paper is 18” wide), then cut two pieces of jersey 18” x 18”.
Using one piece of freezer paper, fold it in half, then quarters, then diagonally if you choose – cut out shapes as you would if you were making a paper snowflake. Thin your craft paint by about half with water. That's it! 9 Pillowcases and 1 easy Tutorial. & DIY: Tank Dress with Pockets! academichic. At long last, I present a tutorial for the tank dress I made a few weeks ago before the end of the semester blindsided me.

I’ve been seeing these tank+patterned skirt all over the place lately, but frequently they were too short or too short-waisted for my particular proportions. After some googling, and studying the really excellent skirt tutorial and t-shirt dress tutorial at Ruffles and Stuff and the skirt with pockets tutorial at Freshly Picked, I decided that even my fairly rudimentary sewing skills could handle this project. And since I celebrated my height yesterday for Dress Your Best week, it seems appropriate to post a sewing project prompted by my need for a longer-than-in-stores dress.
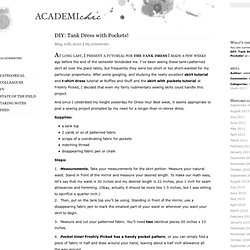
Supplies: a tank top2 yards or so of patterned fabricscraps of a coordinating fabric for pocketsmatching threaddisappearing fabric pen or chalk Steps: 1. 3. 4. Pin and cut out a pair. 5. 6. 7. 8. 9. 10.