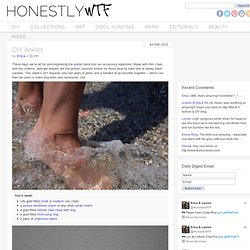

DIY Anklet. These days we’re all for reincorporating the anklet back into our accessory repertoire.

Made with thin chain and tiny charms, delicate anklets are the perfect summer trinket for those beachy bare feet or barely there sandals. This week’s DIY requires only two pairs of pliers and a handful of accessible supplies – which can then be used to make bracelets and necklaces, too! Cut the chain to length by measuring it around the ankle. Using the pliers in a back and forth motion, open the jump ring that is attached to the lobster clasp. Thread one end of the chain onto the ring. Thread the wishbone charm onto the chain. Honestly, that’s it! The same method can be applied to a bracelet or necklace – just search for charms online and you’re ready to make charm jewelry all summer long! (all images by HonestlyWTF) DIY Charm Bracelet. I’ve been itching to do a charm bracelet tutorial on HonestlyWTF for awhile now.

And it wasn’t until I recently purchased a gorgeous vintage pearl charm bracelet that I was motivated to locate all the necessary supplies to recreate something just as pretty. The main focus of this week’s tutorial is to teach you how to wire wrap, which allows you to add any type of charm to personalize your own bracelet! You’ll need: Start by threading a headpin through a large pearl. Stack the petal bead cap and a spacer bead on top. Use the round nose pliers to bend the headpin to the left, about 2 millimeters above the spacer bead. Find the center link of the bracelet and attach the charm to that link.
Now use the flat nose pliers to hold the loop tight for traction. Use the wire cutters to trim away any excess wire. Continue adding more charms, alternating between large and small pearls. Your charm bracelet is finished. Layer with your favorite bracelets and enjoy! (studs and pearls) Painted Leather Bracelet D.I.Y. I'm so excited to share this D.I.Y. with you today!

If you love the look of geometric bracelets this season, this one is for you. Emma and I have a deep love for our local leather store and as a result, have a giant stash of leather scraps. This project is fun to create and a great gift idea! 1-2. Cut strips of leather that are 1-2 inches longer than your wrist size. . Here's what you need to attach a snap to your bracelet.
(can find this in any craft store in the sewing section), a hammer, and a hole punch tool 5. This is Emma's pretty creation. These bracelets make great gifts. DIY Macrame Bracelet - Honestly WTF. Growing up by the beach in Southern California, the ability to knot a macrame bracelet was practically a right of passage.

Although those days are long behind us, we’ve never forgotten the ever-so-simple square knot technique. This time, however, we’re replacing hemp and wooden beads for more updated elements like colorful nylon cord and glossy metal charms. Happy knotting! You’ll need: Start by cutting the knotting cord into two 30 inch, two 20 inch and one 10 inch lengths.
DIY Braided Bead Bracelet - Honestly WTF. It’s been awhile since our last bracelet DIY.

I don’t know about you, but our wrists have been begging for another colorful addition for months now. So after playing with some materials that were already on hand, we’ve created a tutorial for a braided bead bracelet, which is a not so distant cousin of the hex nut and wrap bracelet. Because honestly, you can never have too many . . . You’ll need: Cut the waxed linen cord into a 26″ and 19″ piece. Tie a knot about half an inch down from the loops. Start braiding the strands. Push the bead against the base of the braid, and cross the left strand over the middle. Keep a finger at the base of the braid, holding the beads in their place and keeping the braid tight.
Finish the bracelet with another inch of braided cord, measuring it against the wrist. Thread on a two hole button – two strands through one hole and one strand through another. Vintage Twist on Friendship Bracelets. More Design Please - MoreDesignPlease - DIY : Sailors Knot Bracelet&