
Recycled – a world of free opportunities. I love the society we’re living in, our lifestyle, work ethics and spirit of entrepreneurship and adventure.
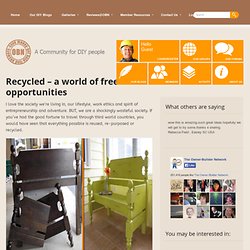
BUT, we are a shockingly wasteful society. If you’ve had the good fortune to travel through third world countries, you would have seen that everything possible is reused, re-purposed or recycled. If you have an old bed frame that has seen better days, why not consider turning it into an outdoor bench We’ll start this album – and add to it, but why don’t YOU send us your ideas and images so that we can add them too? There are many images spread over multiple pages. If you liked these ideas, you will also like viewing other recycling ideas… How to Make Teacup Candles.
I love easy crafty projects, and was excited when Meg Perotti posted an easy step-by-step tutorial for making your own teacup candles!
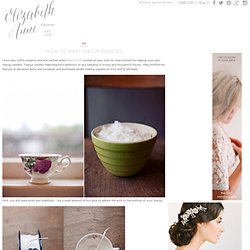
Teacup candles make beautiful additions to any tabletop or lovely and thoughtful favors. Meg thrifted her teacups at Salvation Army and Goodwill, and purchased candle making supplies on Etsy and at Michaels. First, you will need wicks and stabilizers. Use a small amount of hot glue to adhere the wick to the bottom of your teacup. Next, melt your wax. Use simple barbeque skewers to hold the wick in place while pouring. Set your teacup on a flat surface to dry, and do not move the cup while drying. Lillies - Album photos - Lillies Planet. Styling and Salvage: FOR SALE. Willommen - Entwurf Direkt. Thomas Forsyth. UCreate: porte de placard en Art Desk par iCandy main. Hi friends! I can't tell you how excited I am to be a creative guest on Ucreate today! I've been bubbling with excitement for weeks and have been scheming over what project would be Ucreate-worthy.
I hope this one fits the bill...! First of all, I'm Autie and my friend Jen and I blog over at iCandy handmade. I'm a busy mom of 2 cute little kids and during nap time and bed time, I love to work on projects! The project that I thought I'd share with you today started out with these. The drawer does not open, but the cupboard door does...and it leaves about an inch of space to keep something in it...like art masterpieces of a few sheets of homework paper...hmmmm I bounced some ideas off of Jen, and this is what I came up with...I give you the Cupboard Door into Art Desk Tutorial I made one for each of my littles, and so far, they're totally diggin' it!
If you want to know what I did, here's a quick run-down on what I did: I wanted to use the drawer as a supply holder. Le blog français officiel d'Etsy, le site de vente en ligne mondial des créateurs fait-main et du vintage. Le site pour encourager, aider et conseiller les mamans créatives entrepreneuses. ACCUEIL - www.brigha-neko.fr. DIY: Ljusslinga med lampskärmar * Lamp shades on a string.
Hos Fabriken pågår just nu en riktig julstuga där tipsen på julpyssel blir fler och fler.
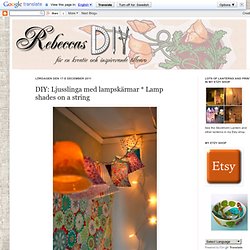
Mitt bidrag blir denna ljusslinga gjord med plastmuggar. Mannen tyckte att färgvalen var somriga, men jag vill gärna att slingan håller även efter nyår och därför valde jag pasteller och mycket färger.Jag var på en utbildning för ett tag sedan. Där fanns det traditionella mineralvattnet med plastmuggar, eller ja, alla andra tog dem för muggar men jag såg direkt att det egentligen var små lampskärmar. I sann återvinningsanda och med risken för att verka lite knäpp, tog jag hand om de flesta använda muggar, tog med dem hem och diskade ur dem. Idag gjorde jag om samtliga till små lampskärmar med hjälp av tyg och lim. At work the other day I noticed that the plastic cups for mineral water looked like tiny, tiny lamp shades. Rita av muggen genom att rulla den över ett papper och rita utmed över- och undersida.
Klipp ut tygbitar utifrån mallen. Cut the fabric using the template you just created. Красивые Игрушки: Мастер класс: шьем подушку "Сова" Для создания подушки, а точнее наволочки, нам понадобятся:Ножницы, в том числе ножницы зиг-загСпециальную подложку для аппликаций или флизелинБулавкиПуговицы или кнопки, лентыНесколько видов ткани для наволочки и аппликацииФетрТекстильный клей Нитки мулине Для создания наволочки, а точнее ее передней части, нам нужен квадрат из ткани размером 30 х 30 см + по 1 см на припуски на швы с каждой стороны.
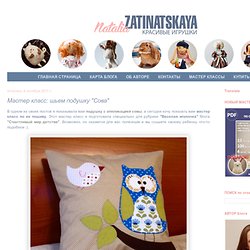
Для задней ее части нам нужны 2 прямоугольника. Чтобы определить их высоту нужно к 32 см (длина передней части) прибавить еще 5-6 см и получившуюся сумму разделить на 2. Для аппликации нам потребуется вот такая выкройка: Вырезаем каждый элемент выкройки, переводим на ткань и опять вырезаем. Все делаем в 1 экземпляре, кроме тела совы - из ткани мы вырезаем 2 детали, не забывая сделать припуски на швы в 1 см. Дублируем все детали флизелином (кроме тела совы и деталей из фетра - это ветка и клюв) с использованием утюга. Приступаем к стачиванию деталей аппликации к наволочке. Шьем наволочку. Facile, pas cher, rapide, et fantastique DIY mur d'entité.