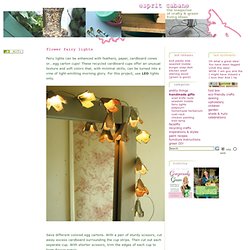

Fairy lights, esprit cabane, DIY decorative objects. Fairy lights can be enhanced with feathers, paper, cardboard cones or...egg carton cups!

These recycled cardboard cups offer an unusual texture and soft colors that, with minimal skills, can be turned into a vine of light-emitting morning glory. For this project, use LED lights only. Save different colored egg cartons. With a pair of sturdy scissors, cut away excess cardboard surrounding the cup strips. Then cut out each separate cup. Starting at the cup opening, make a short slit into each side of the cup. Talk Crafty To Me.
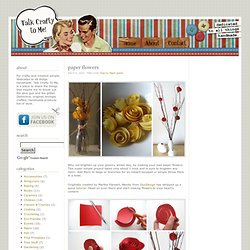
Why not brighten up your gloomy winter day, by making your own paper flowers.

This super simple project takes only about 5 mins and is sure to brighten any room. Add them to twigs or branches for an instant bouquet or simply throw them in a bowl. Originally created by Martha Stewart, Wendy from DoziDesign has whipped up a quick tutorial. Head on over there and start making flowers to your heart’s content. Crazy paper thing. Paper Flower Key Holder / Mark Montano.
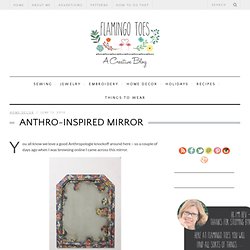
Easy Cd Case ....NO Glue .... For Everybody.... Anthro-Inspired Mirror & Flamingo Toes. You all know we love a good Anthropologie knockoff around here – so a couple of days ago when I was browsing online I came across this mirror.

Oh I definitely need that. Hold the presses – did that say $498??? Huh. We can do better than that. :) So after scouring the thrift shops, cutting myself on mirror glass, and overcoming an unreasonable fear of Mod Podge, here is my version! (Bear with me here – taking a picture of a mirror is a bit tricky. Ready for the tutorial? You’ll need: A MirrorEasy Off Oven CleanerFabric (enough to cover the frame and the back of the mirror)Mod PodgeA Staple Gun or other framing tool I went searching for a method to removing silvering and came across a great tutorial at Mitzi’s Collectibles. DIY String Chandeliers : Ruffled® Jessica of Wednesday Inc shows us how to make those gorgeous twine chandeliers from the inspiration shoot she shared with us this morning.

Using balloons, glue and twine, you can also make these lanterns for your wedding – and then bring it home and use it as your very own mid century lampshade. What you will need are: balloons, glue, yarn, tray for glue, corn starch 1/2 cup of Corn starch, 1/4 cup of Warm water, clear fast drying spray paint, hanging lamp cord or fishing line (depending on your desired final product), and a lighting kit if you’re looking for a fully functional lantern. Jessica recommends using a sharpie to mark on the inflated balloon how much room you need to leave for the lighting cord.
She also recommends coating the balloon with vaseline prior to wrapping the yarn coated with glue so it doesn’t stick on the balloon once it’s dry. You can see all the details on Jessica’s blog. Are you getting excited to try to do this at home as much I am? Instructions: Wedding Invitations, Envelopes, Stationery, Crafts. How to make gift bags from newspaper.
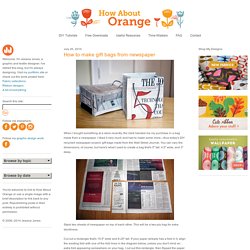
When I bought something at a store recently, the clerk handed me my purchase in a bag made from a newspaper.

I liked it very much and had to make some more—thus today's DIY recycled newspaper project: gift bags made from the Wall Street Journal. You can vary the dimensions, of course, but here's what I used to create a bag that's 5" tall, 4.5" wide, and 3" deep. Stack two sheets of newspaper on top of each other. This will be a two-ply bag for extra sturdiness. Cut out a rectangle that's 15.5" wide and 8.25" tall. Fold a flap 1.25" down from the top. Cut two pieces of cardstock or chipboard to 4.25" x 1", then glue them on the widest two panels just under the top fold.
Put glue on the outside of the 0.5" tab and bring the left-most panel over to form the body of the bag, aligning the cut edge of the panel with the folded edge of the flap. Upend the bag so the 2" flap is now up. Put glue on both flaps and fold them inward to form the bottom of the bag.