
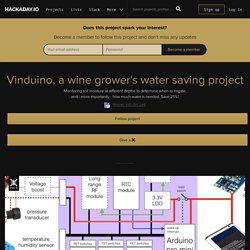
Vinduino, a wine grower's water saving project. Silicone Rubber Casting 01/01/2016 at 23:33 • 0 comments Making a small quantity of gypsum sensors using 3/4" PVC pipe couplers works pretty well.
Due to planned field trials, I was looking for an easy way to produce more sensors while maintaining consistency.I decided to do an experiment with 2-component silicone rubber, and ended up buying the OOMOO-30 trail kit. This kit produces just under one liter of rubber. With that quantity a mold for 9 sensors is possible. The material is easy to work with, and vacuum degassing is not necessary. Curing takes about 6 hours.First step is to make the sensor casting shapes, using 3/4 PVC pipe cut to 5 cm length, glue a cap on, and insert the machine screws. Smart Wireless Irrigation Controllers- Postscapes. OpenSprinkler — Open-Source Internet-based Sprinkler / Irrigation Timer. Open-Source Internet-based Sprinkler / Irrigation Timer Order OpenSprinkler is available for purchase at Rayshobby Shop.
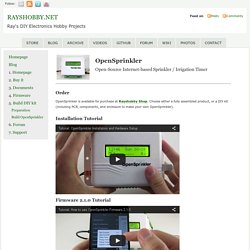
Choose either a fully assembled product, or a DIY kit (including PCB, components, and enclosure to make your own OpenSprinkler). Installation Tutorial Firmware 2.1.0 Tutorial Updates Overview. Smart Wireless Irrigation Controllers- Postscapes. Smart Wireless Irrigation Controllers- Postscapes. Rain Bird SST Smart Sprinkler Timer - Installation. Rain Bird UT1 Replacement Transformer for SST Indoor Irrigation Controllers-UT1. Arduino sprinkler valves + wifi + twitter. [Edit: I made the hardware part more compact by using a relay shield.
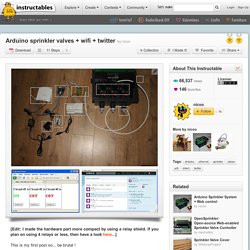
If you plan on using 4 relays or less, then have a look here...] This is my first post so... be brutal ! I have a small yard with a very odd shape, well... L-shaped really and not enough pressure at the tap to be able to water it in one go. So I had to create 3 sprinkler sub systems that can only be turned on one at a time. I sourced 3 Gardena valves but refused to cough up the extra cash for their dull 'computer' (not sure why they call it a computer btw). Arduino time, I say... As a bonus, I inserted at the end of this instructable my scripts that automagically turn the sprinklers on and off, check the weather forecast (so I don't water the lawn if it is going to rain soon) and log their activity on twitter.
Enjoy ! Announcing the First DC Powered OpenSprinkler (v2.3 DC) After several months of continued development, I am excited to announce the release of the first DC powered OpenSprinkler — v2.3 DC.
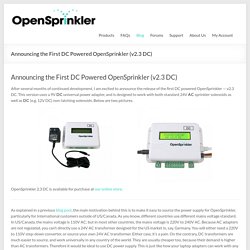
This version uses a 9V DC universal power adapter, and is designed to work with both standard 24V AC sprinkler solenoids as well as DC (e.g. 12V DC) non-latching solenoids. Below are two pictures. OpenSprinkler 2.3 DC is available for purchase at our online store. As explained in a previous blog post, the main motivation behind this is to make it easy to source the power supply for OpenSprinkler, particularly for International customers outside of US/Canada. As you know, different countries use different mains voltage standard.
Given the above benefits of DC, why in the world are sprinkler solenoids designed to work on 24V AC? But there is no reason why we can’t achieve the same effect with DC. Understanding 24VAC Sprinkler Valves. I often get questions about sprinkler valves, so in this post I will explain the basic electric properties of sprinkler valves.
If you are designing a sprinkler controller circuit, understanding these properties can be helpful. It’s a common mistake to assume sprinkler valves work with DC voltage. While most valves indeed CAN be powered by DC voltage (see below), they are designed to work with AC voltage in the range of 22VAC to 28VAC. That’s why if you look at a standard sprinkler transformer, the output is usually AC. The electric part of a sprinkler valve is the solenoid — it’s a cylindrical-shaped thing screwed into the valve. Let’s start by measuring the resistance of the sprinkler solenoid. The catch is exactly in the fact that sprinkler solenoids are powered by AC voltage.
With an LCR meter, I measured the inductance of the two solenoids: One reads 63.57 mH, the other 132.45 mH. This, plus the resistance, gives a total impedance of: OK, so this is getting closer to the reality. Arduino-Based WiFi Lawn Sprinkler Controller. This post describes a project I undertook to build a home-grown, Arduino-based, WiFi-enabled lawn sprinkler controller.
I don’t know about you, but I’m never happy with my lawn sprinkler schedule. In Austin, it can rain till my garage floods one week, then return to the typical four-year drought conditions with 100°F+ temperatures for the rest of the summer. As we progress through the drought stages, we go from being allowed to water whenever we want to twice a week to once a week. I also find that the consumer-grade zone controllers have really crappy user interfaces, they are often limit you to either an “every X days” pattern or watering on specific days of the week (but not both), and they tend to limited in how many events are associated with a given zone…not to mention you have to go out to your yard – or maybe your garage if you’re lucky – every time you want to change the schedule.
Arduino-Based WiFi Lawn Sprinkler Controller.