

Adventures of our Fami-Ly: Quiet Book Tutorial and Templates. Well, here are all my secrets, sources, and sewing tips from the quiet book I debuted a few weeks ago.
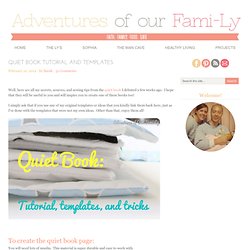
I hope that they will be useful to you and will inspire you to create one of these books too! I simply ask that if you use any of my original templates or ideas that you kindly link them back here, just as I’ve done with the templates that were not my own ideas. Other than that, enjoy them all! To create the quiet book page: You will need lots of muslin. 1. 2. 3. Step 4: Place pins in each of the four corners (to ensure identical size in both layers of muslin) and cut out your page. Step 5: Decorate those pages! I also used a layer of interfacing between the pages (for extra “oomph”).
Step 6: Layer the pages as shown in the *lovely* diagram below to make a little “page sandwich”: Step 7: Use LOTS of pins and pin the pages together (as shown above) Sew, using a 1/2 seam allowance around the edges of your “page sandwich”. Step 8: Hand stitch the opening closed. Handmade #2:Doorway Puppet Theatre. Fleece Farm Friends. Doll suitcase: tutorial. I created this fun doll suitcase for my oldest daughter and we love playing with it together.
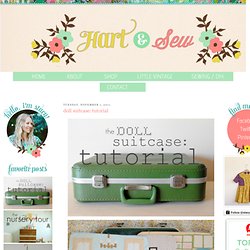
It has three interchangeable rooms, a secret clothes storage space under the floor, and it's portable! Would you like to make your own? I'll show you how! You will need all of the supplies listed above, as well as the notably missing iron, thread, scissors, and sewing machine. The 'wallpaper' fabric, or base fabric, for the rooms needs to be at least a whole fat quarter (depending on the size of your suitcase), but the remaining fabric can be scraps - it's a great way to use up some of your stash.
Cupcake cutie: Free Pattern: Felt cube toy for baby. I made this cube for my son more than a year ago and now that I have whipped it out of storage for my daughter I thought I would share the pattern with you.
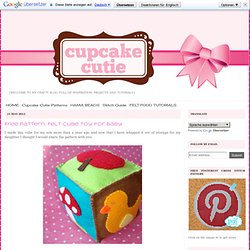
You will need: Assorted pieces of felt: Larger pieces for the sides Scraps for the pictures. 十二生肖有三枚難產 on Flickr - Photo Sharing! Kisautók. Quiet {Flip} Book. This is a project I have been working on since June.
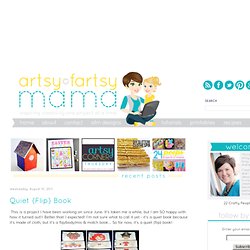
It's taken me a while, but I am SO happy with how it turned out!! Better than I expected!
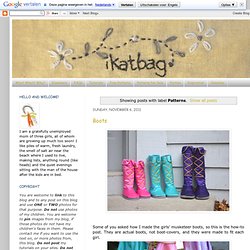
Boots. Some of you asked how I made the girls' musketeer boots, so this is the how-to post.
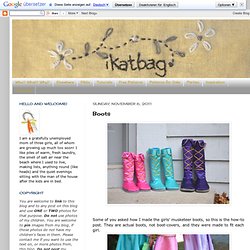
They are actual boots, not boot-covers, and they were made to fit each girl. I began by tracing around their feet to make the sole pattern. I also used my old ballet slipper patterns, much adjusted in both shape and size, because my kids' feet have since grown, for the vamps. Here is a paper muslin. Note that, to get a nice rounded toe area (as opposed to flat and squashed), the vamp (green part) is actually bigger than the sole in the toe area. Only a rounded and roomy toe portion. The boots have a back zipper, so the kids can put them on and take them off by themselves. Here is the link to the pattern pieces, which you can print out in three sizes, along with an instruction sheet.
Patterns. Alright, so they're more popularly known as messenger bags but I grew up calling them satchels.
Unlike traditional satchels, however, these aren't leather. Tutorial. Fabric dollhouse.
Homemade Sidewalk Paint DIY. Thursday, 19 July 2012 Homemade Sidewalk Chalk Paint DIY We are for sure in the heat of the summer.
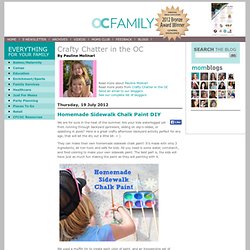
Are your kids waterlogged yet from running through backyard sprinklers, sliding on slip-n-slides, or splashing in pools? Here is a great crafty afternoon backyard activity perfect for any age, that will let the dry out a little bit. = ) They can make their own homemade sidewalk chalk paint! We used a muffin tin to create each color of paint, and an inexpensive set of paintbrushes. Next, pour some water over the cornstarch. Finally, pour about 4 drops of food coloring in the cornstarch water mixture and stir. The gnomes cottage. How to Build Cardboard Castle. We can’t think of a better way to spend an afternoon than building this colorful cardboard castle with your kids.
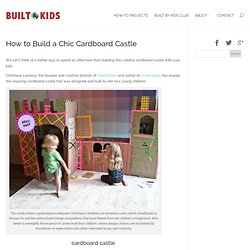
Christiane Lemieux, the founder and creative director of DwellStudio and author of Undecorate, has shared this inspiring cardboard castle that was designed and built by her two young children. The castle strikes a great balance between Christiane’s fondness for luminous colors which DwellStudio is famous for and the unstructured design and patterns that have flowed from her children’s imagination.
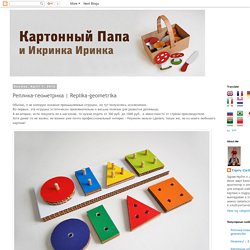
Who better to exemplify the essence of Undecorate than children, whose design choices are not limited by boundaries or expectations but rather motivated by joy and creativity. cardboard castle. Parking « La Factoría Plástica. Hace un par de meses compré en Ikea unas lámparas Forsa. Реплика-геометрика. Обычно, я не копирую никакие промышленные игрушки, но тут получилось исключение.
Making The Faraway Tree. Welcome to The Making Of The Faraway Tree!
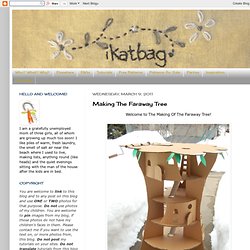
First, let me say that this is not a tutorial. It's more like a behind-the-scenes to its construction. Unlike sewing, which is better illustrated with detailed step-by-step instructions, building with cardboard isn't. Often a person can tell just by looking, how a cardboard thing is put together. The Faraway Tree. This being National Reading Month, I thought I'd do my bit for advocating children's literacy.
Have you read this book? It's the first of Enid Blyton's original trilogy that is beloved by millions of children all over the world. There are three books in the trilogy: The Enchanted Wood, The Magic Faraway Tree and The Folk Of The Faraway Tree. The originals cost a small fortune on ebay now, although you can buy the revised reprints (and a revised fourth title Up The Faraway Tree) easily and affordably enough. Victoria_daniel_paperdolls.pdf (application/pdf-object) Felt Number Mobile – Try Handmade Gallery. Studio ToutPetit: Tutorial Tuesdays * Doll Suitcase.
Wee mouse tin house in Entertainment, books and tales for babies and kids. What's Mummy Up To ...: Matching Scraps. We love Matching Games. Kartonállvány új szerepben. A munkámból kifolyólag néha egészen csodálatos alapanyagokra tudok szert tenni. Ez történt a múltkor is, amikor egy már senkinek sem kellő, fehér, emeletes kartonállványt cipeltem haza diadalmasan - mondjuk diadalmas csak én voltam, mert amikor Ő is meglátta a szerzeményemet, olyan pillantást vetett rám, aminek leírásához szegényes az én tollam... :-)Na de engem nem lehet csak úgy eltántorítani ilyen-olyan pillantásokkal, és mondtam, hogy máááárpedig ezt én felhasználom valamire....
Mom 4 Real: Make A Puppet Theater From a Pallet. I have had two pallets sitting on the side of my house for two months. I have one project in mind, but this one popped in my head this weekend, and I decided to jump in and just do it. I was staring at the pallets leaning up against the house, and thought hmmm…what if I popped a couple of boards out so you could see through them, like a window. Giochi da viaggio: come si fa un libro casetta.
Pom Pom Tutorial – Elmo & Cookie Monster. I will still do some pom-pom projects this week. Hopefully you can have some gift ideas for the upcoming Christmas Pom Pom is the easiest craft I found to be able to make various cartoon features. All you need is to trim and assemble it with fabric glue. This time I am demonstrating how to make pom poms for Sesame Street characters. I picked Elmo and Cookie Monster, the more popular characters from Sesame Street. Tips: If this is the first time you landed in this blog and wanted to make pom pom, you might find these 2 post useful, Basic Pom Pom Making and Pom Pom Trimming. Material you will need: 1. Apply some fabric glue on the center line of the black felt. Keep on rollin’ Through our gifts! This Crayon Roll Holder is a great and useful gift for children!
I noticed on our crayon roll that the inner fabric lining gets marked up quite a bit from the crayons going in and out. So this time instead of using interfacing on the lining piece I covered it with iron on vinyl. Gwenny Penny: Pencil Pouch Tutorial. 2011 Holiday Tags. The Train To Crazy: Handmade Dress Up: DIY Fairy Wand Tutorial. Welcome to the Handmade Dress Up Series! Catching Fireflies; The Faux Decor Version. A lot of us can recall fond childhood memories of running around the neighborhood, on warm summer nights, catching fireflies. Ruffly Crayon Apron Tutorial. Felt Baby Doll Diaper Pattern. Wooden Spoon Puppets (Family Theme) Craft Stick Jewelry Box.
Sew Fearless. ByNight_tuto_CREATIVE_SUITCASE_ENGL. Busily spinning momma: Just A Little Bit of Pillow Talk... SPIDERS! twitch twitch twitch. All for the Boys - All for the Boys - Taggie Cube. [home again, home again] Summer Road Trip #2: DIY Travel Games. Baby Doll Diapers and Accessories TUTORIAL {Guest Blogger: Christina from 2 Little Hooligans} Make A Soft Stacking Toy That Is Also Educational. DIY Felt Play Mats: Construction & Trains. Playmat / car mat. Ty's Christmas present #1 car mat. Stuffed Animal to Puppet. Vingerpoppetjes / Handpoppen. Farmer's Wife in Your Life: Baby Book. Crazy Little Projects. Free Pattern & Directions to Sew a Learn to Dress Toy Snake. Let's diy! Dinosaur Tails. Nap Time Crafters: Cupcake Matching Game. Waterwall. Toy Kitchen 'girl power' mode. Homemade Dominoes. {TUTORIAL} magnetic me using free photobooth props.
Car Play Mat Nostalgia (with a Hemming Tutorial!) Swaddle Baby Tutorial. Puppet Theater Tutorial. DIY Tee Pee Tent - part 2 ▽▼▽ My Poppet. DIY Tee Pee Tent - part 1 ▽▼▽ My Poppet. Make a Homemade Magnetic Fishing Game. A Pocket Pal (Free Pattern & Tutorial) Playful DIY train table. RTW: Chalk Mat with Storage Pocket TUTORIAL. Felt Fishing Set. 4ef9187029.pdf (application/pdf-object) Safety Tips for Mermaid Style Swimming. Fairy Wand. I-Spy Activity Placemat. The Belle Dress: A Tutorial. Sleeping Bags for Tiny Critters. Monster Art Totes for Preschoolers. Old MacDonald Puppet Tutorial and Pattern.
Felt Letters for Clementine’s Room. Crunchy Leaves Craft · Lesson Plans. Fabric letters for the fridge. Don't Call Me Betsy: Munchkin Soft Book Tutorial. Quiet Book Templates. Quiet Book. Everyday Mom Ideas: Make Your Own Family Board Game (Memory Lane) Blanket Tutorial From I am Momma Hear me Roar! Littlest Pet Shop mat. Dress-Up Crown Tutorial. How To Make A Stick Horse. Car Mat...Part 3 Mark it Up and Play!