
Get a Jump Start on Your Next Web Site with This HTML Cheat Sheet. Build Your Own Virtual Pet Cube Raspberry Pi Projects: PIK3A Retro Gaming Table... I'm not a fan of Ikea.

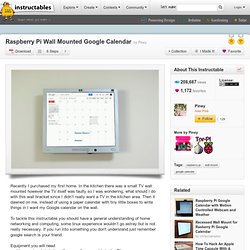
In fact, it's a place I usually try to avoid, until I discovered that you can hack it's ultra-cheap tables into retro video game systems! You know the one I mean: PIK3A: The Raspberry Pi 3 IKEA Retro Gaming Table. You guys have been busy making your own versions, which I'm thrilled to be reading about. Keep those photos and top tips coming. But in the meantime, meet PIK3A Mark II. This is, in many respects, the same build as the PIK3A Mk I. There were definitely options, but the table size makes them prohibitively intrusive for the average living room. The answer presented itself in the LACK TV stand; a narrow, 90cm by 26cm table that boasts a shelf and a table top deep enough to accept the joysticks and buttons.
There isn't much to explain about the build that isn't already covered in the PIK3A Mk I. Make an Animated GIF Photo Frame with a Raspberry Pi. Change the Layout of Launchpad on OS X with a Terminal Command. Turn an Old Mac Into a Cheap VPN with OS X Server. How to Improve Your Photos and Videos with Affordable Lighting. Add a Recent Applications Folder to Your Dock with a Terminal Command. Raspberry Pi Wall Mounted Google Calendar. Recently I purchased my first home.
In the kitchen there was a small TV wall mounted however the TV itself was faulty so I was wondering, what should I do with this wall bracket since I didn’t really want a TV in the kitchen area. Then it dawned on me, instead of using a paper calendar with tiny little boxes to write things in I want my Google calendar on the wall. To tackle this instructable you should have a general understanding of home networking and computing, some linux experience wouldn’t go astray but is not really necessary.
If you run into something you don't understand just remember google search is your friend. Equipment you will need. How To Hack Your Phone Charger. No TV unless you exercise! The system has three components- a detector, an Arduino Nano, and a relay.
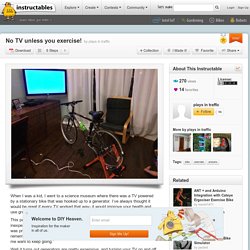
The relay is hooked up inline to an RCA cable going from a video source to the TV. The Arduino looks for input from the detector, and if it doesn’t receive a signal within a certain amount of time (I’m using 10 seconds), it turns off the relay which opens the circuit and the input to the TV goes dark. I have a warning buzzer that goes off when there’s 2 seconds left in the countdown.
The detector I’m using is a black/white detector normally used for robot line following. I put a strip of black and white tape on the back wheel of my bicycle, which is attached to the bike stand. A Picture To Show You Clearly The Effects of Aperture, Shutter Speed and ISO On Images. How to Choose the Best Firmware to Supercharge Your Wi-Fi Router.
Quick and Easy MacBook Repairs That'll Save You a Small Fortune. The 20 Second Modification That I Do With Every New Mac. Over the years, I’ve purchased something around fifteen Macs for myself, my family, and my previous and current startup team.
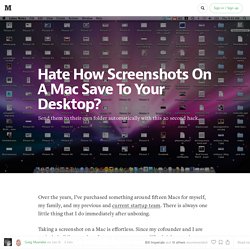
There is always one little thing that I do immediately after unboxing. Taking a screenshot on a Mac is effortless. Since my cofounder and I are actively building product for our newest startup Whttl right now, it means that I take at least five to ten every day. Holding down Command+Shift+3 captures the entire screen, and Command+Shift+4 captures a highlighted area. By holding down Command+Shift+4, and then hitting the space bar, you’ll even capture a screenshot of a specific window or menu. I recommend changing the settings so that all of your screenshots are saved to their own folder. 1. 2. 3. Defaults write com.apple.screencapture location ~/Documents/Screenshots 4. 4. Killall SystemUIServer.