
Stencil with freezer paper (harry potter tee)... - StumbleUpon. Yes, I am a nerd.

I came up with a brilliant idea for a Harry Potter t-shirt and I couldn't resist. "Expecto Patronum! " However, you can make whatever kind of design you want with a freezer paper stencil. It doesn't have to be Harry Potter related. (Although it would be awesome if it was.) I learned about the joys of freezer paper back in my early college days. Basically, freezer paper is backed with a plastic coating that will stick to soft surfaces when ironed, but it peels off cleanly and easily.
To make a sweet t-shirt you will need: Paper Flower Key Holder / Mark Montano. Difficulty Rating: Beginner Tags If you need a quick 'just because' gift for someone, this is it!
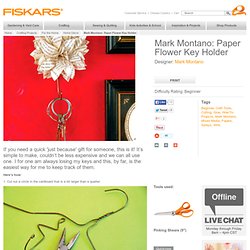
It’s simple to make, couldn’t be less expensive and we can all use one. I for one am always losing my keys and this, by far, is the easiest way for me to keep track of them. Here’s how: 1. 2. 3. 4. 5. Page corner bookmark for kids in Ideas for kids crafts - StumbleUpon. Mad in crafts: DIY Fire & Ice Lanterns - StumbleUpon.
The old becomes new: A new variation on the outdoor lantern.
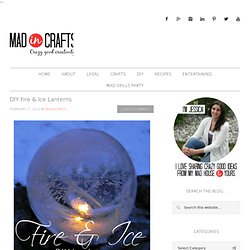
We have had an unusually warm winter in Michigan this year, and while the temps have been nice, I have had to hold off on this project idea until we got a cold snap. We finally got some snow and cold earlier this week, so I was able to try out this fun winter project. Cassette Tapes Reborn as a Clever Box Lamp Cassette Lamp by Vanessa Moreno - Bright Ideas Lighting Design Competition - StumbleUpon. Craftgawker - StumbleUpon. DIY Doily&Lamp - StumbleUpon. Handmade Coasters. V and Co how to: jersey knit bracelet - StumbleUpon. I don't know what it is about this time of year that makes me just want to have my bare feet in the sand, be watching the sun setting into the ocean, and breathing in the warm salty air of the beach...as i get older, more and more i find myself missing that place i used to go to almost every.single.day. as a teen.
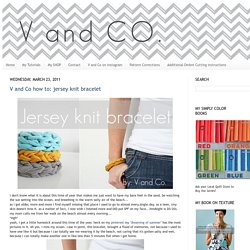
(my skin doesn't miss it. as a matter of fact, i now wish i listened more and DID put SPF on my face...hindsight is 20/20). my mom calls me from her walk on the beach almost every morning... *sigh*yeah, i get a little homesick around this time of the year. heck on my pinterest my "dreaming of summer" has the most pictures in it. ah yes. i miss my ocean. case in point. this bracelet, brought a flood of memories, not because i used to have one like it but because i can totally see me wearing it by the beach, not caring that it's gotten salty and wet, because i can totally make another one in like less than 5 minutes flat when i get home.
*sigh* okay... *cut off excess tails! DIY: Feather Hair Clip/Extension. Bird tattoos + DIY temporary tattoos. Friendship Bracelet Patterns. Love this website?

Give us a "like" Here's a collection of friendship bracelet patterns for making embroidery floss bracelets. If you're looking for non-embroidery floss friendship bracelets, check out this friendship bracelet overview page What's on this page... Knotting Instructions. Happy Valentines Day! This year I made this adorable gift for my boyfriend.
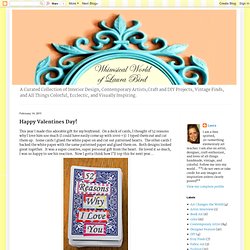
On a deck of cards, I thought of 52 reasons why I love him soo much (I could have easily come up with 1000 <3) I typed them out and cut them up. Some cards I glued the white paper on and cut out patterned hearts. The other cards I backed the white paper with the same patterned paper and glued them on. Both designs looked great together. It was a super creative, super personal gift from the heart. Quilling - Turning Paper Strips into Intricate Artworks. Quilling has been around for hundreds of years, but it’s still as impressive and popular now as it was during the Renaissance.
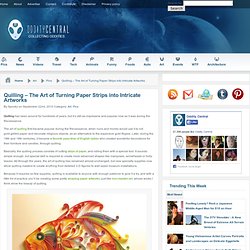
The art of quilling first became popular during the Renaissance, when nuns and monks would use it to roll gold-gilded paper and decorate religious objects, as an alternative to the expensive gold filigree. Later, during the 18th and 19th centuries, it became a favorite pass-time of English ladies who created wonderful decorations for their furniture and candles, through quilling. Basically, the quilling process consists of cutting strips of paper, and rolling them with a special tool. It sounds simple enough, but special skill is required to create more advanced shapes like marquises, arrowheads or holly leaves. All through the years, the art of quilling has remained almost unchanged, but new specialty supplies now allow quilling masters to create anything from detailed 3-D figures to wall-sized museum installations.
Awesome milk trick!. - StumbleUpon. How to Decoupage a Glass Plate. The Battle Shots - pete.com. An Owl Friend.