
Home · nextcloud/nextcloud-snap Wiki. Kubernetes: Getting Started With a Local Deployment // Jetstack Blog. 7/Jul 2015By Matt Bates In Part 1 of this series of blogs, we introduced Kubernetes, an open source container management system from Google, based on operational systems that run over 2 billion containers a week.
Kubernetes will very soon be production-ready with the 1.0 release scheduled for this month. In this second part, we will get hands-on, setup a local cluster and deploy a Nginx web server. An application and its desired state is described in terms of several fundamental units in Kubernetes. Pods: are the most basic unit in Kubernetes. As we will see in a future post, Google’s Container Engine (GKE) is the easiest way to use Kubernetes in the cloud – it is effectively Kubernetes-as-a-Service. Kubernetes runs almost everywhere, on different flavours of Linux and cloud.
Deploying a full Kubernetes cluster takes some effort, especially across hosts, so to get started quickly, Kubernetes can be deployed in standalone mode. Kubernetes architecture - a high-level view Step One: Run Etcd. Running Kubernetes on CoreOS. My kubernetes setup. This is a description of my local kubernetes setup.
If you want to set up kubernetes yourself chances are you should follow the proper guide. This is intended to be the reference that I was desparate for when I set out doing this a few months ago. I wanted to run my own kubernetes deployment to run applications and experiment. I didn't just want to try out kubernetes, I wanted to run it 24/7. From the looks of it the easiest way to do this is using Google Compute Engine or AWS. After considering a bunch of options (including running a Raspberry Pi Cluster) I came to the conclusion that my best setup would be to run a single physical server that hosted bunch of virtual machines. I picked Xen as my hypervisor, Ubuntu as my "dom0" (more on this later) and CoreOS as my kubernetes host.
Hardware Dell T20 ServerIntel i5-459016 GB RAM120 GB SSD Software Hypervisor: Xen Hypervisor / Ubuntu 16.04. Kubernetes OS: CoreOS Alpha Channel. Installing Xen Looks good! Kubernetes - Creating a Custom Cluster from Scratch. Edit This Page This guide is for people who want to craft a custom Kubernetes cluster.
If you can find an existing Getting Started Guide that meets your needs on this list, then we recommend using it, as you will be able to benefit from the experience of others. However, if you have specific IaaS, networking, configuration management, or operating system requirements not met by any of those guides, then this guide will provide an outline of the steps you need to take. Note that it requires considerably more effort than using one of the pre-defined guides. This guide is also useful for those wanting to understand at a high level some of the steps that existing cluster setup scripts are making. Designing and Preparing Learning You should be familiar with using Kubernetes already. Cloud Provider Kubernetes has the concept of a Cloud Provider, which is a module which provides an interface for managing TCP Load Balancers, Nodes (Instances) and Networking Routes.
Nodes Network. Cloud Proxmox derrière une seule IP. Dernière étape, le Natage de votre IP publique Voilà nous touchons au plus important, les précédentes étapes étant plutôt classiques.
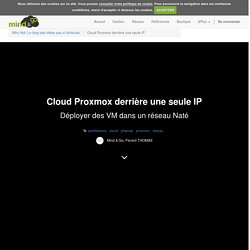
Pour cette dernère étape nous allons utiliser un peu de ligne de commande pour créer deux fichiers de conf qui seront exécutés au démarrage du réseau : # cd /vz/root # touch kvm-networking-down.sh kvm-networking.sh # chmod +x kvm-networking* Ensuite, référencez ces quelques lignes dans votre fichier de gestion du réseau Proxmox comme écrit ci contre. Occupons nous maintenant de remplir ces fichiers de conf. Dans cette séquence toute simple nous avons activé l'IP forwarding et ouvert les ports 80 et 443 (http et https) de sorte que tout le traffic soit redirigé vers le pfSense. Pour le second fichier, nous fermerons chacun des services ouverts. Voilà, il vous suffit désormais de redémarrer votre Proxmox et nous serons bons.