

TRONQUITOS IMANTADOS. Últimamente me ha dado una extraña fiebre por todos aquellos objetos para el hogar con forma de rama o tronco.
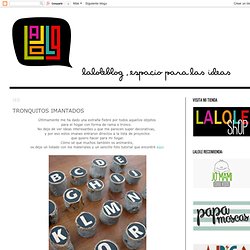
No dejo de ver ideas interesantes y que me parecen super decorativas, y por eso estos imanes entraron directos a la lista de proyectos que quiero hacer para mi hogar. Cómo sé que muchos también os animaréis, os dejo un listado con los materiales y un sencillo foto tutorial que encontré aquí. {last mintue christmas decorations} 3D paper star wreath tutorial. Revamping My Picture Wall! I am in the middle of “musical rooms” at my house with the new baby on the way which also involved moving the kids playroom.
I have spent the last few weeks building, revamping and painting this area. My latest project was changing up the old frame wall. I showed you guys how I fabric matted my old frames. This time around they will be getting a pop of color Fun! I am using the old frames from the wall and will also be adding a few new ones. Remove the glass and all the other goodies that come on the inside of the frame. I decided to use scrapbook paper for my backgrounds. I then used a craft knife to cut around the mat or glass of each frame. Then, I sprayed the glass with Elmer’s spray adhesive and stuck the paper down to it. Then, just put your glass back in the frame. Not So Idle Hands, Crafts from the Crafty. Magnetic bottle caps. Christmas CD's. Don't forget my Pampered Chef and Heritage Makers Black Friday Sales.
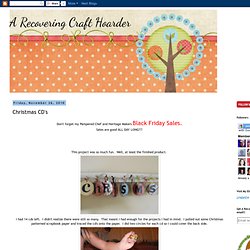
Sales are good ALL DAY LONG!!! This project was so much fun. Well, at least the finished product. I had 14 cds left. I didn't realize there were still so many. Odds and ends: pretty jars. I'll admit it, I judge books by their covers.
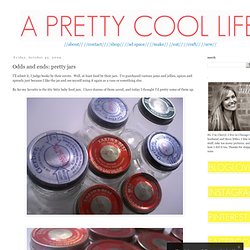
Well, at least food by their jars. I've purchased various jams and jellies, spices and spreads just because I like the jar and see myself using it again as a vase or something else. By far my favorite is the itty bitty baby food jars. I have dozens of them saved, and today I thought I'd pretty some of them up. DIY Recycled CD Cover Frames.
Every little bit of plastic we recycle and reuse makes a difference, so here is a crafty little idea how you can make a difference, by reusing your CD boxes as photo frames.
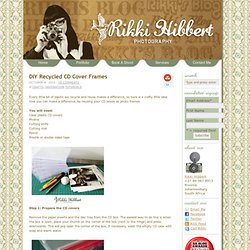
You will need: Clear plastic CD covers Photos Cutting knife Cutting mat Pencil Prestik or double sided tape Step 1: Prepare the CD covers. Recycle Reuse & Repurpose – Glass Jar Photo Frames. In South Africa, recycling is way of life that not very many people incorporate into their daily routine.
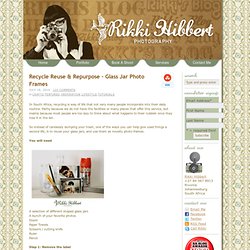
Partly because we do not have the facilities or many places that offer this service, but mainly because most people are too lazy to think about what happens to their rubbish once they toss it in the bin. So instead of carelessly dumping your trash, one of the ways you can help give used things a second life, is to reuse your glass jars, and use them as novelty photo frames. You will need A selection of different shaped glass jars A bunch of your favorite photos Doom Paper Towels Scissors / cutting knife Ruler Pencil Step 1: Remove the label.
The June Inspiration Wall. This wall of cheap clipboards from Wal-Mart has been one of my best late night ideas.
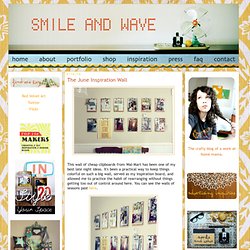
It's been a practical way to keep things colorful on such a big wall, served as my inspiration board, and allowed me to practice the habit of rearranging without things getting too out of control around here. You can see the walls of seasons past here. A lot of the images I put on my clipboards are from magazines I find at garage sales or catalogs I receive (Urban Outfitters, J. Crew, Anthropologie, etc.) and little bits of crafting left overs.
DIY / Hankie Holder - Martha Stewart Crafts. Home Office Storage Solutions. Love to the Mothers. DIY : Lace Jewelry Holder. The Write Start: Alpha Rocks. We made some alpha rocks at Camp Mom last week, an idea that has been floating around in my head since I saw this post last summer.
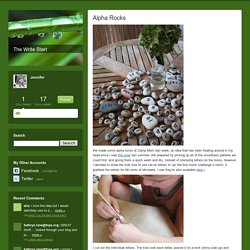
We prepared by picking up all of the smoothest pebbles we could find, and giving them a quick wash and dry. Instead of stamping letters on the rocks, however, I decided to show the kids how to use rub-on letters to 'up' the fine motor challenge a notch. (I grabbed the letters for 99 cents at Michaels; I see they're also available here.) I cut out the individual letters. The kids took each letter, placed it on a rock (shiny side up) and rubbed over the letter with a stick until it "magically" transferred on to the stone. After: Handmade Photo Frame. Jewelry Display Repurposed Painted by thevintagetreehouse. Wipe Off Weekly Menu Board. I am a meal planner.
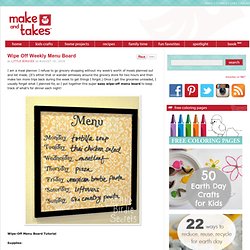
I refuse to go grocery shopping without my week’s worth of meals planned out and list made. (It’s either that or wander aimlessly around the grocery store for two hours and then make ten more trips back during the week to get things I forgot.) DIY Doily Lamp. Spring Scrapbook Paper Tree. Hello fellow crafters!
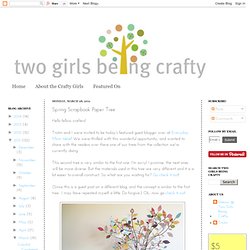
Tristin and I were invited to be today's featured guest blogger over at Everyday Mom Ideas! We were thrilled with this wonderful opportunity, and wanted to share with the readers over there one of our trees from the collection we're currently doing. This second tree is very similar to the first one. I'm sorry! I promise, the next ones will be more diverse. (Since this is a guest post on a different blog, and the concept is similar to the first tree.. Thanks, Julia, for having us on your blog!