
30 Quality Tutorials For Working With Textures In Photoshop. Textures can work wonders to any design, therefore its certainly worth knowing how you can utilize textures in Photoshop to enhance your designs.
It may be a print design or web design project textures can be used. In this blog post we searched the web to seek out some of the very best tutorials, which will educate you on how you can use Photoshop and textures together to produce great results. I hope you enjoy the roundup of some of the very best texture tutorials, and would love to hear your thoughts in the comments below. 1. 5 Awesome Techniques for Using Textures in Your Designs At some point in my design career I came to a realization that I can add incredible depth to my art by applying elements from the real world through scans and digital photos. 2. In this tutorial, you’ll learn how simple it is to texturize objects using different fusion mode layers, adjustment layers, color tweaks and some very simple filters in Photoshop. 3. 4. 5. 6. 7. 8. 9. 10. 11. 12. Master Photoshop masks and selections. Creating selections and masks in Photoshop is a fundamental part of any professional creative workflow.
Whether you're a junior designer, illustrator, animator, or even a creative director, at some point you will have to create a mask and cut something out in Photoshop - even if it's only because you're working late and the repro department has all gone home. There are many varied ways to create selections in Photoshop, ranging from the quick and easy techniques that we're all familiar with - such as using the Magic Wand tool to cut out objects from a high-contrast, flat background, or switching to the Pen tool for greater accuracy - through to more precise, time-consuming techniques that take a while to master.
In this workflow guide I'll walk through some more advanced, non-destructive ways of creating masks. 01. Non-destructive layer mask tricks Add a layer mask to any Photoshop layer, and click on the white linked thumbnail to edit it. Best Photoshop Tutorials. Photoshop is what makes the virtual world seem alive.

Its nothing less than a blessing for designers. The Internet is full of Photoshop Tutorials and you will find a tutorial on each and every tool. With that being said, we understand that these tutorials require time and effort to find so we’ve saved you both. How? Well, basically, we compiled a collection of easy to understand Photoshop tutorials that will aid you with just about every aspect of Photoshop and teach you the essentials of the software. Who knows, after going through these tutorials, you may end up being the next big thing in the world of Graphic Design. This article is divided in 14 Sections: Advertisement Tutorials for Beginners 5 Common Photoshop Myths Solved for Absolute Beginners In this post, author will provide 5 Simple, Yet Useful Photoshop “How-to”s for Absolute Beginners.
More Information on 5 Common Photoshop Myths Solved for Absolute Beginners. Top 10 Best Photoshop Tutorial Sites. While Adobe Photoshop is considered by most web designers the best and most versatile graphic editing tool, it comes with a steep learning curve and mastering it takes hours or practice.
Once you purchase the program, install it on your computer, and run it for a first time, you can get easily overwhelmed by its countless features, but by finding a great Photoshop tutorial site and reading and following some well-written tutorials, you will be on your way to learning some great new skills. We have taken the time to put together a list of 10 excellent Photoshop tutorial sites, which will help you master this powerful graphic editor and improve your image-editing techniques: Tutorial 9 The website is loaded with excellent design articles, showcases, and roundups, has a RSS feed to which you can subscribe, and allows its members to post useful links, vote, and comment on the tutorials as well.
Double Exposure Style in Photoshop. We've featured quite a few posts and images with the effect most call double exposure.
This technique consists of 2 images superimposed. There are some really nice examples with very intricate overlaying, usually with faces of people mixed with photos of nature. 10 Experimental Noise Textures. I've been meaning to make this texture pack for a while now and finally got around to it.
I know these won't be the most widely used textures, but there may be a couple of instances where they are just what you needed. I've noticed a lot more designs lately using random "noise and scratches", so I thought I would try and replicate that into some textures. Please let me know if you make anything great with them! Click on the textures below to download the high-res version or download them all in a zip file at the bottom of the post. Enjoy! Free High Resolution Textures - Lost and Taken. 80 All-You-Need Photoshop Brushes. Achieving a Vintage Look Through Color Tones in Photoshop CS.
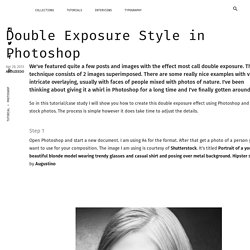
By Guest Contributor Anna Gay Photographers are often striving for a “vintage” look in their photos, and even though there are endless ways of achieving a vintage look, there are a couple of characteristics to keep in mind.

First of all, the color tones in a vintage photo often lean towards either a blue or a red hue, or a cross-processed look. Vintage photos also have an element of noise or grain that can be achieved through textures, and also a certain amount of vignetting around the edges of the photo. In this tutorial, we will look at adjusting color tones and adding vignettes. This photo is the result of adjusting the color curves, adding two vignettes, and a color fill, which we will walk through step-by-step. First, open your photo in Photoshop and make sure your foreground color is set to white in your side tool bar.
You will see the above dialogue box. As you can see here, there should be three layers – your Background image, then your two gradient layers.