
Photoshop Water Tutorial. Second Picture is devoted to original tutorials about 3D graphics, Photoshop, Photography and Web Design.
Water Tutorials Picture 1. Photoshop HDR. Second Picture is devoted to original tutorials about 3D graphics, Photoshop, Photography and Web Design.

HDR Photography Elsewhere 19.02.2008 Category: Photoshop Tutorials Picture 1. The final result of Photoshop HDR imaging. How to Create an Easy Dispersion Effect in Photoshop. Giving a subject a dispersion or splatter effect can create an incredibly dynamic image.

The best part is, it’s very quick and easy to do with a few Photoshop brushes, but the end result can look very complex as if it took you hours to create. In this tutorial, I’m going to walk you through 3 easy steps to create this dispersion effect. Here’s a look at what we’ll be creating. WeGraphics members will want to grab this brush set for the tutorial: Splatters Volume 2 For non-WeGraphics members a good free alternative can be found here: Splatters Brush Set Step 1 After a little bit of searching I found this photo of a guy jumping in the air by Camera Eye Photography.
Copy and paste the photo into a new PS document. Content Aware did a pretty good job of removing the guy from the background. How to enhance your subjects with striking light effects in Photoshop. In this Photoshop tutorial I’ll show you a simple technique that can be used to enhance any kind of subject with stunning light effects.
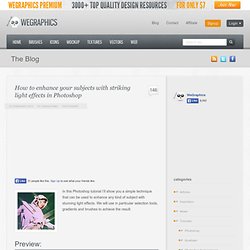
We will use in particular selection tools, gradients and brushes to achieve the result. Preview: Become a Premium Member and get unlimited access to source files and premium resources for only 7$/month.
Textures. Old paper picters. Text. Faces. Done. Pages with tutorials. Hexagon Bokeh Effect in Photoshop. In 2008 I came up with a technique using the Brush Tool in Photoshop to create a digital bokeh effect.
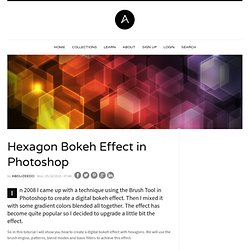
Then I mixed it with some gradient colors blended all together. The effect has become quite popular so I decided to upgrade a little bit the effect. Design a Grungy Floating Island. I’m back!

Sorry about the few days absense, but I’ve had zero internet access unfortunately for the past few days. Don’t worry though, I’m back with a new tutorial and have no plans of slowing down with the site. I hope that you enjoy the tutorial. How to Create Scotch Tape in Photoshop. Creating a Stunning Old-World Look in Photoshop. In this tutorial, we are going to create a sort of old-worldy composition featuring a compass and making use of some awesome vector artwork from Arsenal.

As always there is a PSD file at the bottom of the tutorial. In this instance, I would highly recommend downloading it as this is quite a complex composition. Be warned this is a LONG tutorial! Oh and in case you're wondering, inspiration comes from a really neat set of books, one of which is called the Golden Compass (actually they are making the book series a movie now!).
Assets. Learn How to Create Liquid Plastic Effectffect. Welcome to PhotoshopStar.com!

If you find this site useful, you might want to subscribe to our free newsletter for updates on our new Photoshop Tutorials and Articles. In this tutorial i will teach how you can create in a few steps the effect of liquid plastic on Photoshop. Final Image Preview Resources Mouse Photo Step 1. Create Light Leaks & Lomo Effects Using Actions in Photoshop. In this quick tip tutorial, we will explain how to create light leaks and lomo effects for you photos using actions in Photoshop.
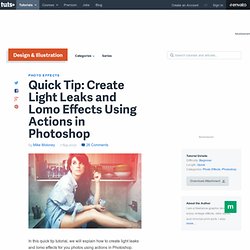
Let's get started! Tutorial Assets The following assets were used during the production of this tutorial. Step 1 Begin by opening your images and navigating to the Window Tab of Photoshop. Step 2. Perspective Correction In Photoshop - Repairing Keystoning. Written by Steve Patterson.
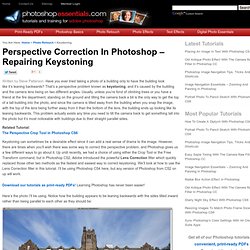
Have you ever tried taking a photo of a building only to have the building look like it’s leaning backwards? That’s a perspective problem known as keystoning, and it’s caused by the building and the camera lens being on two different angles. Usually, unless you’re fond of climbing trees or you have a friend at the fire department, standing on the ground and tilting the camera back a bit is the only way to get the top of a tall building into the photo, and since the camera is tilted away from the building when you snap the image, with the top of the lens being further away from it than the bottom of the lens, the building ends up looking like its leaning backwards.
This problem actually exists any time you need to tilt the camera back to get something tall into the photo but it’s most noticeable with buildings due to their straight parallel sides. Related Tutorial: The Perspective Crop Tool in Photoshop CS6. How to soften the skin without losing the texture in Photoshop – Two Methods » ideasplayer.com.
Method 1 In this Photoshop tutorial I will show you how to soften the skin while preserving the texture and other important details such as hair, eyebrows and eyelashes. Download the image used in this tutorial from here or use your own. Open your image in Photoshop and duplicate the background layer. First we are going to make some color corrections. I always use Adjustment Layers to make color corrections instead of working directly on the image. In this image I want to reduce the red and yellow tones so my first step is to add a Hue/Saturation adjustment layer with the following settings: Now add a Levels adjustment layer with the following settings: Next we will adjust the contrast and brighten the image.
Finally add a Photo Filter Adjustment layer with these settings: Create a Grunge & Textured Mixed Collage in Photoshop. Learn how to create a Grunge & Textured mixed media Collage in Adobe Photoshop. We’ll be using Brushes, Photographs, Textures, Patterns and using various methods & techniques to create this mixed media collage artwork. Final Result Resources. Transparent Glass Musical Shapes. Welcome to PhotoshopStar.com! If you find this site useful, you might want to subscribe to our free newsletter for updates on our new Photoshop Tutorials and Articles. This tutorial about how to create unusual transparent glass effect which you can use in your designs. Create a new document about 500 pixels width and 500 pixels high and fill it with any color, it doesn’t meter for now. Then apply Gradient Overlay layer style for this layer: After that I would like to add the picture of microphone which can radiate musical notes.
Press Ctrl+C to copy selected area, then go back to the main canvas and use Ctrl+V to bring copied part of image to here. Fantastic Glowing Effect. Welcome to PhotoshopStar.com! If you find this site useful, you might want to subscribe to our free newsletter for updates on our new Photoshop Tutorials and Articles. Here I’m going to show you one interesting fantastic glowing effect which you can use in your designs. In the beginning you should create a new document with size about 500×500 pixels and fill it with black color. Then find some appropriate picture of hand or other item you want.
You can search for some pictures on Google Images or can use mine. Then use Magic Wand Tool to divide palm from the white background. Remove selection with Ctrl+D and begin creating the effect.