
How to design a grunge styled portrait in Photoshop. Today we will learn a technique that can be used to create nice portraits with your grunge textures.

We will use many selection tools and masks to isolate objects. This is a tutorial for beginners who are approaching to an intermediate level. Preview of the result: Become a Premium Member and get unlimited access to source files and premium resources for only 7$/month. Click here to learn more. Support material: Step 1 Open the photo of the lady in Photoshop and go to Image>Image size. Step 2 With the Lasso tool select the head of the lady and add a layer mask (click on the “add layer mask button” at the bottom of the layer’s window). Step 3 Select the lady’s layer (not the mask) and go to Image>Adjustments>Threshold. Step 4 The aim of this step is to isolate black parts of the image. Step 5 In the Paths window click on the right arrow and select Make Work Path with tolerance 1,0. Step 6 Create a new layer and with a black brush start painting over the white parts in the hair of the lady.
How to Cheat with Visualization in Photoshop. Have you ever seen any fruits or vegetables with a face?

In this Photoshop tutorial I’m going to show you how to make a realistic view collage with fruit and a human face. Final Image Preview Note: Original tutorial published on Photoshopstar.com some years ago. Tutorial was updated and now republished. Resources Step 1 Open up the photo and reduce the size to 800 x 600 by using Image > Image Size. Step 2 Open the picture and copy it to the first canvas with fruit. Set the opacity to 100% for current layer again and begin cleaning with the Eraser Tool. Move the layer with the face a little bit to the left by using the Move Tool. Step 3 Press Ctrl+J to duplicate the layer and hide the upper copy (click on the eye, which indicates layer visibility).
After that use Image > Adjustments > Hue/Saturation: Select Burn Tool (Brush: 70px, Range: Midtones, Exposure: 30%) to make some very light parts a bit darker. Step 4 Go back to the hidden layer and make it visible again. Step 5 Looks good, doesn’t it? Realistic View Tears on Face. Welcome to PhotoshopStar.com!
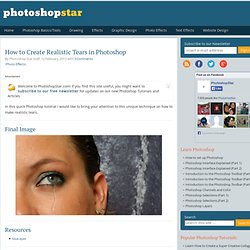
If you find this site useful, you might want to subscribe to our free newsletter for updates on our new Photoshop Tutorials and Articles. In this quick Photoshop tutorial I would like to bring your attention to this unique technique on how to make realistic tears. Final Image Resources blue eyes Step 1 Open up the picture and reduce the size to 600 x 328 pixels with Image > Image Size. Step 2 Change the layer mode to Screen for the current layer and go to Layer > Layer Style > Blending Options.
Step 3 Looks good, but not so realistic right now. Step 4 Apply the Blur Tool to the current layer. We end up with a nice, realistic tear. How to Create a Grunge Style Illustration with Stains. Inspired by the article "18+ Sources of Inspiration from Coffee, Ink, Blood and other Stains," by Steven Snell, I decided to show my personal way of creating stain based designs in Photoshop.

In this tutorial, we'll grab a picture, apply several filters to it and obtain a monochromatic stain, which combined with stain brushes and a texture will transform into an eye-catching grunge result. Let's get it started! Final Image Preview Before we get started, let's take a look at the image we'll be creating. Click the screenshot below to view the full-size image. Video Tutorial Our video editor Gavin Steele has created this video tutorial to compliment this text + image tutorial. Step 1 It's time to get dirty. Step 2 Now, convert the image to black and white adding a Channel Mixer Adjustment Layer, for the Preset choose Black & White with Blue Filter (RGB). Step 3 Use the Burn Tool darken the lips, eyelids, eyebrows and hair of the "Girl" layer.