
How to make a photograph Lomographic in GIMP. Lomography is most commonly recognised in old film photographs and is used aesthetically in photographs.

I will show you a quick process to achieve this ‘Lomo’ effect in GIMP! The Olgas, Kata Tjuta - Lomo Effect 1. Starting Choose your image and open it in GIMPNow go, Colors –> Curves - This is the basis of the Lomo-Effect, these adjustments will change the colours:You click on the Channel tab to change between channelsDo ‘S’ curves on all, except the Blue Channel:Value/RGB Channel – ‘S‘ Curve, as shown: Value/RGB Channel 'S' Curve (Click to view larger) RED Channel – ‘S‘ Curve, as shown: RED Channel - 'S' Curve GREEN Channel – ‘S‘ Curve, as shown: GREEN Channel - 'S' Curve BLUE Channel – Opposite ‘S’ Curve, as shown: BLUE Channel - Opposite Curve, as shown 2. Duplicate your layer:Go, Colors –> Map –> Gradient Map (Make sure your Colours are Black and White – Default)Then, set that layer to Overlay at 50% Opacity, as shown: Duplicate Layer - Gradient Map (B&W) - Overlay 3.
That’s It! Written by Mike. The hand. The hands are a notorious source of frustration. This section won't concentrate on the muscle structure, since the hand is very complex in this regard, and knowing this won't help much in drawing them. Instead, we'll look at proportions, range of motion, and possible simplifications.
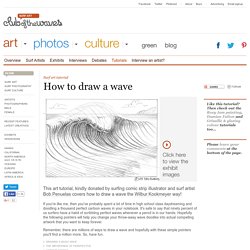
Structure and proportions Figure 2.20. Bone structure and proportions of the hand There is a very easy and surprisingly accurate way to remember the proportions of an adult's hand. The palm of the hand houses the metacarpal bones. The palm of the hand can be simplified to a box. Figure 2.21. Notice that the box does not line up with the contour of the fingers. The two black arrows in the previous figure show how the little finger can move up and down. Figure 2.22. Take a look at some examples of how to use this model: Figure 2.23. The first one is a relaxed pose. This is certainly not the only way to draw a hand. Tutorials. How To Draw A Wave. This art tutorial, kindly donated by surfing comic strip illustrator and surf artist Bob Penuelas covers how to draw a wave the Wilbur Kookmeyer way!

If you're like me, then you've probably spent a lot of time in high school class daydreaming and doodling a thousand perfect cartoon waves in your notebook. It's safe to say that ninety percent of us surfers have a habit of scribbling perfect waves whenever a pencil is in our hands. Hopefully the following pointers will help you change your throw-away wave doodles into actual compelling artwork that you want to keep forever. Remember, there are millions of ways to draw a wave and hopefully with these simple pointers you'll find a million more. So, have fun. Drawing a basic wave The following illustrations and captions by Bob Penuelas take you through the basic steps of drawing a wave… Step 1 Sketch in the basic shape of the curl, spray, foam and base of the wave. Step 2 Step 3 Step 4 Add the rest of the flow lines.
Step 5 Step 6 Tips… Paddler's view. Art 1. Optical Design. Realistic gemstone tutorial - Paint Tool SAI by *longestdistance.