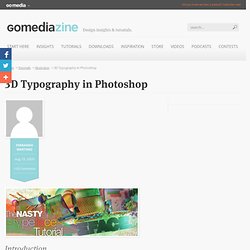

3D Typography Tutorial in Photoshop & Illustrator. Introduction In this tutorial we are going to go over various techniques you may have seen before, as well as a bulk of techniques that may be new to you.

After you have completed this intense walk though, I assure you will be able to explore even more new ways of creating typefaces as well as other types of ideas. Inspired by the work of Nelson Balaban as well as my own, I decided to re-create an old piece of mine using the techniques I am about to show. The completion of this effect will probably take around 8 hours collectively; however, once learned, the process shall be pretty easy and fast to replicate.
Even though it is extensive, nevertheless it will be very fun and insightful. Lets Get Started We shall start out by choosing a typeface that appeals to us the most. The typeface I have chosen for the image above (MOD) can be found here.This font is created by a great typographer named Svetoslav Simov. Step 1 – Setup Alrighty then. Step 2 – Extrusion Step 3 – Expansion. How to Create Explosive Typographic Effects in Cinema 4D Graphic design tutorials, freebies, & advice by working artists and designers. In this tutorial I will walk through the steps I used to create this illustration to bring alive the word “collide.” While you may not find yourself needing to recreate the word “collide,” I hope you will find useful the techniques I will cover: - extruding text in Cinema 4d - using displacement maps in Cinema 4d - using the explosion deformer in Cinema 4d - exporting to photoshop from Cinema 4d - unique color enhancing techniques in Photoshop - various layer modes applied in Photoshop for great light effects (A basic knowledge of Cinema 4d and Photoshop is required) STEP 1: Creating 3d text I created a new document in C4d and added some text with the built in text tool.
I typed the word COLLIDE in the Attributes manager. I applied Extrude Nurbs by making it a parent of my text. Parent/child relationship shown above in my Objects Manager. There’s a small problem at this point: The word “collide” is treated as one object and I want to manipulate the individual letters. Create a Trendy Typographic Poster Design.
This post was originally published in 2008 The tips and techniques explained may be outdated.

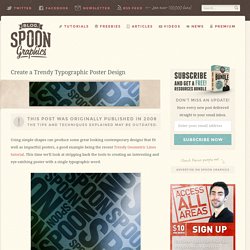
Using simple shapes can produce some great looking contemporary designs that fit well as impactful posters, a good example being the recent Trendy Geometric Lines tutorial. This time we'll look at stripping back the tools to creating an interesting and eye-catching poster with a single typographic word. Find a random image to base the design on, the subject of the photo isn't at all important, just choose a picture with varied contrast and preferably tailored towards your chosen colour scheme. In this case I've picked out a landscape scene with a mix of blues and greens. Open up the image in Adobe Photoshop and resize accordingly. Go to Filter > Blur > Gaussian Blur, drag the slider almost all the way to the maximum to completely disguise the original subject and blend together the colours and tones. Head over to the fantastic Bittbox.com and download one of the free high-res textures. Hell of Tutorial in Photoshop.
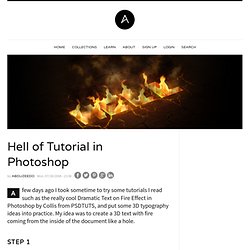
A few days ago I took sometime to try some tutorials I read such as the really cool Dramatic Text on Fire Effect in Photoshop by Collis from PSDTUTS, and put some 3D typography ideas into practice.

My idea was to create a 3D text with fire coming from the inside of the document like a hole. Step 1 The first thing you will have to do is create the 3D text. To do that you can use Illustrator. It has a very nice 3D filter and it will work just fine. Type the text you want and go to Effect>3D>Extrude & Bevel. Step 2 Now you will have to expand the 3D effect in order to select and change the color of the faces you want. Step 3 - Photoshop Create a new document in Photoshop and fill the background with Black. Step 4 With the Magic Wand Tool (W) select the black faces and delete them. Step 5. 3D Text Shatter Effect Tutorial. I’m going to show you how to make a 3D text shatter effect.

This effect is made in two programs, Cinema 4D and Photoshop.If you haven’t heard of Cinema 4D before it is a relatively easy to use 3d application, it is quite similar to 3dsMax or Maya. I will go pretty in depth with the Cinema 4D part, for all the inexperienced users, so bare with me if I go too slow. Now enough chit chat, let’s jump in. Required Resources. 3D Typography Tutorial in Photoshop & Illustrator. Gisela-Silver Prom Dresses. ...and we’ll give you a gift!

No thanks, I'm just here to shop Featured Picks For You... © 2014 Windsor, Inc. All rights reserved. Use of this website constitutes acceptance of the Windsor Privacy Policy. California Law:This business may sell products with chemicals known to the state of California to cause cancer, birth defects, or other reproductive harm.