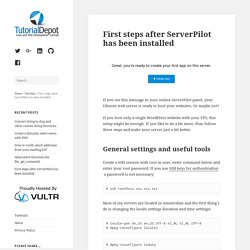

If you see this message in your online ServerPilot panel, your Ubuntu web server is ready to host your websites.

Or maybe not? If you host only a single WordPress website with your VPS, this setup might be enough. If you like to do a bit more, than follow these steps and make your server just a bit better. General settings and useful tools Create a SSH session with root as user, enter command below and enter your root password. . # ssh root@xxx.xxx.xxx.xxx Most of my servers are located in Amsterdam and the first thing I do is changing the locale settings (location and time settings) # locale-gen en_US en_US.UTF-8 nl_NL nl_NL.UTF-8 # dpkg-reconfigure locales # dpkg-reconfigure tzdata After this you need to choose your location to get the right time zone. Current default time zone: 'Europe/Amsterdam' Local time is now: Thu May 21 22:10:00 CEST 2015.
Optional for Vultr servers I have a mix of servers from DigitalOcean and from Vultr. . # hostname -F /etc/hostname MySQL and phpMyAdmin # automysqlbackup. Nginx as reverse proxy with cache for all domains on other virtual machine. I want to explore the world of Nginx Reverse Proxying with caching.

As I’m doing so I’ll log my findings in this blogpost. I am using a Ubuntu 12.10 OpenVZ template which installs pretty fast. In this example it will be available to us on 192.168.1.100 and our apache server with multiple virtual hosts will be available on 192.168.1.200. Nginx installation If at this moment we visit the server on with a web-browser it shows us: “It works!” Of course this is incorrect so we want to stop the apache service and activate the nginx service. If at this moment we visit the server on with a web-browser it shows us: “Welcome to nginx!” So far so good, easy peasy, but what happens if we restart the machine? It will most definitely show us the default apache server page. Mettez un turbo dans votre serveur web avec NginX. Le serveur web Apache reste le serveur d’application http de premier choix pour le PHP5, du fait de sa grande fiabilité, de son ancienneté, et de ses performances éprouvées y compris pour des fortes charges sur des serveurs de production en environnement distribué.
Sa grande sophistication et la complexité de certaines configurations utilisant de nombreux modules optionnels en font en revanche un grand consommateur de mémoire RAM, ce qui est moins problématique qu’auparavant sur des serveurs modernes. Il reste qu’Apache en solo n’est désormais plus la meilleure solution pour des sites web pour lesquels les performances ultimes sont recherchées. Je vous propose ici une architecture combinant Apache, eAccelerator et NginX sur un même serveur dédié qui apporte un excellent rapport performances/simplicité de maintenance et d’installation.
NginX, le serveur venu de l’Est Est-il encore besoin de présenter NginX, le serveur “léger et rapide” développé par le russe Igor Sysoev ? Location ~* \. Configurer un serveur web dédié OVH/Kimsufi sous Debian 6. En septembre 2009, j’avais écrit un tutoriel détaillé sur la configuration d’un serveur dédié OVH qui a remporté un grand succès.

Aujourd’hui, il est temps de remettre à jour ce guide alors que la version 6 de Debian (intitulée “Squeeze“) est disponible en version stable depuis quelques mois. En gardant la procédure initiale comme référence, je présente ci-dessous une version adaptée à une configuration sous Debian 6/64 bits. Il s’agit au départ d’un memento qui me sert à “remonter” rapidement une configuration opérationnelle sous Debian 6 / Apache2 / PHP5 / Mysql pour héberger des sites sur un serveur dédié GNU/Linux type OVH ou Kimsufi.
Cette configuration, qui inclut également eAccelerator et des outils de supervision et d’administration de base (Munin, phpsysinfo, mytop, PhpmyAdmin, AWStats) est opérationnelle et suffisamment sécurisée pour une installation standard (à condition de faire régulièrement toutes les mises à jour des packages). Guide: WordPress with Maximum Performance and Speed. This is a step by step guide in which I will show you how to setup WordPress with maximum speed and performance for just $15 per month utilizing Nginx + PHP-FPM + APC + Cloudflare + Redis.

It is the same that this blog is using and I will show you how. No need for any caching plugins! WPengine.com will charge you $249 per month for something similar but I am 100% certain my unique solution will outperform them any time of the day. Summary Instead of Apache we will use Nginx which is way, way more faster. Out of the box settings This guide does not contain any firewall settings, security or any change of settings. Step 1: Get a good VPS Get a good VPS and choose Debian 6, 32 bit. After quite some research I went for 6syns, order here and the nano package for $15/month should be ok.
Download Putty and connect to your server. Step 2: Installation of Software.