How to Make a Drop Shadow in Illustrator CS6/CC. Adobe Illustrator - Apprendre à dessiner (1/8) - La plume. How to make hair? / Comment coloriser les cheveux? Create a Painted Portrait Effect in Illustrator Using the Bristle Brush. In the past, when I wanted to create a paint-like effect, I always opened Photoshop and relied on the trusty old bitmap graphic.

That is, until I discovered the Bristle Brush in Illustrator. The Bristle Brush (which is actually a set of brushes) allows you to paint with layers of vector strokes that apply different shades and transparencies to the stroke. The result is a beautiful and realistic looking paint stroke that is 100% vector. In this tutorial, I’m going to show you how to use the Bristle Brush to create a painting similar to the one I created below. Step 1 – Tracing the Original Image First up, find a good portrait photo. I copied and pasted the image onto a new art board in Illustrator. Then I clicked (Object | Live Trace | Tracing Options). Once you’ve got your trace, click (Object | Expand) to convert the trace to an editable object, and reduce the color to 20% black. Very Important: You need to repeat the above steps 3 times. Step 2 – Painting the Traces Related Posts. How to Create a Geometric, WPAP Vector Portrait in Adobe Illustrator. How to Create a Self-Portrait in a Geometric Style.
In this tutorial we’re going to talk about how to create an illustrated self-portrait in a geometric style.
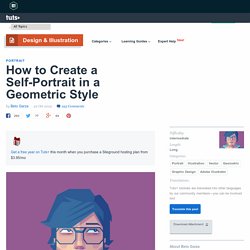
We’ll be using a photograph of ourselves as the base of the illustration, drawing a sketch from that, and then creating the final piece. Let’s get started! Since posting this tutorial, readers have been inspired to create their own self portraits in this style. Check out what they’ve achieved over on a special edition of Tuts+ Workshop: Created by You. First, we take or select a photo. Now, create a New Document (cmd+N or ctrl+N) in Adobe Illustrator with an artboard size of 600 x 480px. We are going to organize the layers as follows: The top layer is named “Draw”. Lock the "Background" and "Photo" layers.
Now you can delete the "Photo" layer. Change the Opacity of the sketch to 30% and lock the "Sketch" layer. Now, start drawing from back to front using the Pen Tool (P). For the t-shirt, just draw one half of it, then Copy (Cmd + C) and Paste in front (Cmd + F). How To Create Geometric Low Poly Art The Easy Way. I’m sure we’ve all drooled over those awesome low poly art images and wondered how on earth they are made.
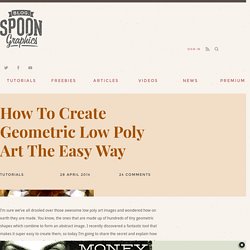
You know, the ones that are made up of hundreds of tiny geometric shapes which combine to form an abstract image. I recently discovered a fantastic tool that makes it super easy to create them, so today I’m going to share the secret and explain how you can create your own low-poly geometric artwork using this magical app with some help from Illustrator and Photoshop. Here’s the style of artwork we’ll be creating in this tutorial. It’s a detailed image made up of hundreds of tiny geometric shapes which give the art that popular low-poly effect. The finished product gives the impression that the process is really complicated, but it’s actually super easy thanks to a free little program called I ♥ ∆. I’ll be using a photograph of a tiger from Shutterstock as the base for my artwork, but there’s some little tweaks that are required to make the photo completely symmetrical.