
Muhammad Hafiz
Follow Me at Twitter:@HafizCCahabat Add and Follow at Yahoo!Koprol:muhammadhafiz YM:mhafiz61@ymail.com mhafiz97_mylife@yahoo.co.id MySpace:muhammad(MuhammadHafiz) Website Tumbler:muhammdhafiz97.tumbler.com Hotmail:muhammadhafiz38@windowslive.com pintar,baek hati,kadang kadang cuek, NXM(Nexian Messenger):28951887
Heppiii news - gantung diri. Foursquare. Kennedy Fried Chicken. Visual Thinking. Tutorials/Templates. Architecture & Design. Sew. Circle Skirt From An Old Sheet. Sew. Sew. Make your own 6-pocket mini pocketbook and stay organized — insatiable need. I’m sure that many of you, like me, are on an eternal quest for organization.

I know I’m not alone in finding the Container Store’s promise of a perfect, organized life utterly seductive. But here’s the thing…I don’t really like purging, I love my stuff. Therefore I also love pretty things in which to stash my stuff, so I get to enjoy my fantasy of being organized and contained. This tutorial is about helping you stay organized, in a quick, easy, and super-cute way. It is a distilled version of the Holland Cox pocketbook, and is a breeze to make. The pattern …is only four rectangles. The body is 7.25″ tall.the large pocket is 5.5″ tallthe medium pocket is 4.25″ tallthe small pocket is 3″ tall materials needed I chose a vintage cotton canvas for the body in a bright retro floral, and quilting weight cotton in a matching color for the interior.
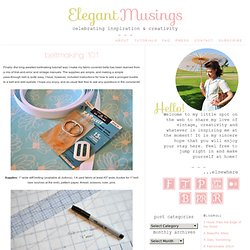
You’ll also need a button and a bit of elastic for the closure, and a bit of ribbon for the pen. Start with the pockets 1. 2. The closure 3. 4. 6. Beltmaking 101. Finally–the long-awaited beltmaking tutorial!

Way I make my fabric-covered belts has been learned from a mix of trial-and-error and vintage manuals. The supplies are simple, and making a simple pass-through belt is quite easy. I have, however, included instructions for how to add a pronged buckle to a belt and add eyelets. I hope you enjoy, and as usual feel free to ask any questions in the comments!
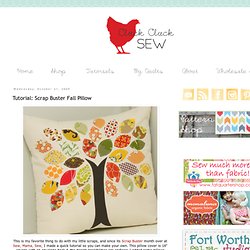
Supplies: 1″ wide stiff belting (available at JoAnns), 1/4 yard fabric at least 45″ wide, buckle for 1″ belt (see sources at the end), pattern paper, thread, scissors, ruler, pins. Begin by measuring your waist and adding 6″ to 8″ inches to the length (I tend to err on the side of more, especially for a belt using a pronged buckle). Cut the belting the length of your waist plus the extra. Using the paper pattern, cut one layer of your fabric. Fold the fabric around the belting, wrong sides out. Gently work the seam to the center of the belting width, and press seam open. Tutorial: Scrap Buster Fall Pillow. This is my favorite thing to do with my little scraps, and since its Scrap Buster month over at Sew, Mama, Sew, I made a quick tutorial so you can make your own.

This pillow cover is 16" square with an envelope back & the design possibilities are endless! I added some pillows I’ve previously made with this same method at the end of this post. Happy Sewing! You’ll Need: Web tools/APIs 2. Travel Sites. Photography. House Related. DIY. Useful Stuff. The Mind and other Dangerous Things. Technology. Awesome. eBooks. Discover Music. Musics. Environment. Energy Tech - Environment. Tech. √AppsTwıtter. Online Search Tools. The Mind and other Dangerous Things. Dotcom bubble 2.0 - 2011, the next dotcom bust?
USA. Music. Carlos.
U.S. History. Help. Google.