

3-Minute Makeovers. Easy ways to enhance your photos eZine image: As a professional photographer and mother of three, I snap thousands of photos every month, and I want those photos to look great, whether they end up on a wall or in a scrapbook.

The first step to a great photo is capturing a meaningful moment, and my new eBook, 40 Top Tips for Better Photos, Adding background textures. This tutorial was featured over at Ucreate a few months back and I thought I'd share it here with all of you today!

The photos I took here, and here were all edited using this technique. Customize Picture Package Layouts in Photoshop CS. In previous versions of Photoshop, you had to go through a somewhat non-intuitive process if you wanted to customize the default layouts in the picture package feature.
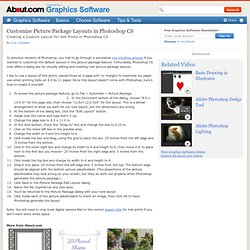
Fortunately, Photoshop CS now offers a dialog box for visually editing and creating new picture package layouts. I like to use a layout of 4x6 prints, placed three on a page with no margins to maximize my paper use when printing 4x6s on 8.5 by 11 paper. Focus With Light - Photoshop Effect. Written by Steve Patterson.
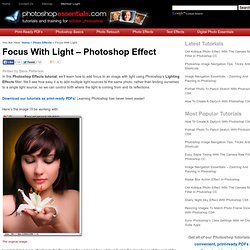
In this Photoshop Effects tutorial, we’ll learn how to add focus to an image with light using Photoshop’s Lighting Effects filter. We’ll see how easy it is to add multiple light sources to the same photo, rather than limiting ourselves to a single light source, so we can control both where the light is coming from and its reflections. Here’s the image I’ll be working with: The original image.
I want to bring more attention to the flower and the woman’s face while reducing the importance of the rest of the image. The final lighting effect. Fantasy Look to your Picture - Stunning Mesh Easy Soft Focus And Glow Effect In Photoshop. Written by Steve Patterson.
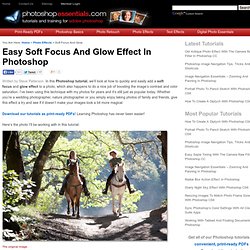
In this Photoshop tutorial, we’ll look at how to quickly and easily add a soft focus and glow effect to a photo, which also happens to do a nice job of boosting the image’s contrast and color saturation. I’ve been using this technique with my photos for years and it’s still just as popular today. Whether you’re a wedding photographer, nature photographer or you simply enjoy taking photos of family and friends, give this effect a try and see if it doesn’t make your images look a bit more magical.
Here’s the photo I’ll be working with in this tutorial: The original image. Tutorial - How to Design Feathered Edges in Photoshop. This tutorial will explain how to create soft edges on an image in Photoshop so it will blend into the background.

We will be using a photo of a 72 Chevrolet Nova and giving it a black background as shown below. 1. Copy the original image: Copy the image so you still have the original, and work from the copy. 2. Before cropping the image leave enough background so you can feather the edges. 3. Blot out areas in the background that will distract from the quality of the image with the rubber stamp or smudge tool. 4. Use one of the selection tools to highlight the area you want to feather. 5. In order to highlight your border evenly on all edges turn on the ruler and measure the same amount in the numbered guide on both width and height.
The image of the Nova with the border selected: 6. You will be copying the image and pasting it onto another background but first you need to set the background color of the new image. Blog Archive » Convert a Day Time Photograph into night time. This tutorial will teach you how to convert a Day Time Photograph into a night time photograph in a very simple way.

Step 1: Open any High Quality Photograph in Photoshop. Step 2: Now we will make a Duplicate of this layer so that if any step goes wrong then we can restart the whole process without any problem. Pages: 1 2. Create A Starry Night Sky In Photoshop. Written by Steve Patterson.
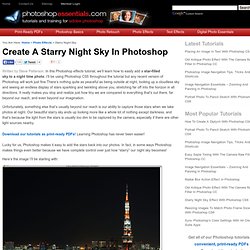
In this Photoshop effects tutorial, we’ll learn how to easily add a star-filled sky to a night time photo. I’ll be using Photoshop CS5 throughout the tutorial but any recent version of Photoshop will work just fine.There’s nothing quite as peaceful as being outside at night, looking up a cloudless sky and seeing an endless display of stars sparkling and twinkling above you, stretching far off into the horizon in all directions.
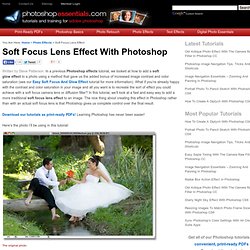
It really makes you stop and realize just how tiny we are compared to everything that’s out there, far beyond our reach, and even beyond our imagination. Unfortunately, something else that’s usually beyond our reach is our ability to capture those stars when we take photos at night. Our beautiful starry sky ends up looking more like a whole lot of nothing except darkness, and that’s because the light from the stars is usually too dim to be captured by the camera, especially if there are other light sources nearby. The final result. No? Soft Focus Lens Effect. Written by Steve Patterson.
Misunderstood Photoshop: Clipping Masks. The Photoshop clipping mask feature is a quick way to create effects such as text filled with a photograph.
Helen Bradley points out more handy uses for clipping masks, such as limiting the effect of adjustment layers, or simplifying the process of editing a portion of an image. You can follow along with the accompanying video tutorial to see exactly how it's done. In this series, Helen Bradley discusses some handy Photoshop tools that are often overlooked or misunderstood, either because they’re hidden away or because their use isn’t immediately apparent. Yet these tools provide smart and useful ways to perform various tasks in Photoshop, so they’re worthy of adding to your Photoshop skill list. In the third article in the series, we consider the clipping mask feature, which is often incorrectly referred to as "clipping paths" and sometimes called a "clipping group.
" How to Correct Green Color Cast in Photoshop {Before & After Photo Editing Tutorial} We are happy to welcome Kara Wahlgren, owner of Kiwi Photography in South Jersey as our featured photographer in this week’s “Before & After” photo editing tutorial. Follow along as she demonstrates how to correct a green color cast in Photoshop. “Before” Photo The image above was taken at one of my favorite locations. The rich, green foliage makes a perfect backdrop—but it also creates a green color cast.