
Color to Black and White in PhotoShop. Digital post-process manipulation is a great way to fix any problems with the actual picture as well as to improve an already existing shot.

Color can be changed within seconds, as opposed to minutes and hours in a conventional darkroom. I found digital manipulation to be a great way to learn the basics of color and contrast as well as saturation. Digital was perfect in my eyes until they were opened to the lack of black and white options. I was not happy with shooting black and white from my digital camera by turning it to grayscale mode.
This worked but then left me stuck. The Wrong Way I started to create black and white by going to image>adjustments>desaturate. The Solution After a little more searching I discovered that each Red, Green, and Blue channel created a grayscale image when isolated and each image portrayed the color differently. Here's how I do it. Getting An Idea. Areas of Color in Black and White Photos. This tutorial is to help you learn how to make certain spots color after you have converted a color photo to black and white.

Ok after you have the picture that you want to work on open in photoshop: 1. How To Add Color To Black and White Photos in Photoshop. NOTE: If the following tutorial feels overwhelming, or you’re just not interested in learning the software and would rather pay a professional, there ARE other options.

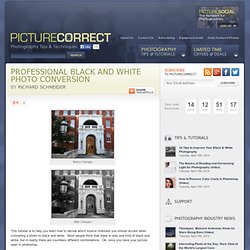
Head over to ColorAPhoto.com to find out more. For everybody else, here’s how to color your photographs yourself: One of Adobe Photoshop’s best features is the ability it gives you to colorize black and white photographs. With Photoshop you can add color to the entire photo, or just “paint” one part of the image to create a focal point—it’s up to you. Sound interesting? Professional Black and White Photo Conversion. Before Changes After Changes This tutorial is to help you learn how to decide which source channels you should accent when converting a photo to black and white.

Most people think that there is only one kind of black and white, but in reality there are countless different combinations. Ok, once you have your picture open in photoshop: 1. 2. 3. 4. 5. 6. For different photos, the best looking combinations will almost always be different. For Further Black & White Post-Processing Power: Many consider this program (which also works as a plugin for Photoshop & Lightroom) to be the most versatile conversion tool for B&W enhancement: Topaz Black & White Effects. How To Color Old Black and White Photos. Digital black and white photography. Black and White image manipulation tools and techniques Topaz B&W Effects A review of the B&W Effects plugin from Topaz Labs.

Conversion of colour images to a range of black and white styles. Includes ability to fine tune and mask adjustments [November 2013] Taming contrast enhancement halos with Silver Efex Pro - Although Nik Silver Efex Pro 2 is a great tool for creating black and white images, it's quite easy to generate halos and other artefacts around objects. Keith looks at how multiple applications of the plugin can help. Nik Silver Efex Pro V2 Review of the latest specialist black and white conversion plugin from Nik Software. Nik HDR Efex pro Review of Nik's HDR image processing software. Using the 7D at night A short article written as part of Keith's testing of the Canon 7D.
Mono, with a Dash of Colour – Photoshop CS2 Tutorial. Photoshop Tutorial: Adding Color To Black And White Photo. Adobe Photoshop CS5 Tutorial: Adding Selective Colour To A Monochrome Photo. Skin Retouching in Photoshop. This tutorial will help you learn how to speed up skin retouching and polish photos in Photoshop using basic techniques.

Original Photo Step 1 Duplicate the background image and rename it to Layer 1. Step 2 Go to Filter > Other > High Pass and set the Radius to around 4.5 pixels. Step 3 Change the Blending Options for Layer 1 from Normal to Soft Light and uncheck the eye to make Layer 1 invisible for the next step. Step 4 Duplicate the background image again and rename it to Layer 2. Step 5 As you’ll see the image will be just slightly blurred and smoothen out but not the edges. Step 6 Flatten Image and use the Clone Stamp Tool mixed with a Soft Brush with the Flow set to around 30% to manually select areas next to one another, blend it in as much as you can using this tool to make further improvements to the skin. Step 7 This step here is to quickly balance out the whole lot, to do that we need that extra bit of shadow to be added to the overall image.
Final Result. Tutorial - Black + White + Color. 5 Black and White Photography Tips. A Post By: Darren Rowse Continuing the Black and White Photography theme we’ve been on lately in the latest forum assignment (where the photos featured in this post were submitted) I thought I’d share five pretty random Black and White Photography Tips. 1.

Shoot in RAW I know many readers of DPS can’t shoot in RAW (because their camera doesn’t offer it) or don’t shoot in RAW (because they either don’t know how or don’t like to) but for the most control in the post production phase of converting your color images into black and white ones – you’ll want to shoot in RAW if your camera does allow it.
Of course shooting in JPEG doesn’t stop you shooting in black and white – but if it’s an option, give RAW a go, you might be surprised by what it offers you in post production. Adding Color Accents to a Black and White Photo.