
428 Gift Patterns For Sewing Addicts : I posted this list of sewing links a few weeks ago.
Today, I’m reposting it, for anyone who might have missed it the first time around! It’s time to start creating handcrafted gifts for the holidays. With that in mind, here are 428 Gift Patterns from Craft Stew. Included here are all your favorite sewing patterns from past posts….. anything that is appropriate for gift giving. I skipped most of previous posts on clothes patterns, as they would require multiple fittings. 428 Gift Patterns Free Tote Bag Patterns – Favorite? Home Sewing Projects – Favorite? Free Hat Patterns – Favorite? Free Fleece Hat Patterns – Favorite? The basic messenger bag. Jamie's on the left, Chelsea's on the right.
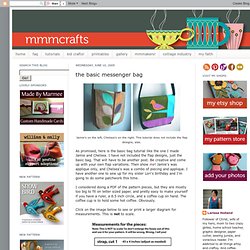
This tutorial does not include the flap designs, alas. As promised, here is the basic bag tutorial like the one I made Jamie and Chelsea. I have not included the flap designs, just the basic bag. That will have to be another post. Be creative and come up with your own flap variations. I considered doing a PDF of the pattern pieces, but they are mostly too big to fit on letter sized paper, and pretty easy to make yourself if you have a ruler, a 6.5 inch circle, and a coffee cup on hand. Click on the image below to see or print a larger diagram for measurements.
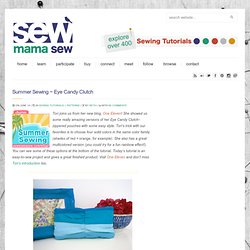
YARDAGE: Assuming the width is 45 inches, you'll need about a yard each of the outside and the liner, plus your interfacing if you are using it. THE FINISHED BAG DIMENSIONS, EXCLUDING THE STRAP: about 12 inches x 12 inches x 3 inches wide at the bottom. 1/4 INCH SEAM ALLOWANCE IS INCLUDED IN THE MEASUREMENTS. Draw and cut out all your paper pattern pieces. 2) Outside Pocket. Eye Candy Clutch.
Tori joins us from her new blog, One Eleven!
She showed us some really amazing versions of her Eye Candy Clutch– zippered pouches with some easy style. Tori’s trick with our favorites is to choose four solid colors in the same color family (shades of red + orange, for example). She also has a great multicolored version (you could try for a fun rainbow effect!). You can see some of these options at the bottom of the tutorial. Today’s tutorial is an easy-to-sew project and gives a great finished product. You Will Need: 7” ZipperZipper Foot2 – 8 ½ “ X 4 ½ “ Pieces of fabric for your lining2 – 8 ½” X 4 ½” Pieces of fusible lightweight Interfacing4 different colors of fabric– From those colors cut two of each 11” X 2 ¼” strips (giving you a total of 8 strips of fabric Assemble The Panels 1. 2. 3. 4. Media.colettepatterns.com/free/patterns/colette-patterns-0001-bloomers.pdf. Perfect Box Pouch Tutorial « Make it Modern.
How insanely fabulous is this pouch?

I can’t decide if I love it so much because a) it is made from glittery elephant fabric, b) of it’s small but perfectly proportioned size, c) it holds my on the go quilting supplies or d) all of the above. If you’d like to make your own see how below. You will need: 2 pieces of exterior fabric measuring 8 inches by 6 inches. (The longer side will be the top of your pouch, keep this in mind when cutting directional fabric)2 pieces of interior fabric measuring 8 inches by 6 inches2 pieces of mid-weight woven non-fusible interfacing (This helps add body to your bag, because without it it wouldn’t be very “boxy””1 12 inch zipperCoordinating thread (this will be visible on the outside of the bag) Things that will come in handy: rotary cuttercutting matshearscraft scissorsclear ruler Step 1: Choose and cut your fabric- is it just me or is this oftentime the hardest part?
Step 2: Layer your pieces. Step 3: Stitch the layers together 1/4 in from the edge. Reusable Coffee Sleeve Tutorial.