Petit Atelier. Corset Maker's Free Workshop part 1. Sew What's New Blog – Curating sewing and quilting talent, techniques, and tutorials, since 1997! In the mood for Couture - Vintage Sewing Patterns. Stitch & Pink - Stitch and Pink. PRINT DESIGN - RALPHPINK.COM. Rosalie's Medieval Woman - Clothes and Accessories. Medieval Clothing & Dress Accessories Medieval clothing is an immensely broad term, covering the basic tunics of the 10th century, the cottes and bliants of the 12th and 13th centuries, the fitted kirtles, gowns and cotes of the 14th and 15th centuries to the massive houppelands and Burgundian gowns of the later 15th century.
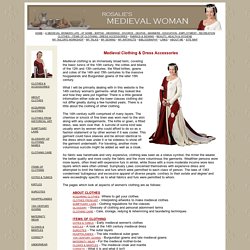
What I will be primarily dealing with in this website is the 14th century woman's garments- what they looked like and how they were put together. There is a little general information either side as the lower classes clothing did not differ greatly during a few hundred years. There is a little about the clothing of other clothing. The 14th century outfit comprised of many layers. As fabric was handmade and very expensive, clothing was seen as a status symbol- the richer the wearer, the better quality and more costly the fabric and the more voluminous the garments.
The pages which look at aspects of women's clothing are as follows: How to Make Historically Accurate, Authentic Hakama. There are quite a few hakama tutorials online and in print, but I was disappointed in most of what I found.
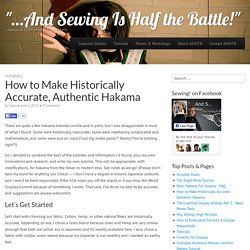
Some were historically inaccurate, some were needlessly complicated and mathematical, and some were just on crack (“Just big skater pants”? Really? You’re kidding, right?!). So I decided to combine the best of the tutorials and information I’d found, plus my own innovations and research, and write my own tutorial. This will be appropriate, with modifications, for hakama from the Heian to modern eras. Let’s Get Started. How to make a Tsuke Obi. Someone asked for a tutorial on how I made my tsuke obi so here it is!

Here is the list of things you will need. Two lots of 2 metres of fabric your choice (for reversible obi) 2 metres of stiff interface 4 metres of ribbon Sewing Machine Thread Pins Of course if you do not want to make a reversible obi then you just need 4 metres of one type of fabric. Instructions Step one Take your fabric and place it so the right sides are touching. Here is the basis pattern that I used. To lay out the pattern I would recommend the following. How to Copy a Garment that Fits Perfectly Without Taking it Apart.
Home - Sew Sweetness. Home - Sew Sweetness. 第210回 洋服生地から着物を作るための情報. How to Make a Vintage Dress: Tips for Sewing Success. Anyone can sew a vintage dress, but having a plan of action certainly makes it easier.
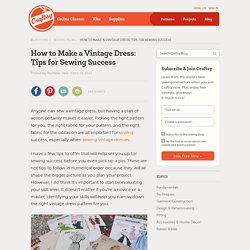
Picking the right pattern for you, the right fabric for your pattern, and the right fabric for the occasion are all important for sewing success, especially when sewing vintage dresses. How to make a yukata. Collar reinforcement strip (1): 18cm X 88cm (7" X 35") If you are using 72cm (28") wide fabric, you will need at least 6m (6.6yd) for a standard yukata, more if you are taller than about 5'3".
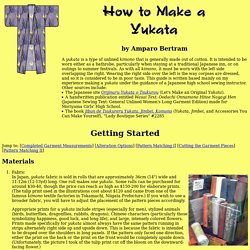
If you are using 90cm (36") wide fabric, you will need at least 4.26m (4.7yd), more if you are taller. If you are using a yukata roll, you will automatically have two selvage edges on most of the pieces, but if you are using a wider fabric you should sew along the cut edges to prevent them from raveling. Directions for cutting a yukata roll: Note: This is a side view. Mark a spot near the edge of the fabric where the two free ends overlap (making certain, if you have matched the pattern, that your mark includes both layers). At the 53cm mark, fold both layers of fabric over so that you now have four layers. Measure your height (you may want to add one inch) from the starting point and fold the fabric once again, giving you eight total layers.
Cut the fabric wherever it touches the starting mark. Drafting Your Own PDF Sewing Patterns - An Overview. Hello there!
If you are new here, you might want to subscribe via email so you don't miss a post. UPDATE: I’ve launched a course that covers all the information to use Illustrator to make PDF patterns. It’s the course I wish I had been able to find when I was starting; you can find out more about how to make sewing patterns here: Now back to the original post.
Twice this week I’ve been asked about how I go about making my patterns, so I thought this post could be an overview with a lot of links to resources for anyone interested in learning more. There are two basic parts to making PDF patterns. I’m self-taught as far as drafting patterns. Though it’s old (the 1970s photos are fun) it is thorough in explaining how to measure your body and draft slopers, then create patterns from them. Later when I got into blogging, I discovered Ikat Bag. As for digitizing, well that’s another learning curve. Latest Free Sewing eBooks. Fashion, Sewing Patterns, Inspiration, Community, and Learning. Pattern Drafting & Draping.
Sew Daily. Sewing needles and embroidery needles for needlework, quilting and appliqué. - John James Needles. Start Our Free Online Sewing Class For Beginners. Pages This Blog.