
Diy. When I was in China last summer, I remember noticing that most girls had ponytails tied with a scrunchie with bunny ears.
I could never pull this off, but thought it was adorable, and kept it in mind for an Easter DIY. It's a great way to use fabric scraps, a simple accessory to wear at an Easter party, and a sweet Easter gift for a little girl. When I was done with the DIY, I saw that there was a similar one on YouTube. Since it's done, I'm still posting my version, but if you would rather follow video instructions, then just hop on over to Ann Le's video tutorial. Also, I wanted to take a picture on myself to show the final result, but I really REALLY look awful these days, as a result of that never-ending sickness and tiredness. Okay, on to the DIY! Supplies needed:Fabric, about 1/8 yardFabric glue (or a sewing machine if you prefer to sew)Elastic (I used the 0.25 wide one), about 9"ScissorsPencilSafety pin Start by cutting a 18" x 3" piece of fabric.
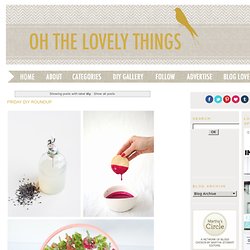
Cut a 12" x 5" piece of fabric. Build a Stone Bath Mat. Is the SF Bay Area's Only Open-Access Public Workshop. United States - Materials Catalog - Ponoko. Passionate about creating. ShopBotTools CNC Routers. Project Cost - Install a Recessed Light. How to build an Awesome Sidewalk with recycled lumber for only $50.00. After reading that title you might wonder, why would anyone make a sidewalk out of wood?
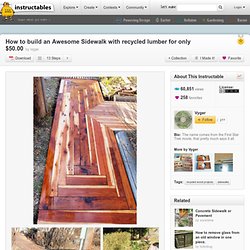
Well, there are a few very good reasons for doing it. A little history More than 25 years ago my wood sidewalk started out as an experiment to see how practical it might be. We needed some kind of walkway for the country house we had just moved into. I thought of using the traditional concrete but in the climate that I live (Northeastern Montana) cement sidewalks have some problems. My challenges for this project were: Come up with a design that could use all the different sizes of redwood I salvaged without producing a lot of waste. Resurface the older weathered wood so it matched with everything. Create a good-looking, practical sidewalk at a reasonable cost. By the way, I have included a lot of comments and extra info in the pictures so be sure to check any yellow outlined squares in them.
How to Build an Earthbag Roundhouse. Note: If you’re new to earthbag building, please read the introductory Step-by-Step Earthbag Building Instructable first.
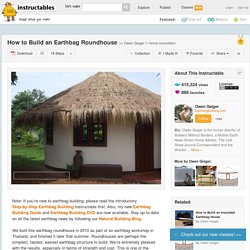
Also, my new Earthbag Building Guide and Earthbag Building DVD are now available. Stay up-to-date on all the latest earthbag news by following our Natural Building Blog. We built this earthbag roundhouse in 2010 as part of an earthbag workshop in Thailand, and finished it later that summer. Roundhouses are perhaps the simplest, fastest, easiest earthbag structure to build. We’re extremely pleased with the results, especially in terms of strength and cost. The other key advantage of earthbag is cost. Basic project information: 18’ exterior diameter; 15’ interior diameter; 177 sq. ft. interior floor space; total cost of materials: $2,045, which is about $11.50/square foot.