
Cardboard Furniture Designer: YouTube Channel.
DIY Cardboard Tables & Shelves. Mod Circle Side Table, Stool, Basket, Etc. DIY Cardboard Chairs & Other Seating. Woven Cardboard Upholstered Stool. Flat-Pack Cardboard Beach Office. Materials • Cardboard: upcycle all those boxes!

This project utilizes single wall corrugated board, but some improvement can be achieved by using double wall corrugated board. Will discuss that later. • Duct tape: your choice of colors Tools • Box cutter or Xacto knife, and good cutting surface • Scissors for cutting slots (shown in next step) • Measuring tape • Drawing pen for marking the cuts and folds • Straight edge and a butter knife to make creases Cardboard as a construction material: The humble cardboard contains some genius structural engineering. When placed vertically on its ends, the corrugation / flutes form vertical columns, capable of supporting considerable amounts of weight. Human proportions in furniture design Mass produced furniture are designed to correspond to the average proportions of their intended users.
Cheap Bed Substitute. Cartonniste Tutorial (English Version) Dernière actualisation le 16 Spetembre 2008 version française I will try here to translate important informations to create a cardboard furniture.
My english is already poor but some people is very nice and translate it for me ... for you ! This translation has been made entirely by Clarisse and her husband, Marthyn. Thanks a lot to you both. This part contains : -- Necessary equipment .................what you need to make furniture or other little things -- The steps by photos................... to help you to understand with pics -- Create your first piece of furniture ........... explain how to make an easy cardboard furniture to learn how to proceed AVAILABLE NOW. DIY Designing Cardboard Furniture. Check out books and catalogues for inspiration.
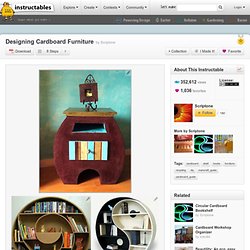
The first cupboard I planned to make was a Chinese style black and gold one. In this instructable the same methods are used for every type of object you plan to make. I will show step by step techniques of how I made a craft cupboard to store my knicks knacks. Check out my other instructables for details on how to make your own door hinges - tips and tricks for cardboard furniture: So now you've figured out you basic construction. Cardboard Cat Chaise. Although we don’t claim to understand it, a cat that has installed itself in a cardboard box is a happy cat.
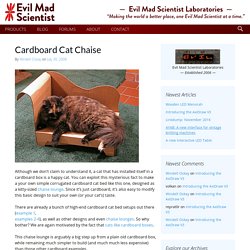
You can exploit this mysterious fact to make a your own simple corrugated cardboard cat bed like this one, designed as a kitty-sized chaise lounge. Since it’s just cardboard, it’s also easy to modify this basic design to suit your own (or your cat’s) taste. Cardboard Cat Rocket Tower. Step #1: Make the bottom of the rocket.
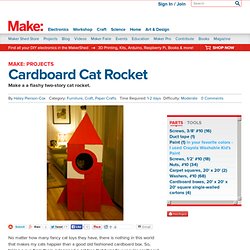
PrevNext Select the box that you will use for the bottom of the rocket and lay it flat. Find and mark the center of one side by drawing two diagonal lines from corner to corner, and making a dot where the lines cross. (Make sure you do this in pencil so you can erase the lines later.) Step #3: Cut out this entrance using a box cutter. Step #4: To keep your rocket structurally sound, you'll need to line the bottom box with a second box so the walls are double-layered on three sides.
DIY Cardboard Lumber. DIY: Headboard Made From Old Books.
Ma boîte à fils. Mercredi 13 avril 2011 3 13 /04 /Avr /2011 05:42 Hello les filles !!! Et oui, il y en a quelques unes qui avaient trouvé.... certainement à cause des couleurs !!!! Alors, je te présente : ma boîte à fils !!! Tu veux quelques explications ??? On y va !!! On commence avec les tiroirs... il en faut 8 !! Montage... habillage !! L'entourage des tiroirs : et là, j'ai fait l'inverse... habillage, et montage (je voulais que les clous se voient) sans oublier de mettre une anse et les étagères !!
Devant, côté, et de dos ! Car avant, ma boîte à fils, c'était ça !!! Un peu de tri... et voilà !!! Toutes les explications sont dans le fichier .pdf, qui est ici !!