
DIY Stylish 'Wood' Wall Storage System. The idea of this striking DIY wall storage system belongs to a dynamic design duo Kathleen Hackett and Stephen Antonson.
It’s based on using of cardboard tubes, looks really chic and is quite flexible. Materials and tools Two four-foot-tall cardboard tubes, one measuring 10 inches wide and the other 12 inches wideContact paperWashers, bolts, plastic anchors, screws1-2 inch wood planksBracesJigsawDrillUtility knife Instructions Cut each cardboard tube into smaller tubes of varying heights using a jigsaw.Cover the outside of each tube you got with contact paper.
Make A Basket From A Wine Box. My mom always used to say that necessity is the mother of invention.
It's so true in this case. I looked for at least 2 months for a basket for our daughter's room. I looked at Marshall's, HomeGoods, Ikea, TJ Maxx, Target, but didn't have any luck. None of the baskets were the right size. As I was walking out of Trader Joe's, I picked up an empty wine box and brought it home. I thought it would look good wrapped in jute just like the vase I showed you a few weeks ago. First, the box was cut down a bit. Then, the jute was hot glued on. Lined Canvas Diaper Box. You can find almost anything on Pinterest…it’s true.

Upon wasting my time searching the other day, I found a fantastic tutorial on upcycling diaper boxes. Hmmm…what could I do with this? Oh, yes – toys scattered all about our living room floor: check, a desire to get said toys put away when not in use: check, cute fabric laying there staring at me: check! I decided to take on this project! I changed some things from this tutorial I found, but you could use either hers or mine. What you’ll need Diaper Box Canvas fabric (1 yard covered two diaper boxes) Measuring tape Spray adhesive Craft glue Scissors (or rotary cutter and mat) Here’s how Cut the flaps off of your box.
Measure the outside width and length of the box. Width Length Cut your fabric Mine was 25 x 31 Center your box on the canvas. DIY Decorative Storage Box. Yesterday, when I shared my no-longer-naked nightstands, you got a peek at my fun new storage bins.
They’re just perfect for storing some books and journals and stuff in our hand-built nightstands. But peek inside them and you’ll see they’ve got a trashy little secret: They’re made from the boxes that my bedroom wall lamps were packaged in, and covered with a fun Starburst Orange organic cotton fabric from Monaluna. When I chose not to have drawers in my nightstands (because they were my first building project), I decided to make my own budget-friendly, fabric-covered storage bins out of cardboard boxes. But little did I know how insanely perfectly the project would come together. See, I wasn’t kidding when I said the lamps were a two-for-one deal. DIY Decor: Fabric Storage Boxes.
An empty shoe boxes or any box that has a separate lid is perfect for stacking and storing small items around your home.
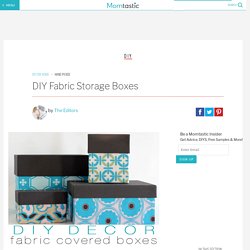
Covering boxes with leftover scraps of fabric or wallpaper from other decorating projects is an easy DIY that makes your storage part of your decor. Don’t have fabric scraps around the house? I used Fat Quarter fabrics to cover these DIY fabric storage boxes; they are pre-cuts of fabric that measure about 18-inches by 21-inches. Cardboard Boxes Into Wall Storage Folders. The whole idea of Wall Storage Folders was originally inspired by a little book purse Diane created and shared on Craftypod several years ago.
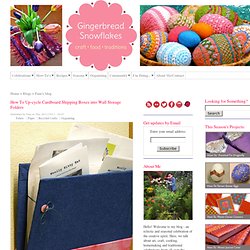
Diane's friend, Michele, who shares her crafty brilliance on Michele Made Me, inspired me to take this idea one step further and recreate these absolutely useful Wall Storage Folders from common ole everyday ubiquitous cardboard! The folder I am making in this tutorial happens to be the perfect place to store knitting and crochet patterns I have ordered and am planning to make this year! It hangs right next to the shelves that house boxes and baskets filled with the yarn assembled for these projects. All very organized and pretty and inspiring! Two of the original folders that still hang on the wall near my computer and printer have been wonderfully useful for temporary storage of recipes, craft ideas and patterns that I have downloaded and printed.
Cardboard Can Rotating Rack. This tutorial is created courtesy of my husband who made me this can rotating rack for a Valentine’s Day gift and agreed to document the process to share with all of you!
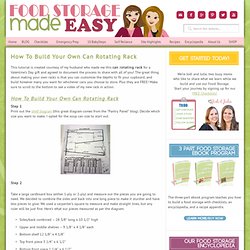
The great thing about making your own racks is that you can customize the depths to fit your cupboard, and build however many you want for whichever cans you choose to store. Plus they are FREE! Make sure to scroll to the bottom to see a video of my new rack in action. How To Build Your Own Can Rotating Rack Step 1 Print out the shelf diagram (this great diagram comes from the “Pantry Panel” blog). Step 2 Take a large cardboard box (either 1-ply or 2-ply) and measure out the pieces you are going to need. Upcycled Toner Box Into Ribbon Holder.