

How to Make Your Own Large Pearl Choker Necklace with Seed Beads. The sparkly rice pearls and seed beads formed this beautiful large pearl choker necklace.
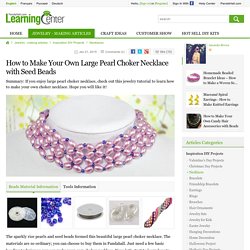
The materials are so ordinary; you can choose to buy them in Pandahall. Just need a few basic beading techniques; you can make your own choker necklace. Now, let's start to learn how to make your own choker necklace! Materials needed on how to make your own choker necklace: 3MM Royal Blue Seed Beads Rice Glass Pearl BeadsJump rings Tiger Wire Lobster Clasp Instructions for making your own large pearl choker necklace: Step 1: Start to make your own choker necklace 1st, cut off 150cm tiger wire, slide a lobster clasp onto the middle of the wire, add a rice pearl and a seed bead to both wires; 2nd, slide a rice pearl, a seed bead and a rice pearl onto each wire, cross both wires to a seed bead and tighten wires.
Step2: Make the basic pattern A for the large pearl choker necklace 1st, add a rice pearl, a seed bead and a rice pearl onto each wire again, cross both wires to a seed bead and tighten wires; Crochet Rope Patterns. A small collection of beaded crochet rope patterns that have been made by myself.
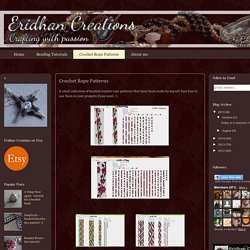
Feel free to use them in your projects if you want. :) Beaded flower - free tutorial. Finally!

I admit it has taken lots of time for me to force myself to some working again. But now, as the spring is already here and the flowers are in bloom, the tutorial for a beaded flower, as I promised in this post, is ready and available to all of you. Simplicity - beaded bracelet - free pattern! :) Beaded donut - tutorial. Part 3. The last part of the tutorial!
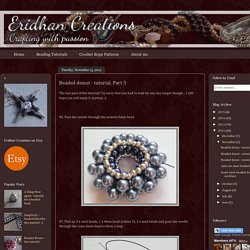
I'm sorry that you had to wait for one day longer though... I still hope you will enjoy it anyway. :) Beaded donut - tutorial. Part 2. Keeping my promise and publishing the second part of the tutorial as soon as possible. ;) So enjoy everyone who was waiting for it. :) 22.
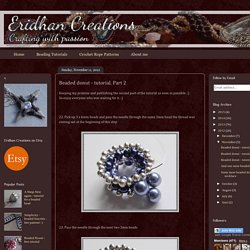
Pick up 3 x 6mm beads and pass the needle through the same 3mm bead the thread was coming out at the beginning of this step. Beaded donut - tutorial. Part 1. Yes, finally it has been finished!
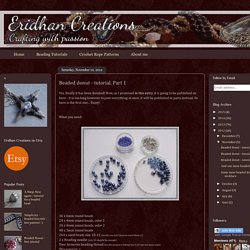
Now, as I promised in this entry, it is going to be published on here - it is too long however to post everything at once, it will be published in parts instead. So here is the first one... Enjoy! What you need: 36 x 6mm round beads 24 x 4mm round beads, color 1 36 x 4mm round beads, color 2 48 x 3mm round beads 264 x seed beads size 10-11 (surely you don’t have to count them ;) ) 2 x Beading needle (size 10 should be enough) Your favourite beading thread (for this project a fishing line 0,20 mm has been used) This tutorial ;) The finished piece is 4cm (1,57") wide in diameter 1. 3. 7. 8. 9. 10. 11. 12. 14. 15. 16. 17.
DIY Right Angle Weave Woven Cuff Bracelet. It’s me again, Keri and it’s time for my DIY tutorials!
Bangles are a big thing, especially in the summer, but not everyone likes the feel of a hard bangle but enjoys the look of one on their wrist. I prefer a bracelet closer to my wrist than what a normal bangle would afford me, I work in a place where it can get too easily caught on something and so a woven cuff provides me with the perfect solution.
Wide bangle look without the worry of snagging. For this tutorial, I’ll be teaching you 2-Needle Right Angle Weave with DIY Right Angle Weave Woven Cuff Bracelet Let’s start! Materials Needed: (You can click this list for the source) BEADING TUTORIALS Collection - Crystal Star Gems & Jewellery. The Heart Beading: Twin Bracelet. I had in my stash some twin beads that were released even before the superduo beads.

They are very irregular, so I was thinking about what kind of project I could make good use of them. It was when I saw a tutorial on the beading daily website, teaching how to make a bracelet using the right-angle-weave technique with superduo beads, that I had the idea to create a bracelet using my old twin beads. The bracelet is very simple: it's just right angle weave with twin beads.
I used seed beads 11/0 to fill the gaps between the twin beads. And I embellished the sides with crystal bicones. The good thing about do right angle weave with twin beads is that the irregularity of the bead's shape doesn't affect the design. I made a tutorial to show you all the steps to create the bracelet. I suggested in the video that you to use twin beads, but you can also use superduo beads.
That's the bracelet: I used chip bicone crystals so I don't have the color name of them. Watch the tutorial HERE.