
Enjoy the download! - maggie makes. Karen’s coffee can lanterns. The nights are warming up here in northern ca, so i’m eager to tackle this lantern diy project from karen at maggiemakes. named after her adorable black lab, karen’s blog primarily focuses on crafts for around the home and provides great instructions and photos. i can’t wait to grab a hammer and a can and give it a go. thanks karen!

-kate CLICK HERE for the full how-to after the jump! Summer may have skipped my part of the globe this year but that hasn’t stopped me from dreaming of those long warm summer nights outside relaxing with friends. when summer decides to come our way i will be ready to enjoy those nights with these rustic coffee can lanterns. inexpensive, fun, simple to make and customize, they add the perfect decoration for a late night BBQ with a group of friends or a night of gin and tonics with the one you love. try our three designs or create your own, with a variety of tools the possibilities are endless.
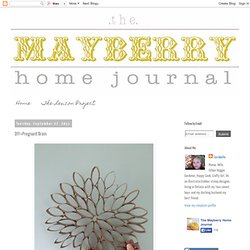
-karen Materials: Process: 1. 2. 3. 4. Secretly Special Reading Nooks. Turn Inexpensive Buckets Into Stacked Storage. DIY+Pregnant Brain. Without getting into too many details-the baby is going to be a little longer than we thought.
We were afraid that she was going to be early, and now that she isn't, I sort of feel like I'm living life in limbo.I don't know if it's just me, or women in general, who find the strangest tasks to pass time until a baby arrives. Suddenly, the weirdest things pop on to our 'to do' lists, and become oddly important. And the tasks seem to grow weirder and weirder with each baby. Right before I had Reuben, for some reason, I decided that my living room futon needed a new cover.
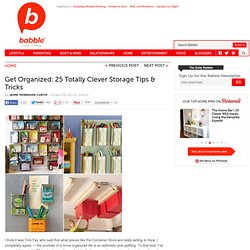
Not great timing, but not so strange. Before I had Zeke, I needed to get all my Christmas cards done early-not just written, that wasn't good enough. Get Organized: 25 Totally Clever Storage Tips & Tricks. By Jaime Morrison Curtis | I think it was Tina Fey who said that what places like the Container Store are really selling is hope.
Turquoise Painted Dresser. So are you dying of curiosity from the preview I posted on Monday?

Did you come back for the full story? If so, I'm glad you did! So, as a refresher, here's the original. Here's the teaser, and you'll have to scroll on down to see the full finished product. I bought this dresser at a garage sale about three years ago, I'm pretty sure I paid $20.00 for it. I started by removing the drawers and their hardware, and sanding all the finished surfaces of the dresser. Next up came a coat of primer. Smart Storage Ideas for Creative Supplies. DIY Nursery Dresser Makeovers for Mom and Baby to Love. By AngEngland | Turn an old dresser into a personalized, beautiful baby nursery item.

Giving a baby a space of their own is as important as it is fun. Jewelry Holder Tutorial. I'm so excited about this tutorial! I've gotten into the habit of collecting old picture frames from thrift stores and estate sales and I never know what to do with them. On top of that, my current jewelry storage situation is, simply put, a hot mess. Storage. Do-it-Yourself DIY String Wedding Lanterns Yarn Chandeliers - StumbleUpon. Jessica of Wednesday Inc shows us how to make those gorgeous twine chandeliers from the inspiration shoot she shared with us this morning.

Using balloons, glue and twine, you can also make these lanterns for your wedding – and then bring it home and use it as your very own mid century lampshade. What you will need are: balloons, glue, yarn, tray for glue, corn starch 1/2 cup of Corn starch, 1/4 cup of Warm water, clear fast drying spray paint, hanging lamp cord or fishing line (depending on your desired final product), and a lighting kit if you’re looking for a fully functional lantern. Jessica recommends using a sharpie to mark on the inflated balloon how much room you need to leave for the lighting cord. She also recommends coating the balloon with vaseline prior to wrapping the yarn coated with glue so it doesn’t stick on the balloon once it’s dry.
DIY Streamer Photobooth Backdrop. Inspired by Amy and Stephen’s DIY photobooth backdrop, we decided to try making one ourselves… It’s so easy! You can even give your own twist to this project by arranging the crepe paper strips in geometric patterns like herringbone. For this project all you need are streamers in different colors, glue, scissors or paper cutter and a large roll of paper (you can find rolls of paper at places like Home Depot or Staples) as the base for the backdrop. Fold 3 feet pieces in halves, then cut the ends – one on a 45 degree angle and the other straight. Run a line of Elmer’s glue across the base paper and start designing your backdrop. Remember to start from the bottom up!