
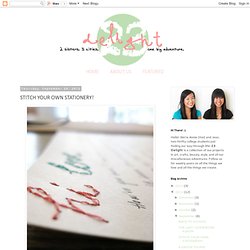
Pin by Kendra Cardoza on DIY Gift inspiration. STITCH YOUR OWN STATIONERY! I have a confession to make.
I'm a paper addict! It's true. Journals, stationery, books...I hoard them like crazy. Yet at the same time, I'm incredibly stingy and I never want to shell out my tiny bit of money for packs of generic stationery. It happened like this... Card Ideas. New fabrics/colors added!
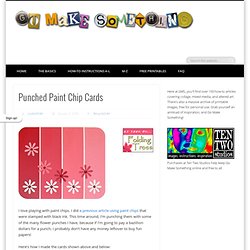
Punched Paint Chip Cards. I love playing with paint chips.
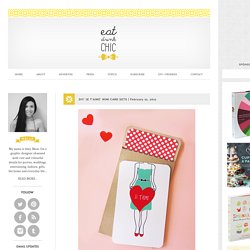
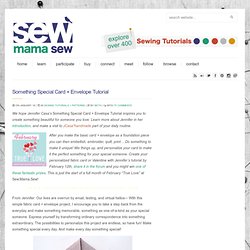
Paint Sample Cards. Herb Garden Seed Card. Handmade Valentine Cards. Je T'aime Mini Card Sets. I really enjoyed creating the design for the 'Je t'aime' coffee cup wrappers' so I thought I'd also transform them into mini cards with polka dot lined envelopes, for those in need of a (very) last minute gift for a loved one!
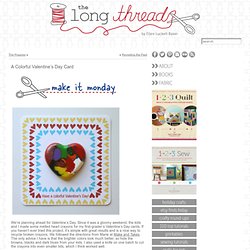
:) Download and print onto thick card stock. Use a rounded corner craft punch on each corner and write your message on the back. The polka dot envelope liner is in the PDF with the card design and you have a choice of red or aqua. Before cutting it out, remember to score gently, with a scalpel, between the dotted lines. You can create your own envelope with the template below. Enjoy! The downloadable pdfs in this article (and across my entire site) are free for personal use only. . { all images by Amy Moss } Something Special Card + Envelope. We hope Jennifer Casa’s Something Special Card + Envelope Tutorial inspires you to create something beautiful for someone you love.
Learn more about Jennifer in her introduction, and make a visit to JCasa*handmade part of your daily routine. After you make the basic card + envelope as a foundation piece you can then embellish, embroider, quilt, print… Do something to make it unique! Mix things up, and personalize your card to make it the perfect something for your special someone. Crayon Valentine's Card. We’re planning ahead for Valentine’s Day.
Since it was a gloomy weekend, the kids and I made some melted heart crayons for my first-grader’s Valentine’s Day cards. If you haven’t ever tried this project, it’s simple with great results and is a nice way to recycle broken crayons. We followed the directions from Marie at Make and Takes. The only advice I have is that the brighter colors look much better, so hide the browns, blacks and dark blues from your kids. I also used a knife on one batch to cut the crayons into even smaller bits, which I think worked well. Geeky Valentine's Card. Valentine's Card Ideas. Valentines when we were little, valentine-making was a serious annual tradition. we would gather all of the tools and materials and papers that we had gathered throughout the past year, and our mom would set up the dining room table for us to work. so many years later, we still keep the tradition and send our cards to each other, friends and family!

Anna my new sewing machine has a gazillion different stitches, and this seemed like a fun way to play around with them. [top image above is from anna] amy i needed my cards to be simple this year as i don’t have much time. a little candy and my typewriter–each one take just minutes! Sarah. Teacup Valentine's Day Card. Father's Day Shirt Card. Materials: Decorative paper for shirt (8-1/2 x 11-inch cardstock was used here)Decorative paper for accessoriesScissorsGlue or double-sided craft tape Optional Materials: Bone folderHole punchDecorative wrapping paperInstructions for DIY Father’s Day shirt card Throughout the craft, it's important to create crisp folds.
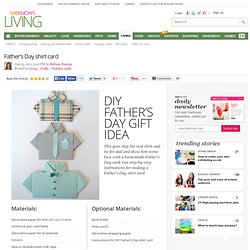
A bone folder can help make this easier. Step 1: Create vertical folds If using decorative paper, turn the paper over so the right side is facing down. Lay the paper flat and fold each side up into the center fold. iDad Father's Day Card. Step 2: Use template 2 to cut out the inside of the card (using the white card stock/paper).
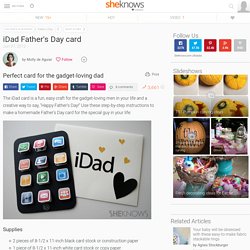
Step 3: Glue the white piece to one of the black pieces and set it aside. Step 4: Locate images to use as your icons on the iDad card. We bought these on iStockphoto.com. You could also do a Google image search for icons — look for medium-sized images for better quality. Save the images and import them into a Word doc, reducing them to consistent size (about 1-1/2 inches x 1-1/2 inches). Step 5: If you are going to put photos underneath your flaps, assemble them in a Word doc, the same way and the same size as the icons. Step 6: Cut out the icons and the photos. Step 7: Spread out some newspapers to protect your work surface. Step 8: With a cutting mat underneath, cut around the two sides and the bottom of each icon with an X-Acto knife, creating lift-up flaps with the icons. DIY Scratch-Off Cards.
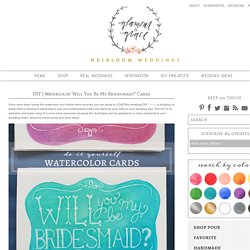
Watercolor Cards. If you have been loving the watercolor and ombre trend recently, you are going to LOVE this amazing DIY Sarah is bringing us today!
Tunnel Vision Card. I know you are invited to at least one wedding this summer. Bring your camera. This is a neat way to present a special wedding picture. It's an old paper trick call a tunnel card. I like to frame it in a shadow box and give it to the married couple. You might even get away with not having to buy one of those expensive items on their gift registry.
Materials: 4 copies of a photo that has a fore, middle and background. shadowbox frame mat 2 pieces of cardstock glue stick. Cut-Out Thank You Note.