
How To Carve a Stamp. I've been making my own stamps since high school.
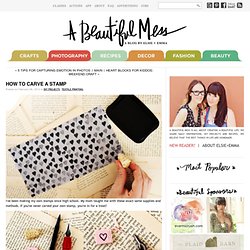
My mom taught me with these exact same supplies and methods. If you've never carved your own stamp, you're in for a treat! How to transfer a photo to fabric. Did you know you can transfer photos to fabric without using iron-on sheets?
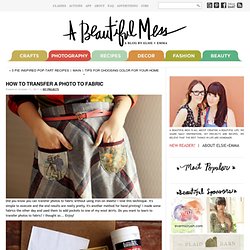
I love this technique. It's simple to execute and the end results are really pretty. It's another method for hand printing! I made some fabrics the other day and used them to add pockets to one of my wool skirts. Do you want to learn to transfer photos to fabric? Supplies Needed: Fabric (I used white quilting cotton), Gel Medium (I used this kind from Liquidex. Garment Rack D.I.Y. - A Beautiful Mess. Looking for a budget friendly way to create garment racks for your home?

Today Rachel shares her D.I.Y. method... You'll Need: Two 1/2" x 60" black steel pipes, Two 1/2" x 48" black steel pipes, Four 1/2" x 8" black steel pipe nipples, Two 1/2" x 2 1/2" black steel pipe nipples, Six 1/2" x 1 1/2" black steel pipe nipples, Six 1/2" black tees, Four 1/2" black 90 degree elbows, Four 1/2" galvinized floor flanges, Two 1/2" black steel end caps, 1 can of black spray paint (optional) and Work gloves. *Note: My supplies cost around $70-$80. DIY Jewelry Display. As a chronic renter I'm always reinventing ways to display my favorite things.
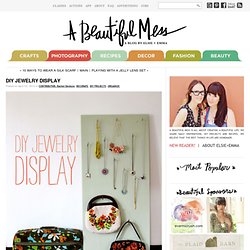
This jewelry display idea is an easy way to show off your baubles and pretties without adding a million holes to your walls or tangling all of your chains in the process. One trip to the hardware store and you're in business. Step 1: You'll need 1 panel of pine measuring 3/4" x 20" x 48", a drill, a pen, primer, spray paint or latex paint in your favorite color, 1/2" screw hooks for jewelry, 1" screw hooks for handbags, sand paper.
Step 2: Place your panel of wood on the floor and arrange your jewelry as you'd like it to hang. Polka Dot Etched Drinking Glass Set. After our first glass etching adventure we were excited to try out more designs.
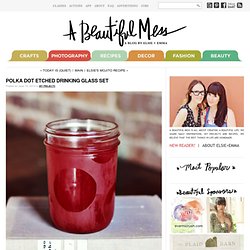
We decided to try a set of mason jar cups with an etched polka dot pattern. The dot pattern is inspired by a Kate Spade vase that I received as a wedding gift... it's so cute and I thought the concept would translate really well to drinking glasses. 1. Supplies: scissors, etching cream (we used Armour Etch ), mason jars, contact paper, sponge brush, gloves for protection. 2. First, cut out large circles in the contact paper. 3. A fun little party idea... Last time I was shopping at Hobby Lobby (which is all the time, let's be honest...)
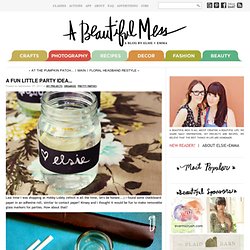
I found some chalkboard paper in an adhesive roll, similar to contact paper! Kinsey and I thought it would be fun to make removable glass markers for parties. How about that? Simply grab a roll of adhesive chalkboard paper, cut a strip, adhere it to your glass and smooth out any wrinkles with your finger. Write guests names on the glasses at your next shower or casual dinner with friends. DIY Studded Doggie Collar. Furniture Makeovers. Homemade Beeswax Candles.
Beeswax candles are our newest obsession!
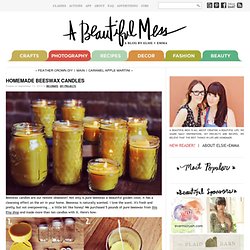
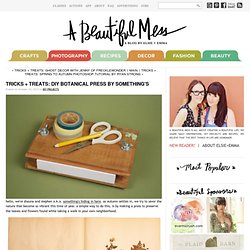
Not only is pure beeswax a beautiful golden color, it has a cleansing effect on the air in your home. Beeswax is naturally scented. I love the scent. It's fresh and pretty, but not overpowering... a little bit like honey! We purchased 5 pounds of pure beeswax from this Etsy shop and made more than ten candles with it. Tricks + Treats: DIY Botanical Press by Something's Hiding in Here. Hello, we're shauna and stephen a.k.a. something's hiding in here. as autumn settles in, we try to savor the nature that become so vibrant this time of year. a simple way to do this, is by making a press to preserve the leaves and flowers found while taking a walk in your own neighborhood. inspired by botanical prints and natural history illustrations, documenting your environment of plants, flowers and leaves becomes a personal catalog of your backyard. nature presses are perfect for all seasons, but we're partial to autumn because it's the time of year when color fires through the countryside and gives you a different impression each day as winter takes over. to start collecting, just take a walk. you would be surprised how interesting and diverse the plants are so close to home. we live in the middle of philadelphia and keep finding new things each time we go exploring. see how much you can hold in your two hands or bring along a basket for a serious haul. have fun!
Color Block Terra Cotta Pots DIY - A Beautiful Mess. It's the perfect time of year to bring a little more green into your home!
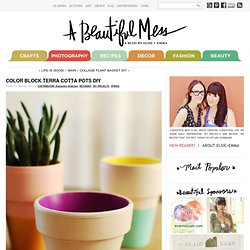
Today we're welcoming Rubyellen as she shares her super cute method for customizing tiny terra cotta pots. Enjoy... Supplies Needed: Paint, terra cotta pot, paint brush and a small plant. 1. Paint the outside of your pot. So sweet! Hanging Basket Garden DIY. We have a sweet little backyard at our new house but with a rambunctious puppy and a curious two-year-old, many of my efforts to plant things in the ground have been thwarted.
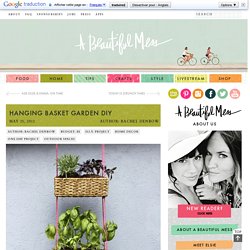
Well, more like dug up, chewed up, and pulled apart. I was determined to have some sort of herb garden so I got smart and came up with my own version of a vertical garden. I used supplies I already had on hand and bought herbs and flowers that would take the same amount of sun. I put this together on a Sunday afternoon and have enjoyed it from my kitchen window all week! 1. This is a great project for renters, apartment dwellers, or anyone who wants to enjoy just a little bit more greenery. Use this same idea in your studio to house crafting supplies, store your fruits and vegetables where you can see them in your kitchen, or add it to your bathroom to store toilet paper and washcloths.