
UML tutotrial. UML tutotrial. UML to Java Code [Netbeans 7.2] - part 1. PlantUML. 4 Quick Steps to Start UML Modeling in NetBeans. The Unified Modeling Language (UML) allows software developers to visualize their software design ideas, providing a clear and effective way to represent user goals, program flows, system architecture, etc.

There are many UML tools you can find in the market, but not many of them support the transition and synchronization between your software design and programming source code. Some of them don't even support generating code from diagrams, which, as a result, require a considerable effort to manually typing the code base on the diagrams created. To save time and cost, it is essential to adopt a UML plugin that works seamless with your favorite IDE, enabling you to run through the entire software development cycle within a unified software development platform.
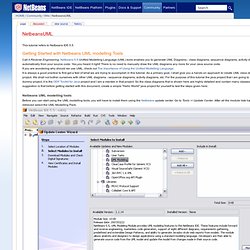
If you are looking for such a UML plugin for your favorite IDE, Visual Paradigm is your choice. Preparation Note: We support NetBeans 6.7 and onwards. Visual Paradigm Professional Edition VS Enterprise Edition Here we go. IDE - Unified Modeling Language (UML) Features. UML. This tutorial refers to Netbeans IDE 5.5.
Call it Reverse Engineering. Netbeans 5.5 Unified Modelling Language (UML) tools enables you to generate UML Diagrams - class diagrams, sequence diagrams, activity diagrams et. al automatically from your source code. Yes,you heard it right! There is no need to manually draw the UML diagrams any more for your Java source code. If you are wondering why should we use UML, check out The Importance of Using the Unified Modelling Language.
Netbeans UML modelling tools Before you can start using the UML modelling tools, you will have to install them using the Netbeans update center. For more detailed instructions on installation you may refer this page Generating UML Class Diagrams Open the project for which you want to genearate the class diagram On the package view on the left hand side in Netbeans, Right-click on the project Name. Select a project name and location The project window should now look like this: Select Class Diagram and click Finish. NetBeans and Android SDK. Installation - NBAndroid. How to install NetBeans AutoUpdate is the best approach to install NBAndroid plugin into your IDE.
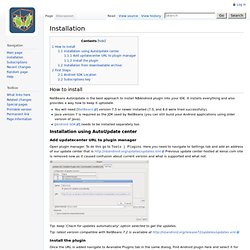
It installs everything and also provides a way how to keep it uptodate. You will need [NetBeans] version 7.3 or newer installed (7.3, and 8.0 were tried successfully). Java version 7 is required as the JDK used by NetBeans (you can still build your Android applications using older version of Java). [Android SDK] needs to be installed separately too. Installation using AutoUpdate center Add updatecenter URL to plugin manager Open plugin manager. Tip: keep 'Check for updates automatically' option selected to get the updates. Tip: latest version compatible with NetBeans 7.2 is available at Install the plugin Once the URL is added navigate to Available Plugins tab in the same dialog.
Click Install to initiate the installation. To confirm selection of plugins to install to accept license to verify the certificate (the plugin is signed with a certificate that is not trusted).