
Guide: Makefiles. Guide: Makefiles Well, now that you're learned how to use lots of source files, objects, and libraries to build large programs, how are you ever going to manage them all?

How will you remember all the commands and options you'll need to remember to build it? Fortunately, you don't have to. DJGPP (and most development systems) include a program that manages your projects for you. If you are using RHIDE, this is the project definition, which is managed through RHIDE's menus (and is documented in RHIDE's documentation). The syntax of a makefile is deceptively simple (GNU make includes a lot of extensions, functions, and tricks that can make makefiles almost as complex as your source).
OBJECTS = main.o foo.o bar.o math3d.o graphics.o They can get pretty complicated also (see the make reference manual) but for now we'll stick to the simple cases. The more interesting command is a rule, which tells make what it's making, what it's made from, and how to make it. A Simple Makefile Tutorial. Makefiles are a simple way to organize code compilation.
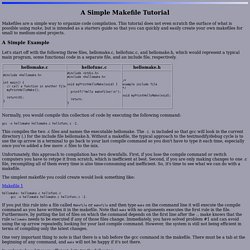
This tutorial does not even scratch the surface of what is possible using make, but is intended as a starters guide so that you can quickly and easily create your own makefiles for small to medium-sized projects. A Simple Example Let's start off with the following three files, hellomake.c, hellofunc.c, and hellomake.h, which would represent a typical main program, some functional code in a separate file, and an include file, respectively. Normally, you would compile this collection of code by executing the following command: gcc -o hellomake hellomake.c hellofunc.c -I. This compiles the two .c files and names the executable hellomake. Unfortunately, this approach to compilation has two downfalls. The simplest makefile you could create would look something like: Makefile 1 hellomake: hellomake.c hellofunc.c gcc -o hellomake hellomake.c hellofunc.c -I.
In order to be a bit more efficient, let's try the following: Makefile 2 Makefile 3. How to Compile ‘n’ Execute/Run C/C++ program in Ubuntu 12.04. Now a Days, Ubuntu is one of the most popular OS among programmers (not only nerds but also the beginners who just entered into the programming world) but for a beginner Ubuntu user coming from Windows may feel some problem in programming with Ubuntu.

On Windows they use nice GUI based IDE, but in Ubuntu things are little different. In Ubuntu it’s better to use Terminal (specially for the beginners), instead of GUI based IDEs such as Eclipse, Netbeans etc for compiling programs. In fact, the command line approach is much easier and efficient, due to the powerful shell such as bash, zsh etc.
So, in this post – you will learn - how to compile and execute (run) C/C++ programs in Ubuntu 12.04 (Precise Pangolin)/12.10(Quantal Quetzal) or other Linux distributions such as Linux Mint 13 (Maya). You don’t need to install any extra applications or tools other than the compiler. . #1. For C sudo apt-get install gcc For C++ sudo apt-get install g++ #2. #include<stdio.h> void main() { printf("Hello! #3.