

Decoupage desk……Going in Circles - Petticoat Junktion. Good Morning Guys, Welcome to my first post of 2012.

Thanks to all who stop by and spend time with me each week. I started this blog in May and have been truly inspired by my fellow bloggers. Kim from Too Much Time On My Hands did a fabulous desk makeover using a decoupage technique. The finished desk was so awesome. Greenlicious End Table TUTORIAL. The weather has not helped with my kitchen makeover.
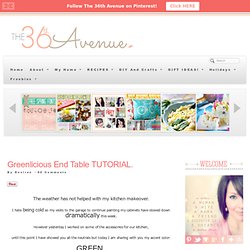
I hate being cold so my visits to the garage to continue painting my cabinets have slowed down dramatically this week. However yesterday I worked on some of the accessories for our kitchen, until this point I have showed you all the neutrals but today I am sharing with you my accent color: The inspiration behind it came from this awesome 7-up crate that I found at my favorite local store. Almost every Thursday my sweet friend Wanda Ann and I go visit there and look for little treasures. House Tour. Welcome...

Thank you for stopping by to tour our home. As you view each picture you will find a link in red below some of the photos that you can click on to bring you to more posts related to that room or subject. Enjoy your stay! Stairs Hopefully you found something interesting here that will inspire you to try something new your own home. Thanks again for coming and come back soon!
Bliss Ranch. Beyond The Picket Fence. Day three's favorite project from the past year was this birdhouse storage table I made from a breadbox.
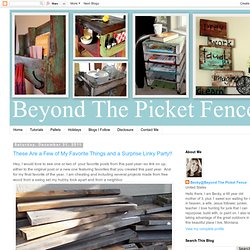
This ginormous breadbox was given to me a few years earlier and it sat with out a purpose. Finally, one day while moving it around in the garage, I saw a birdhouse. I turned it on its end, moved the hinges to the other side, built a base for it, drilled a hole and added a perch. This was the first item to sell at our summer Junk Fest. Another favorite link up from this past year was Mod Vintage Life's casserole holders turned spice racks--love these babies. Five Days... 5 Ways: DIY Tufted Ottoman. Outdoor furniture made out of pallets - rugged-life.com. Key Interiors by Shinay: Vintage Style Teen Girls Bedroom Ideas. Inspiration for Decoration. My mantle needs a makeover.

What, you say? That’s not my mantle? Oh, of course! You’re right. I should back up. My mantle *does* need a makeover, though. My favorite piece is the framed photo (below, right) of my hometown (Auburn) in 1899. The other candle’s scent is “Sani-Freeze”, an ice cream stand that stood just a block from Toomer’s Drugs- and was so run down and dilapidated it was more affectionately known as “The Flush”. Mounting your tv to the wall and hiding all the cords. Edited 1/27/2013 to add: Dropping a TV power cord through your wall isn’t “to code”.
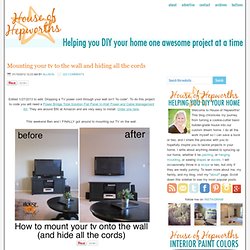
To do this project to code you will need a Power Bridge Total Solution Flat Panel In-Wall Power and Cable Management Kit. They are around $50 at Amazon and are very easy to install. Order one here. This weekend Ben and I FINALLY got around to mounting our TV on the wall. Mounting a TV on a wall (and concealing all the cords) is really not that hard. Oh rrrright. Okay, so here’s the eye sore before we tackled this afternoon project: If there’s one thing Sarah and I have in common, it’s our general loathing of power cords. Every time I walk to my bedroom, the laundry room, or the garage, I’m greeted by that horrible disaster of cords. But check it out NOW! I’m going to give a quick run-thru on how to hang the tv and run the cords through the wall, but honestly, if you just follow the directions that come with the mounting kit you will be just fine.
Featured on: Craptastic. A big thank you out to Katie at Craptastic, who featured my striped table (among 4 other cute stripey projects!)
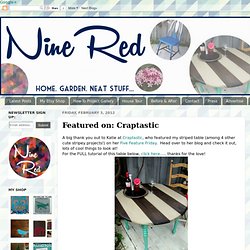
On her Five Feature Friday. Head over to her blog and check it out, lots of cool things to look at! For the FULL tutorial of this table below, click here..... thanks for the love! Happy Friday by the way....... Nifty pallets. How to Make a Rag Rug tutorial. Happy Labor Day!
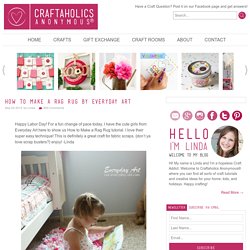
For a fun change of pace today, I have the cute girls from Everyday Art here to show us How to Make a Rag Rug tutorial. I love their super easy technique! This is definitely a great craft for fabric scraps. {don’t ya love scrap busters?} Enjoy! Hi, my name is Jaime and my sister-in-law Emily and I are craftaholics. :) We like to share our creations on our blog, Everyday Art because we think that everyone likes to create a little art everyday.
We’re excited to be here at Craftaholics Anonymous® today sharing one of our recent projects. Introducing, the Pink-and-Blue Rag Rug: Maggie Gedebou / Pinterest. Build a How to Build a Loft Bed. PDF version A loft bed that works with an entire system of plans to get your teen more space and storage in their room.
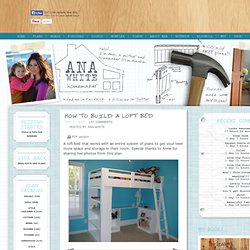
Special thanks to Anne for sharing her photos from this plan. Handmade from this plan >> Dimensions Dimensions: Fits standard Twin Mattress. Materials and Tools Shopping List: 15 – 1×3 Boards, 8′ Long 3 – 1×8 Boards, 10′ Long (cut one long and one short cut from each) 1 – 1×8 48″ Long (cut 1 short cut from this one) 3 – 1×4 Boards, 8′ Long 1 – 2×2 Board, 8′ Long 11 – 1×2 Boards (Less if you have a bunkie board or box spring), 8′ Long 1 1/4″ Screws 2″ Screws Wood Glue Finishing Supplies (Wood Filler, Sand Paper, Paint, Brushes, etc) Tools: measuring tape square pencil safety glasses hearing protection drill circular saw nailer sander level.
Build a Farmhouse Table.