
Reversible Coffee Cup Sleeves. I’m gonna tell you right now, you can’t throw a rock and not hit a tutorial for a coffee cup sleeve out there on the web.
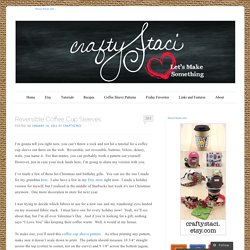
Reversible, not reversible, buttons, Velcro, skinny, wide, you name it. For that matter, you can probably work a pattern out yourself. However, just in case your rock lands here, I’m going to share my version with you. I’ve made a few of these for Christmas and birthday gifts. You can see the one I made for my grandma here. I was trying to decide which fabrics to use for a new one and my wandering eyes landed on my seasonal fabric stack. To make one, you’ll need this coffee cup sleeve pattern .
Cut one from cotton batting, two from ironing board cover fabric and two from cotton fabric. I happen to have scraps of batting and ironing board fabric, but if you don’t and will be buying the supplies, another product you can use is InsulBrite. You’ll only need half of the hair tie, so zigzag stitch through the center, about 3/8” long, then clip through the center. Lay flat. Macaron Coin Purse. Just can’t help for not sewing these sweet little macaron coin purses when one of Craft Passion’s Facebook fans showed them to me.
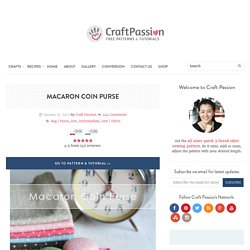
Thanks to XYZZhandmade for her inspiring handmade and some tutorial links in Japanese, this, this, this and this. No, I can’t read Japanese but I can guess from the pictures on how to sew it. Here is the English version of tutorial on how to sew this macaron coin purse where I have added more details in the sewing. The space inside the coin purse is quite limited but good enough to place some small jewelries like ear rings, rings; may be to keep some small coins, folded money; a place to keep small piece of note that wrote your shopping list and reminder etc. Or, simply use it as a key chain or hanging ornament. I have tried both nylon and metal zipper, each gave different feel and effect on the macaron coin purse. Tuto couture: Le col détachable - L'atelier d'Aradia. Explications couture : Le col détachable 1) Le patron 2) Réalisation Mesurez votre tour de cou et essayez d’imprimer le patron pour que celui-ci fasse environ 1 à 2 cm de plus que votre tour de cou.
Pour cela, j’utilise Word pour mesurer, mais si c’est trop petit imprimez le patron tel quel et agrandissez le à vos mesures après. Découpez deux morceaux de tissu pour chaque pièce du patron en veillant à garder environ 1cm pour les coutures. Si votre tissu n’est pas rigide, vous pouvez le renforcer en incluant une pièce de jean dans chaque partie du col ou en posant du papier thermocollant sur une coupure de chaque pièce. Pour les pièces rectangulaires (à peu près) et longues, cousez les ensembles sur les petits côtés et le grand côté du bas, qui sera à la base de votre cou une fois fini, puis retournez cette pièce. Pour l’autre pièce commencez par bâtir le côté extérieur du col.
Tabliers. TUTO GUETRES. Couvertures - plaid. CHAPEAUX. MITAINES. SACS - TROUSSES.