
How To Put Your Hair Up In A Cute Bun. Comb your hair carefully to eliminate any tangles or knots.Take some hair from the top of your head. 3.
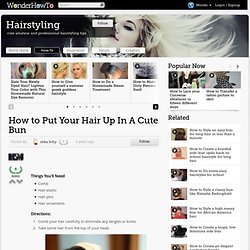
Tie off this hair with a hair elastic. 4. Don't pull off the ends. 5. 6. 7. 8. Makeup Mon...errr Tuesday: Green Eyes. First, I know it's Tuesday and I'm predictably late with Makeup Monday.
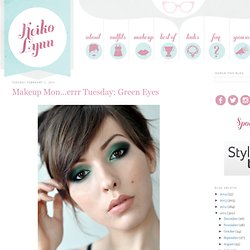
I hope the lack of alliteration doesn't detract from the post; I promise that I have lots of great excuses for not putting this up yesterday. Or, I fell asleep. One of my first forays into the wonderful world of bright eyeshadow was with a beautiful shade of green from Milani (whose older shadows were amazing), and I was forever hooked. Green has since become the most popular color in my rather large makeup collection, though I can't remember the last time I gave them a proper spotlight. That was rectified immediately, upon my recent purchase of the Urban Decay Black Palette, which has a beautiful dark emerald that was surprisingly missing from my arsenal. For this look, I only used the dark green in the palette, Libertine, and the primer potion. For step by step instructions on how to achieve this look, continue reading after the jump!
This will make the colors pop and keep them from creasing. Hair Tutorial: The Perfect Mermaid Curls. Although “perfect” is a relative term, this method for curling hair is pretty much perfect by my standards, mostly because it isn’t fussy.

While I’m a sucker for both ringlets and Californian waves, I like my own curls somewhere in between: relaxed but bouncy. Mermaid-like. Supplies: 1″ curling iron, brush, and hair sprayTime: 45 minutes (for thick hair) All of the magic happens with Revlon’s “Helen of Troy” ceramic 1″ curling iron. For those who have long, thick hair like me, you might find that larger curling barrels produce the most pathetic excuse for “waves” that fall out within the hour, regardless of the amount of hair spray. I’ve found that the 1″ barrel creates tight waves that look good for at least 5-6 hours (though they do relax over time). For hairspray, I’m a fan of Tigi’s Hard Head, which has a strong hold without the severe crunchiness. 1. 2. How to curl your hair with a sock! No heat.
25 Beauty Tips Reusing Household Items – Homemade Beauty Tips on ELLE. 1.

Old Buttons Repurpose spare buttons by using them to keep pairs of earrings together: Most buttons have at least two holes in them, so simply place an earring in each opening to neatly store when not wearing. Photo: Jupiter Images 2. Eyebrow Brush Stuck without a lint-remover? Use this handy makeup tool to remove unwanted fuzz from your shirt. 3. 4.
Sea of Shoes: HAIR HOW-TO. I am sometimes asked how I style my hair, and while my method is far from perfect, I thought I'd show you how!
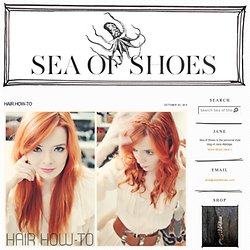
My hair is pretty straight and fine naturally and I always let it air dry. Since I go about three days between washes, I like to curl it on the first day and let it mellow out into some nice waves over the next two. Let's get started! If your hair doesn't hold curl very well then you may want to put a palmful of curling mousse in it when it is halfway dry. First I comb out all of the tangles and apply a liberal amount CHI Iron Guard Protection Spray to prep my hair. (though I want to upgrade to one of the fancy new ones from Sultra soon!) When I'm done curling the bottom section, I mist it with Bumble and bumble Spray de Mode and comb through the curl with my fingers. Ahh!! If you want to dress it up a little, you can do a braided headband look! Follow the Trend With Colorblocked Nails! Why not try it out on your nails instead?
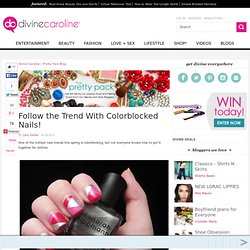
You can keep it simple within the same color family or go bold and crazy—whatever suits your mood! Step 1: Get Your Supplies Together To start, make sure you have all of your supplies handy. For this manicure, you will need three different nail polishes (make sure that at least two of them are thick enough that they can cover the base color), Scotch tape, and a fast-dry topcoat like Seche Vite. For this manicure, I used two colors from the new Minnie Mouse Collection by OPI, If You Moust You Moust and The Color of Minnie, along with my favorite silver nail polish, Stardust by Deborah Lippmann.
Step 2: Paint a Base Color Start with your favorite basecoat and paint your nails the base color. Step 3: Start Taping Next, pull off a small piece of Scotch tape (you won’t need more than an inch at a time) and put it against your hand and pull it off several times until most of the stickiness is gone. Step 4: Apply the Second Color.