

DIY Home Improvement Projects – Do It Yourself Home Repair Guides - Family H... DIY Design Community « Keywords: Makeover-Mondays, DIY, thrift, Inspiration. We all have them: old lumpy pillows that have seen better days but, for whatever reason, we can't bring ourselves to get rid of.
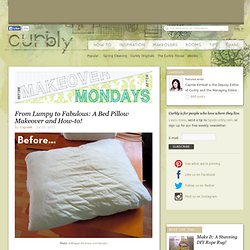
They hide in chests or closets "just in case", waiting for an unsuspecting overnight guest or even, perhaps, the perfect DIY project. If you have a few of these forgotten pillows, we have the solution for transforming them into something better! Wednes-diy. A few of you have asked about the amazing rope swirl tapestries in our new store displays and you’re in luck because one of our display artists put together a tutorial on how to make them!
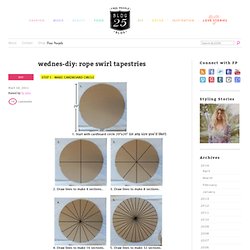
It looks like such a fun rainy day project. what you need: a large piece of cardboard, black marker, scissors, rope in various sizes and colors, neon twine, pompoms. Memorykeeping Projects and Keepsakes - Crafts - Martha Stewart. DIY Design Community &... - StumbleUpon. From 3D maze rugs to eco-friendly bathmats to room-sized chevron rugs, we've shared quite a few DIY flooring projects here on Curbly.
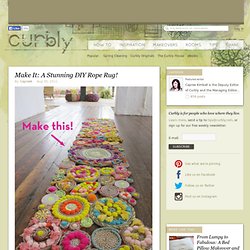
But this rope and pompom rug definitely takes the cake when it comes to originality and, well, straight up pizazz! The original rug pictured was created as part of a window display for clothing brand Free People, but after heeding cries from fans and patrons, they decided to share a tutorial for making your own. Lucky us, right? Whether you choose to use it as a runner in a hallway or give it the wall hanging treatment as a piece of textile art, there's no denying that it'll add some serious flair to your home. Here's what you'll need: a large piece of cardboardblack markerscissorsrope in various sizes and colorsneon twinepompoms. Make: Projects - Pop Top Lamp Shade. Creative Kismet » Blog Archive » little guiding stars.
Since the new year has started I’ve been trying to think of ways to be more kind to my self.
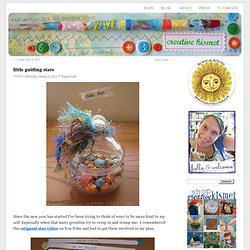
Especially when that nasty gremlins try to creep in and stump me. I remembered this origami star video on You Tube and had to get them involved in my plan. I thought it would be fun to make a whole bunch with kind words and “you are….” phrases inside. I made 60 of them, enough to last me the whole year if I open one a week, plus a few extra just in case. I used 12 x 12 inch scrapbook paper and cut 1/2 x 12″ strips, then followed the video HERE*. *UPDATE! Be Sociable, Share!
Paper Flowers - Anyone Can Do That. Japanese Kusudama, this tutorial is featured on Craftuts Anyone can do that, I assure you.

The proof: I can, just take a quick look at my result below. And, believe me, I am neither meticulous nor particularly patient. Do-it-Yourself DIY String Wedding Lanterns Yarn Chandeliers. Jessica of Wednesday Inc shows us how to make those gorgeous twine chandeliers from the inspiration shoot she shared with us this morning.

Using balloons, glue and twine, you can also make these lanterns for your wedding – and then bring it home and use it as your very own mid century lampshade. What you will need are: balloons, glue, yarn, tray for glue, corn starch 1/2 cup of Corn starch, 1/4 cup of Warm water, clear fast drying spray paint, hanging lamp cord or fishing line (depending on your desired final product), and a lighting kit if you’re looking for a fully functional lantern. Jessica recommends using a sharpie to mark on the inflated balloon how much room you need to leave for the lighting cord. She also recommends coating the balloon with vaseline prior to wrapping the yarn coated with glue so it doesn’t stick on the balloon once it’s dry. You can see all the details on Jessica’s blog.
Are you getting excited to try to do this at home as much I am? Instructions: 1. Origami Lucky Star. Instructables - Make, How To, and DIY. Adventures in art & craft. I love making my own mailers!
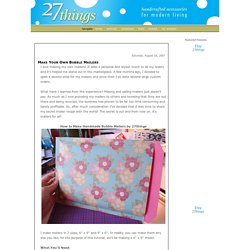
It adds a personal and stylish touch to all my orders and it's helped me stand out in the marketplace. A few months ago, I decided to open a second shop for my mailers and since then I've done several large custom orders. What have I learned from the experience? Making and selling mailers just doesn't pay. As much as I love providing my mailers to others and knowing that they are out there and being recycled, the business has proven to be far too time consuming and barely profitable.
How to Make Handmade Bubble Mailers by 27things I make mailers in 2 sizes, 6" x 9" and 4" x 6". What You'll Need 1. cardstock (one 7.5" x 10.75" sheet)2. pretty paper (one 7.5" x 10.75" sheets)3. rubber cement4. bubble wrap (two 6" x 9" pieces)5. art knife (X-Acto knif)6. cutting mat7. scissors8. ruler9. a scoring tool or an old ballpoint pen that is out of ink Getting StartedStart by trimming everything to size. 1. Joining 1. 5. Finishing upYour mailer is almost done!
1.