
Reversible Tied Tote Bag by Lillyblossom. Sewing for Beginners (that's me) My Little Gems: Car Cozie Tutorial (a.k.a. Car Cozy) Here is what you need : ALL SEAM ALLOWANCES ARE 1/4 inch.
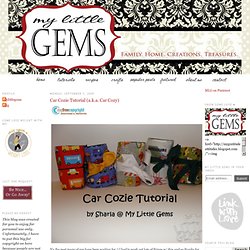
Step one: prepare the road piece. Sewing Novice. Lillian was invited to her first birthday party a few weeks ago, which was for our neighbor boy who turned 5.
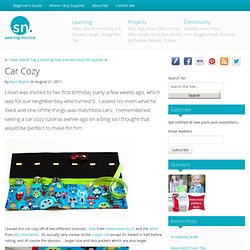
I asked his mom what he liked and one of the things was matchbox cars. I remembered seeing a car cozy tutorial awhile ago on a blog so I thought that would be perfect to make for him. I based this car cozy off of two different tutorials. One from Homemade by Jill and the other from My Little Gems. It’s actually very similar to the crayon roll except it’s folded in half before rolling, and of course the obvious….larger size and less pockets which are also larger. On-The-Go Car Activity Mat @ Fiskarscraft - Fiskars Craft. Designer: Lisa Storms I created this on-the-go activity mat for my 3 year old, who always wants to haul his car and tracks around with him when we leave the house.
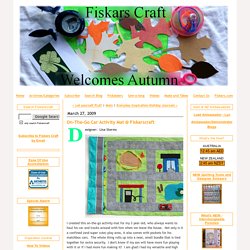
Not only is it a confined (and super cute) play area, it also comes with pockets for his matchbox cars. The whole thing rolls up into a neat, small bundle that is tied together for extra security. Maggie Muggins Designs: The Car Cozie. For Christmas I went all out and made many of the gifts.

Between that and the two kids (baby is doing fine) I've had no time for the blog. You'll see my creations in future posts. Cozy car caddy tutorial. Without further ado ...
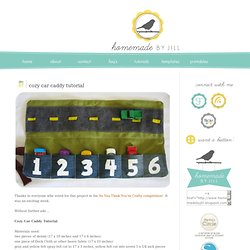
Cozy Car Caddy Tutorial Materials used: two pieces of denim (17 x 10 inches and 17 x 6 inches) one piece of Duck Cloth or other heavy fabric (17 x 10 inches) Envelope Pillow Cover Tutorial. Pillow Tutorial: Envelope Back. Here is the tutorial for the envelope pillows that were made during my class at Alt Summit.

I decided to go with the envelope back pillow because it just might be the easiest thing that you've ever made. First choose a pillow. Any pillow will do. For this tutorial, I used a 12 x12 pillow. Then cut 3 pieces: Front piece, 12 x12 inches. Then cut the two back pieces. Now we will finish the back pieces. Start by ironing one side of each piece.
Press raw edge down 1/2 inch. Fold + press another 1/2 inch. Using a 1/4 inch stitch, hem the back pieces, only one side. Now assemble your pieces. Quick and easy tutorial: mini coloring tote. My kiddo needed a gift to bring to her preschool for a gift exchange.

The price limit was around $2 which didn't leave a whole lot of options. Instead of raiding the Target Dollar Spot, I found small coloring books at Walgreens 2/$1 and made a little tote to hold them! I added a few crayons to finish it off. It is an easy project that doesn't use a lot of supplies, making it inexpensive as well. A binding tutorial. This tutorial is for how to make continuous crossgrain binding.
It is how I bind the majority of my quilts. Part I-How to make the binding strip. First, measure your quilt. Make Your Own Bubble Jet. Swapping blogs with one of my favorites…Beckie from Infarrantly Creative.
You can find me there today…but first you will LOVE what she has for you today! Take it away Beckie… Hello Idea Room readers! Squuuuueaaal! I am so honored to be here today. Tutorial: Homemade Bubble Jet Set *Edited with new recipe* *Edited using inks* I made this bag last night (the pictures show each side of the bag - the pictures are of my gorgeous boys!!!)
Hazelruthes's: How To Print On Fabric. I thought I'd put together a little pictorial tutorial-- ;) to show how easy it is to print images onto fabric. So let's get started. You will need, some muslin or other light colored fabric, freezer paper, scissors and your printer. Please note this for inkjet printers only. Laser printers can melt the freezer paper and then you'll have a big mess and need to buy a new printer---you'll want a new inkjet of course. ;) NOTE: If the project you are making will ever be washed then 1st pre-wash your fabric (not necessary for non-washables like an ornament or decorative item that will never be washed) and 2nd use a product called Bubble Jet following the product instructions. First off choose the image that you want to print and make sure to size it if needed thru whatever photo editor you use. Next decide if you want your muslin tea dyed or not--if so now is the time to do it, because if you wait till afterwards your image will run.
Next do the same thing with your fabric. How to make a tote bag. Here is a simple way to make a tote bag. The best part it is even reversible. You might also like to make a zippered pouch to go with your new tote! How to make a lined zippered pouch tutorial. Here is a quick little tutorial for making a zippered pouch with a lining. It isn’t that hard and I always feel like I have really accomplished something when I am finished —and they make great gifts! I was a mentor for one of the youth at our church. At Confirmation they are each given a different bible verse, special to them, to mark the occasion. A Bit Of This and A Bit Of That: Fabric Swap - 100+ fat quarter tutorials.... Let me tell you, there are a squillion or more tutorials out there and I could have spent months finding even more for you! I admit I didn't check exactly how much fabric you needed for all these projects but I am pretty sure that you can make them all with one or two fat quarters, less for a lot of them.
And don't be blaming me if you spend hours sucked into lots of 'new to you' blogs - some of them are hard to escape from, you have been warned! Many of these blogs have lots of other tutorials to offer so take a look around. Samelia's Mum: Make a Wheat Bag. Spring Fair is rapidly approaching at my son’s school. Chez Larsson: Sewing machine cover how-to. Sewing Machine Cover Tutorial. How to Make the "Best Dress Ever" - A Tutorial. Page corner bookmark for kids in Ideas for kids' crafts. My Swanky Crafts: Scripture Cover Tutorial. FIRST of all..let me tell you, I am NOT a professional seamstress. I don’t claim to be, and am not the best with coming up with patterns. Pink and Green Mama: Feel Better Felt Band-Aids (and toilet paper) Felt band-aids... Charlaanne: { doll tutorial } Hello friends:) Life in Cleveland: 3 Fat Quarters = 2 Toddler Skirts Tutorial. One shabby chick: An iPad cover tutorial. Tutorial: hanging book display - penny carnival.
Tooth pillow tutorial, revisited. This basic tooth pillow pattern includes a loop to hang from the bedpost, doorknob or night table drawer knob, so the Tooth Fairy doesn't have to do that hazardous groping under the beneficiary's pillow. This is pure gold. Pure GOLD, people. It also has a built-in pocket in the mouth for receiving teeth and coins. Bunny Hand Puppets. Old MacDonald Felt Finger Puppets {Free Pattern. Guest Tutorial - How to Make a Hopscotch Rug. Juicy Bits: 32: C is for crown. Baby Rag Quilt Tutorial.