
Useful tips on DIY nails. Clouds. - StumbleUpon. Follow the Trend With Colorblocked Nails! Why not try it out on your nails instead?
You can keep it simple within the same color family or go bold and crazy—whatever suits your mood! Step 1: Get Your Supplies Together To start, make sure you have all of your supplies handy. For this manicure, you will need three different nail polishes (make sure that at least two of them are thick enough that they can cover the base color), Scotch tape, and a fast-dry topcoat like Seche Vite.
For this manicure, I used two colors from the new Minnie Mouse Collection by OPI, If You Moust You Moust and The Color of Minnie, along with my favorite silver nail polish, Stardust by Deborah Lippmann. Step 2: Paint a Base Color Start with your favorite basecoat and paint your nails the base color. Step 3: Start Taping Next, pull off a small piece of Scotch tape (you won’t need more than an inch at a time) and put it against your hand and pull it off several times until most of the stickiness is gone.
Step 4: Apply the Second Color. COLOR ME RIGHT: For that Perfectly Painted Nails. Lines Crossed. Color paper. I’ve been seeing lots of outrageous nail art lately on pinterest.
One hot new product that’s really caught my eye is adhesive nail polish strips. I love the funky designs and bold colors with these products, but they’re usually a little spendy for me. Black&Gold. Last night I suffered through watched Something Borrowed on DVD.
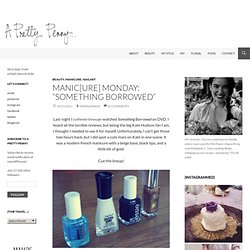
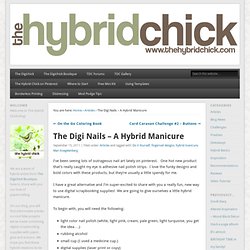
I heard all the terrible reviews, but being the big Kate Hudson fan I am, I thought I needed to see it for myself. Unfortunately, I can’t get those two hours back, but I did spot a cute mani on Kate in one scene. It was a modern french manicure with a beige base, black tips, and a little bit of gold. Cue the lineup!
Start with clean nails and a thin coat of base. Next, apply two coats of beige polish to the entire nail. After the beige polish is bone dry, apply french manicure strips to each nail. More drying time! Adding the gold line is the trickiest part. I sealed everything up with two good coats of the all-in-one base (which actually helped mask some of the imperfections). Lace. Hey Everyone, sorry I’ve been MIA for the past few days, but I was enjoying some much needed quality time with my mom and sister.

I was on a mission to keep the computer off for my four day weekend; however, my sis and I did do a lil somethin for a belated Manicure Mondays post. Here is a super fun real lace manicure that we worked on together – actually, I just sat there watching The Office marathon while sis did all the work :). This took more time than we expected and I’ll have to get back to ya on how long it lasts, but the end result was so worth it! Water Marble. Water Marble Tutorial.

Supplies: orange stick or toothpick, shot glass or cup (the smaller the circumference, the less polish you end up wasting), room temp. water, nail polish, tape (optional, but it helps with the clean up) I like to begin by prepping my nails with base coat and one coat of polish. Here I used China Glaze Innocence for a nice neutral base. Steps: 1. 2. 3. 4. 5. 6. 7. 8. 9. 10. Most importantly, have fun! We would love to see pictures of all your water marbling attempts, so get dipping! Newspaper. Okay, so we’re only three weeks in to this whole thing and I’m already showing you a tame look after I totally promised some of you that I’d do a newsprint nail tutorial this week.

Newsprint we can do next week, but for right now I wanted/needed a manicure by a professional. As I told you in the first “Get Yo’ Nails Did”, it’s important to include real manicures in your nail routine if you’re not comfortable cutting your cuticles and getting into the real work at home. I am not. I’m willing to shell out $20 bucks to have the dirty work done right, but I’m not going to splurge on nail art at the salon most of the time. As you can see from the photo above, I prefer to do a basic manicure but make it a little different by switching up the colors on my index and middle fingers. That’s another thing: Remember that, while you should always be extremely polite to your manicurist, you shouldn’t be afraid to ask for exactly what you want and to tell him/her if it’s not done correctly. Scales pink. Ombré nails are an easy way to spice up your nails without much effort.

You literally just dab and go! Beautylish's in-house nail expert, Romee Ham, shows you how to recreate the hot ombré trend on your tips! Don't worry, if your nails are too short to fit this effect, check out our ombré manicure that's specifically designed for short nails. What You'll Need: STEP 1 Base Coat In broad, even strokes, apply a thin layer of your favorite base coat.