
How To Make Diaper Cakes: Simple Step By Step Instructions. "You have inspired me so much by this site!

Now everyone is excited when I come to baby showers. They can't wait to see the next creative thing that I've made. Thank you! :-)" Boutique diaper cakes are one of the most popular styles of cakes to give as a baby shower gift. Not only is the swirl pattern so darn cute, but it also requires very little supplies to hold it together. Diaper Cake Instructions You will need: Diapers Round cake pans-In the sizes you would like the layers to be Large rubber bands, ribbon or string Supplies to decorate the diaper cake with How To Make Diaper Cakes Start with a round pan in the size you want your diaper cake layer to be.
Start fanning the diapers out, while pressing them against the edge of the pan for stability. Continue to add diapers in small sections and fan them out as you add them. When you finish fanning out the diapers, go back and make sure they are all spaced evenly. Beautiful job! Slide the diapers out. Now the fun part. Burp Cloth and Baby Sock Cupcake Tutorial. Here is the final tutorial in the series!!

Cupcakes made out of burp cloths and baby socks. What you need: Burp Cloth - I made a fringed burp cloth and mine was about 17" x 9". Random size huh? I used the tutorial at Home Sweet Home2 pairs of 0-6 month size socks. What you do: Step 1: Fold the burp cloth into fourths and set aside. Step 2: Start rolling your socks at the top. Note: Have the toe of the sock pointing down on all of the socks. Step 3: Add your second start at the end of the ribbing of the first sock.
Tip: When I added sock #4, I just made sure to add it opposite of where I started sock three. Step 4: When you are all finished rolling your socks, fold the ends of the socks up as neatly as possible. Step 5: Take the burp cloth you set aside and put your socks on one end. Step 6: Secure your cupcake with a piece of scotch tape. Step 7: Take about 10 or so coffee filters and put your cupcake inside. 46859. I guess I was feeling a bit down about my blog in my last entry, but due to all of your lovely comments that feeling is no more!
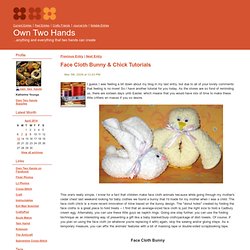
So I have another tutorial for you today. As the stores are so fond of reminding us, there are sixteen days until Easter, which means that you would have lots of time to make these little critters en masse if you so desire. This one's really simple. I know for a fact that children make face cloth animals because while going through my mother's cedar chest last weekend looking for baby clothes we found a bunny that I'd made for my mother when I was a child. The face cloth chick is a more recent innovation of mine based on the bunny design. Face Cloth Bunny Materials:- face cloth- narrow ribbon(s)- 2 googly eyes- 2 pompoms (one large for the tail, one smaller for the nose)- needle and thread to match the face cloth and/or hot glue gun 1) Take a face cloth and lay it out flat.
Boo-Boo Bunny. This photo originally appeared in FamilyFun Magazine Total Time 1 hour Ages all-ages Turn a frown upside down by transforming an ordinary washcloth into a cuddly toy bunny.
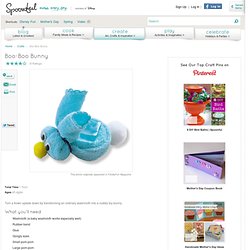
What you'll need Washcloth (a baby washcloth works especially well) Rubber band Glue Googly eyes Small pom-pom Large pom-pom Helpful Tip: Designed with a hole in its center, the bunny slips onto a fingertip for an instant puppet show, or you can quickly pop it over an ice cube to help soothe an unexpected bump or scratch. Washcloth candies tutorial. I'm hoping to share a couple of fun baby shower gift ideas with you in the next few weeks.
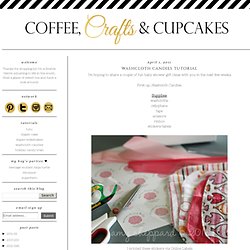
First up...Washcloth Candies Supplies washcloths cellophane tape scissors ribbon stickers/labels I printed these stickers via Online Labels. Lay out the washcloths flat, these washcloths measure 8 1/2 x 8 1/2 inches...but you could use any size. Fold over corner to corner. Start rolling the corners towards the middle...make sure to keep it snug but it doesn't have to be super tight. Roll until you have a tube shape keeping the seam down. Start rolling one end to meet the other end. You have your candy! Place your candy in the cellophane square (about 9x9 inches) with the top side facing down- the "ugly" backside will be facing up...tape the cellophane.
Turn over and tie off each end with a piece of ribbon. Washcloth Cupcake Tutorial. Supplies Needed: (this is to make 1 washcloth cupcake) 2 baby washcloths small rubberbands (I like to use the hair tie elastics instead) toothpick small pom pom in color of your choice 1 white cupcake liner 1 decorative cupcake liner of your choice hot glue gun Lay your washcloth out flat fold over one side about 1/3 of the way.
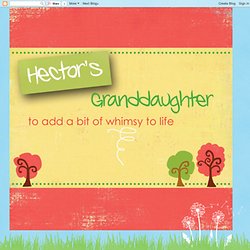
Fold over the other edge as shown in picture, then fold in half. Begin to roll tightly Make sure you roll at a slight angle to give the "frosting" height. This is what it should look like all rolled up. How to Make Washcloth Cupcakes. How to Make a Baby Shower Diaper Cake {Craft Tutorial}